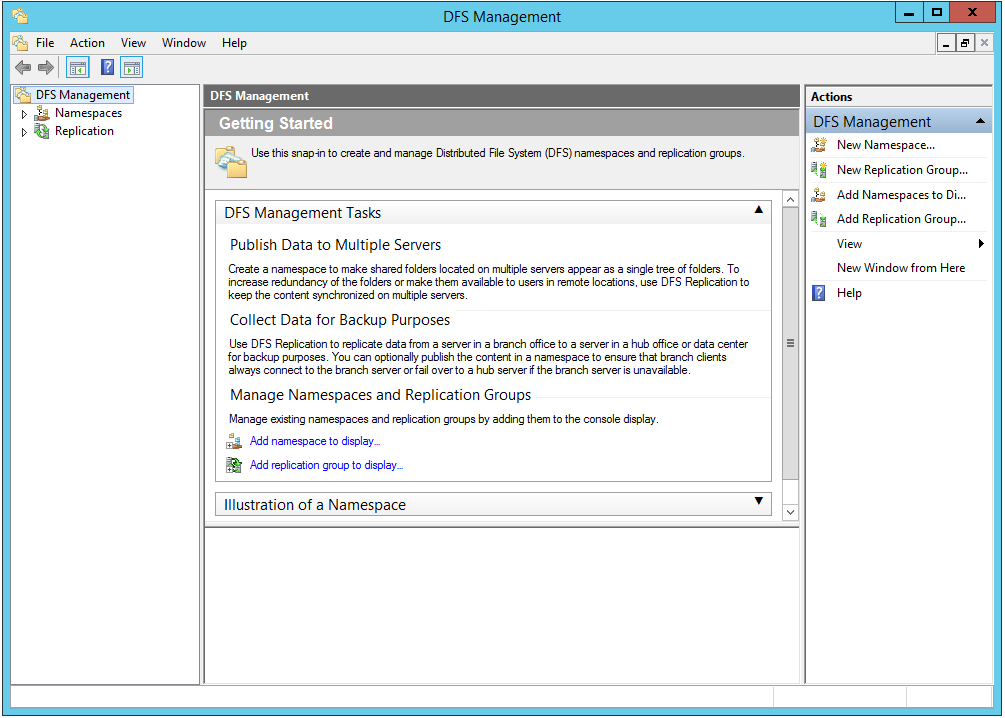
C.2 Creating DFS Namespace Permissions
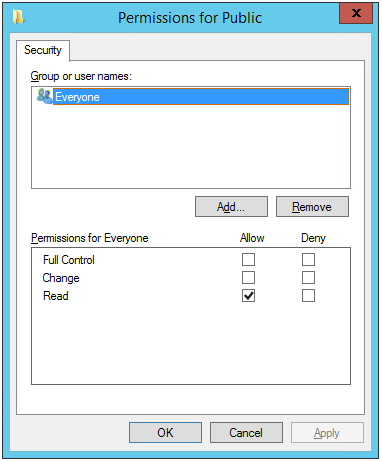
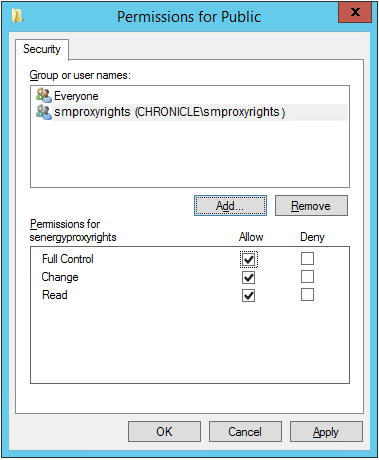
The Storage Manager Proxy Rights Group (named SMProxyRights by default) requires Full Control in the CIFS permissions on the root share of the DFS namespace.
-
From Server Manager, click >
-
Double-click .
-
Right-click the node and select
This launches the New Namespace Wizard.
-
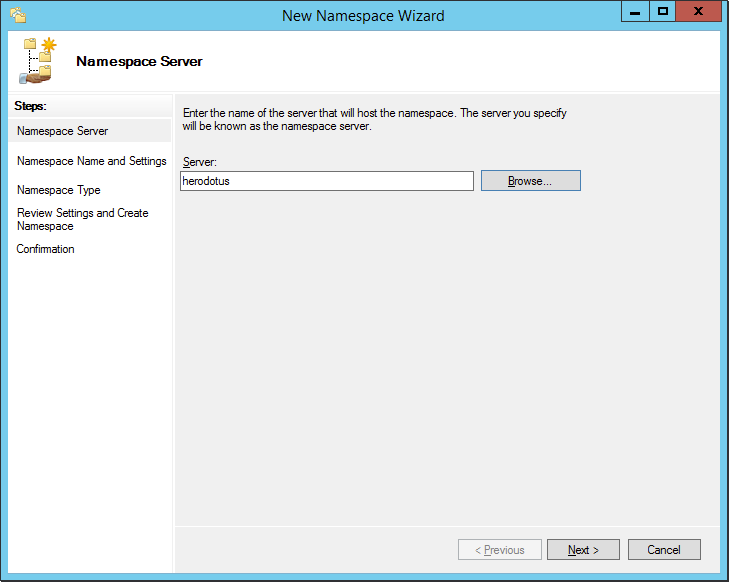
Use the button to specify the server that will host the namespace.
-
Click .
-
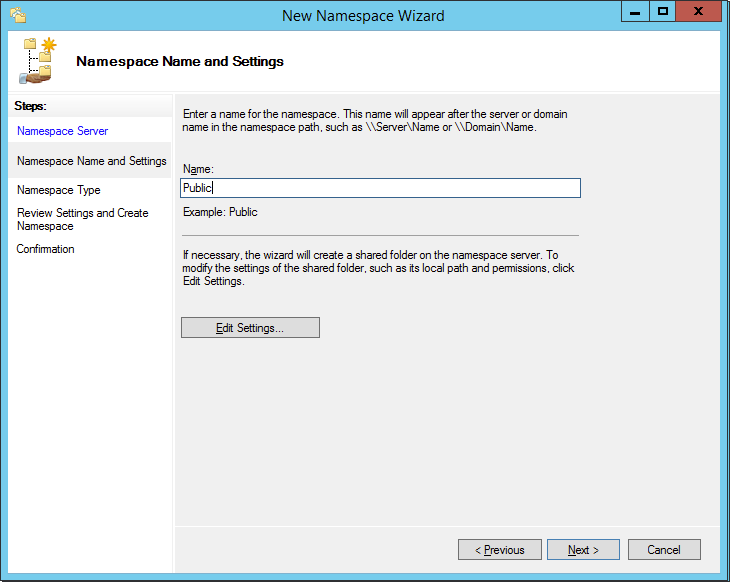
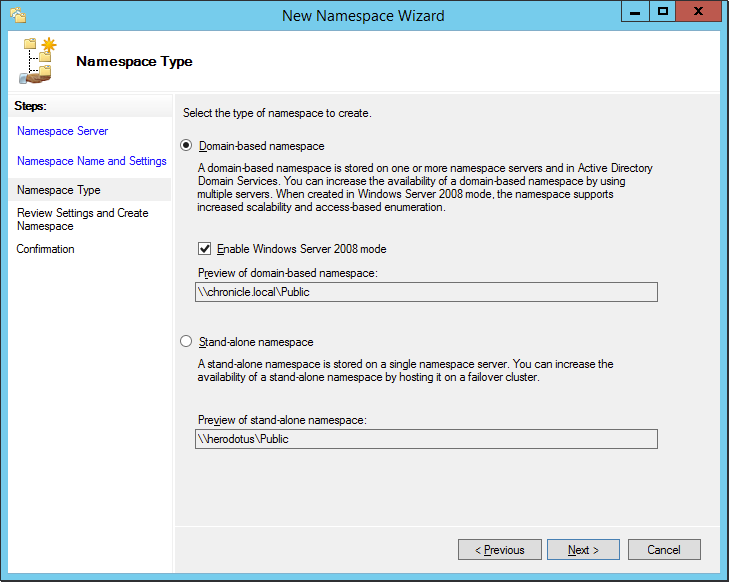
In the field, specify the name of the namespace.
For example, HomeNamespace or Public.
-
Click .
-
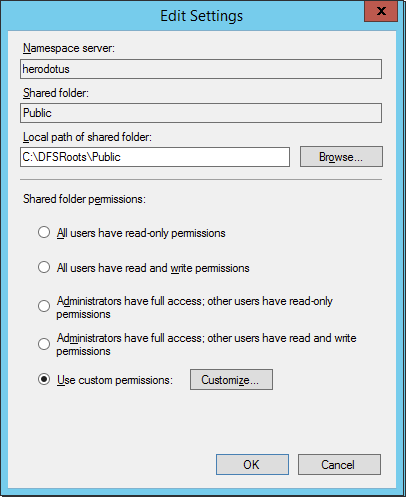
Select , then click .
-
Click .
-
In the field, type sm and click .
-
From the dialog box, select smproxyrights and click .
-
Click to close the Select Users Computers, Service Accounts, or Groups dialog box.
-
With smproxyrights selected, select the check box.
-
Click .
-
Click to close the Edit Settings dialog box.
-
Click .
-
Choose your preferred namespace option and click .
-
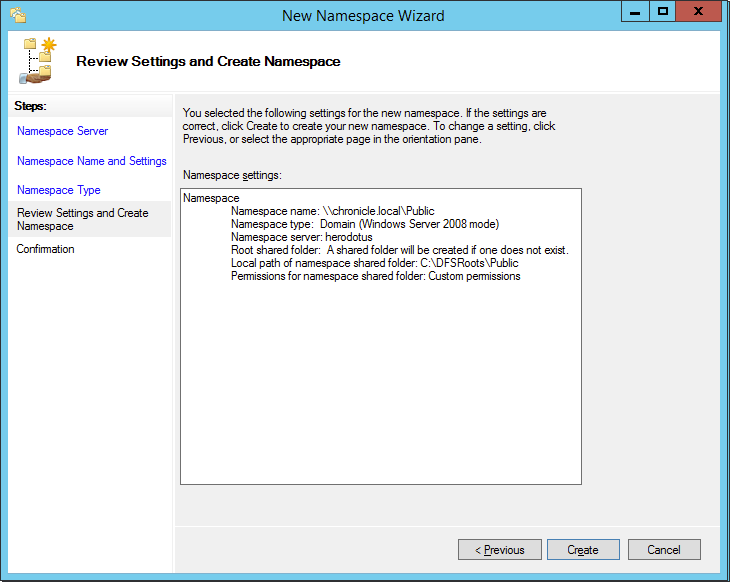
Review the settings and click .
-
Click to close the wizard.