4.7 Installing and Configuring the Admin Client
The Admin Client is the administrative interface for Storage Manager. It can be installed on:
-
Windows 10
-
Windows Server 2019, 2016, or 2012 R2
-
At the root of the StorageManager_5_3_0-x64.iso image, click StorageManager-Admin-5.3.0-x64-xx.exe.
-
When asked if you want to save or run the file, save the file to the hard drive of a computer where you will administer Storage Manager.
-
From the saved location, launch the Admin Client installation file.
-
When you are asked if you want to run this file, click .
An Introduction page appears in the Admin Client Installation Wizard.
-
Read the text and click .
-
Accept the license terms and click .
-
Accept the installation path or indicate a new path by using the button.
To review possible locations, you can click to see all available volumes with disk size and disk availability data.
-
Click .
-
If you want to create a shortcut on the desktop, leave the check box selected and click .
The Admin Client is installed.
-
Click the button.
The Admin Client is launched.
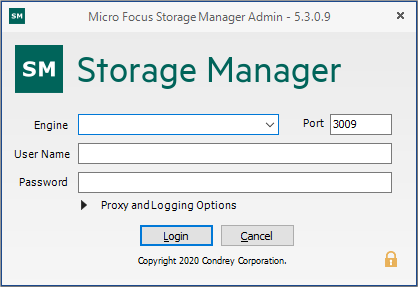
-
In the field, specify the DNS name or IP address.
-
In the field, leave the default port setting to 3009.
-
Specify the username and password.
The user must be a member of the SMAdmins group to be able to log in.
-
Click .
If you are unable to log in, your proxy settings might be preventing you from doing so. Until you enter a proxy exception in your proxy settings, you can click , select , then click .
The Setup Wizard welcome page appears.
-
Read the text on the page and click .
-
Do one of the following:
-
Click to locate and select the path to the license file
-
Click to obtain an evaluation license
-
-
Click .
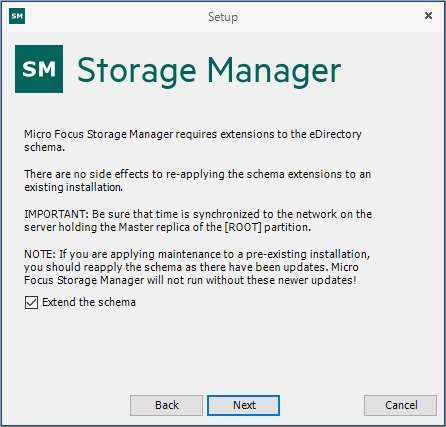
A prompt appears asking if you want to extend the eDirectory schema.
-
Do one of the following:
-
If you plan to manage collaborative storage or auxiliary user storage, extend the eDirectory schema by verifying that the check box is selected and click .
-
If you do not plan to manage collaborative storage or auxiliary user storage, deselect the check box and click .
-
-
Click .
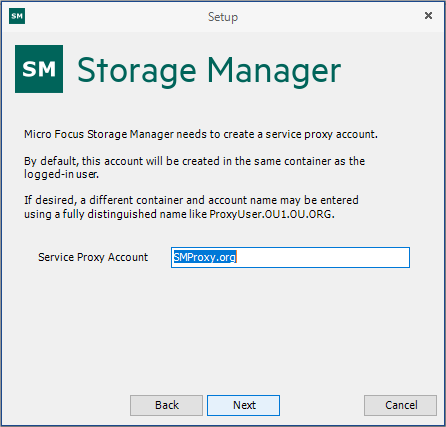
The following page appears:
-
Accept the account name that will be created and click .
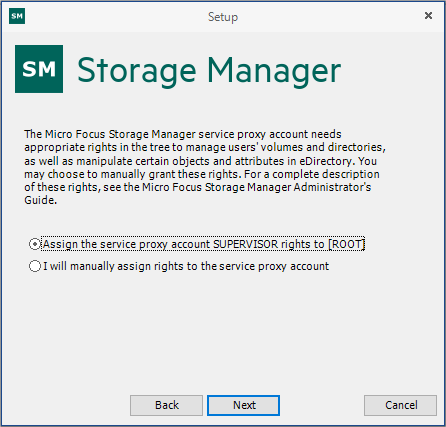
The following page appears:
-
Select one of the options and click .
-
Accept or modify the SM Administrators’ Group name, leave the check box selected, then click .
-
When you are notified that a Proxy Home share will be created on the Engine’s local Proxy Home source path, click .
You are informed that Storage Manager needs to initialize the Engine and its subsystems.
-
Click .
-
When you are prompted, enter your password and click .
-
Proceed with Section 4.8, Authorizing the Event Monitor.