3.5 Creating a Virtual Machine
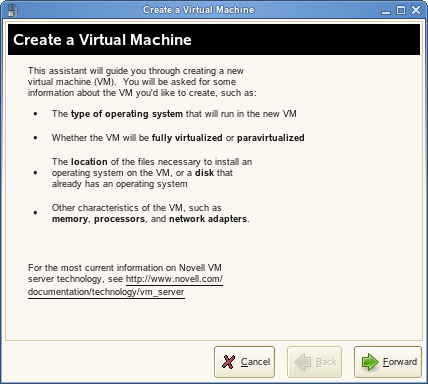
The Create Virtual Machine Wizard helps you through the steps required to create a virtual machine and install its operating system. The information that follows is generalized for installing any operating system. In addition to these instructions, you should consult the Virtualization: Guest Operating System Guide for information specific to the operating system you are installing.
Launch the Create Virtual Machine Wizard by using one of the following methods:
-
From the virtualization host server desktop, click
If YaST doesn’t appear in your list of applications, you can run it by logging in as root and entering YaST2 at a terminal.
-
From within Virtual Machine Manager, click .
-
At the command line, enter vm-install.
If the wizard does not appear or the vm-install command does not work, review the process of installing and starting the virtualization host server. The virtualization software might not be installed properly.
Figure 3-1 Create a Virtual Machine Wizard
The following sections walk you through the pages of the wizard and provide information to help you configure the installation:
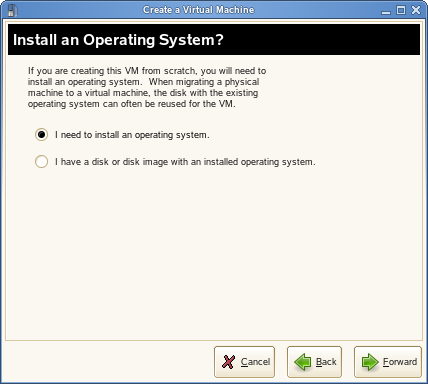
3.5.1 Installing an Operating System
You can choose to run an installation program or choose a disk or disk image that already has an installed and bootable operating system.
Figure 3-2 Installing an Operating System
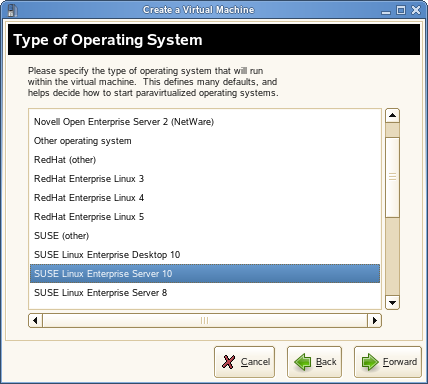
If you choose to run an installation program, you are presented with a list of operating systems. Select the one you want to install.
Figure 3-3 Type of Operating System
3.5.2 Summary
Figure 3-4 Summary
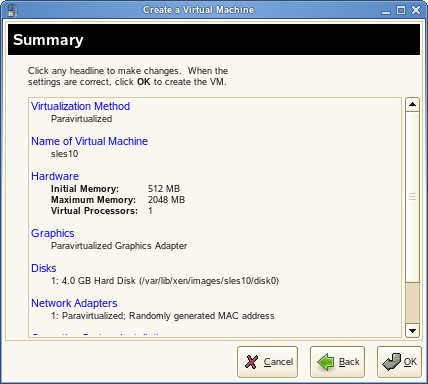
The Summary page shows you a summary of the virtual machine you are creating. You can click on any of the headings to edit the information. As you edit the information in the Summary, consult the Virtualization: Guest Operating System Guide for instructions specific to the operating system you are installing. The Guest Operating System Guide provides information for the following types of virtual machines:
3.5.3 Virtualization Method
The Virtualization Method page allows you to select the type of virtualization you want to implement.
Figure 3-5 Virtualization Method
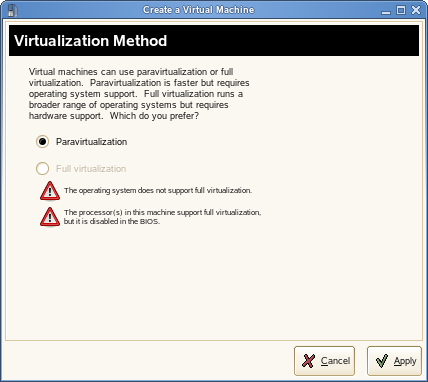
If your computer supports hardware-assisted virtualization, you can create a virtual machine that runs in fully virtual mode. If you are installing an operating system that is modified for virtualization, you can create a virtual machine that runs in paravirtual mode. For more information about virtualization modes, see Section 1.2, Understanding Virtualization Modes.
3.5.4 Name of Virtual Machine
Each virtual machine must have a unique name. The name entered on this page is used to create and name the virtual machine’s configuration file. The configuration file contains parameters that define the virtual machine and is saved to the /etc/xen/vm/ directory.
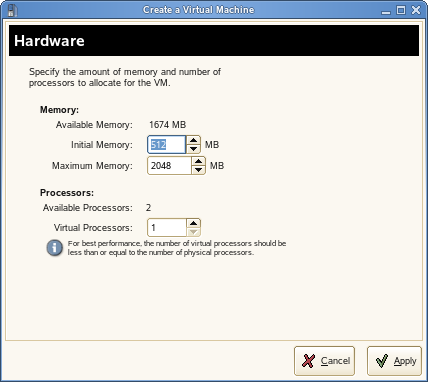
3.5.5 Hardware
The Hardware page allows you to specify the amount of memory and number of virtual processors for your virtual machine.
Figure 3-6 Hardware
-
Initial Memory: The amount of memory initially allocated to the virtual machine (specified in megabytes).
-
Maximum Memory: The largest amount of memory the VM will ever need.
-
Virtual Processors: If desired, you can specify that the virtual machine has more virtual CPUs than the number of physical CPUs. You can specify up to 32 virtual CPUs: however, for best performance, the number of virtual processors should be less than or equal to the number of physical processors.
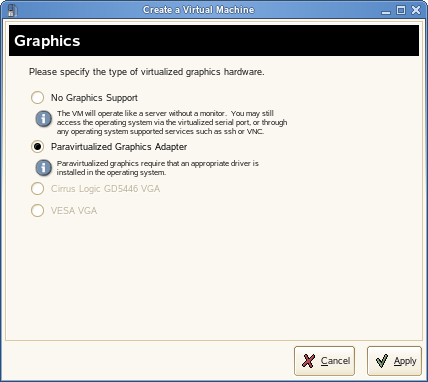
3.5.6 Graphics
Figure 3-7 Graphics
-
No Graphics Support: The virtual machine operates like a server without a monitor. You can access the operating system through operating system supported services, such as SSH or VNC.
-
Paravirtualized Graphics Adapter: Requires that an appropriate graphics driver is installed in the operating system.
3.5.7 Disks
Figure 3-8 Disks
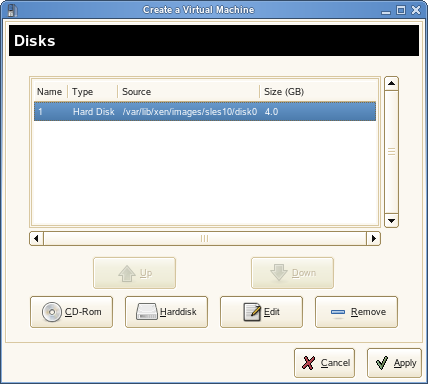
A virtual machine must have at least one virtual disk. Virtual disks can be:
-
File backed, which means that the virtual disk is a single image file on a larger physical disk.
-
A sparse image file, which means that the virtual disk is a single image file, but the space is not pre-allocated.
-
Configured from a block device, such as an entire disk, partition, or volume.
For best performance, create each virtual disk from an entire disk or a partition. For the next best performance, create an image file but do not create it as a sparse image file. A virtual disk based on a sparse image file delivers the most disk-space flexibility but the slowest installation and disk access speeds.
By default, a single, file-backed 4 GB virtual disk is created as a sparse image file in /var/lib/xen/images/ vm_name where vm_name is the name of the virtual machine. You can change this configuration to meet your specific requirements.
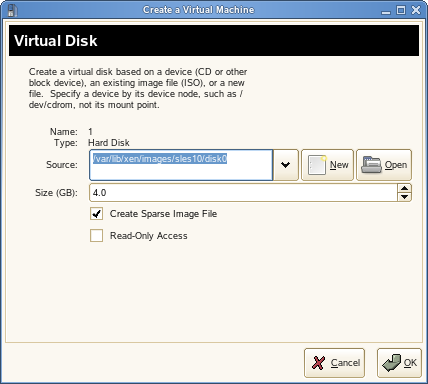
Editing the Properties of a Virtual Disk
When creating the virtual disk, you can click to edit its properties to meet your specific configuration requirements.
Figure 3-9 Virtual Disk
-
Type: Virtual disks have drive designations that use Linux device naming conventions, such as hda. The designation dictates how the virtual disk appears to the virtual machine. For example, a virtual drive designated as hda appears to the virtual machine as the first disk device. Paravirtual disks appear as generic disks (not IDE, SCSI, etc.). Fully virtualized disks appear to the guest as IDE. In all cases, naming is left up to the guest OS.
-
Source: Depending on your specific requirements, you might need to change the location where the disk image file is created and stored, or specify which disk, partition, or volume to use.
-
Sparse Image File: A virtual disk based on a sparse image file does not consume the entire amount of disk space specified but uses disk space only as needed. This is a good option for quickly creating virtual disks, but for best performance, you might want to “pre-allocate” the disk space by deselecting .
-
Read-Only Access: A virtual disk can be safely shared among multiple virtual machines only if every use of the virtual disk is marked as Read Only.
Additional Virtual Disks
A virtual machine can have more than one virtual disk. When creating a virtual machine, you can create additional virtual disks based on files or specify existing disk images or block devices as additional virtual disks.
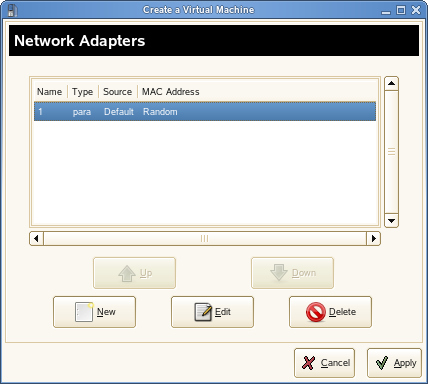
3.5.8 Network Adapters
By default, a single virtual network card is created for the virtual machine. It has a randomly generated MAC address that you can change to fit your desired configuration. You can also create additional virtual network cards. In paravirtual machines, virtual network cards communicate by using a generic network card driver compatible with Xen.
Figure 3-10 Network Adapters
3.5.9 Operating System Installation
The Operating System Installation page allows you to specify the installation source.
Figure 3-11 Operating System Installation
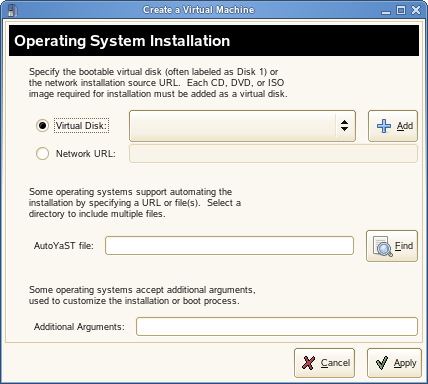
The operating system can be installed from a CD/DVD device or an ISO image file. In addition, if you are installing a SUSE Linux operating system, you can install the operating system from a network installation source.
If you are installing a paravirtual machine's operating system from CD, you should remove the virtual CD reader from the virtual machine after completing the installation because the virtual machine assumes that the original CD is still in the CD reader, even if it is ejected. If it is ejected, the virtual machine cannot access the CD (or any other newly inserted CD) and receives I/O errors.
For instructions on removing the virtual CD reader, see
Virtual CD Readers
in
Virtualization: Configuration Options and Settings
for more information.
If the installation program is capable of recognizing an installation profile, response file, or script, you can automate the installation settings by specifying the location of the profile, response file, or script you want to use. For example, SUSE Linux uses an AutoYaST profile, NetWare uses a NetWare Response File, and Red Hat uses a Kisckstart file to move through the installation screens with no interaction.
You can also pass instructions to the kernel at install time by entering parameters for the field.
For example, on SUSE Linux, if you wanted to specify the parameters for an IP address of 192.35.1.10, a netmask of 255.255.255.0, a gateway of 192.35.1.254 for the virtual server, and use SSH to access installation, you could enter the following parameters in the field:
hostip=192.35.1.10 netmask=255.255.255.0 gateway=192.35.1.254 usessh=1 sshpassword= password
When you have finished entering all the information in the Operating System Installation page, click to return to the Summary page.
3.5.10 Continuing the Installation
If all the information on the Summary page is correct, click to create the virtual machine. A TightVNC screen appears and at this point you begin the installation of your OS. From this point on, follow the regular installation instructions for installing your OS and consult the Virtualization: Guest Operating System Guide for any instructions that might be different for installing your OS in a virtualized environment.