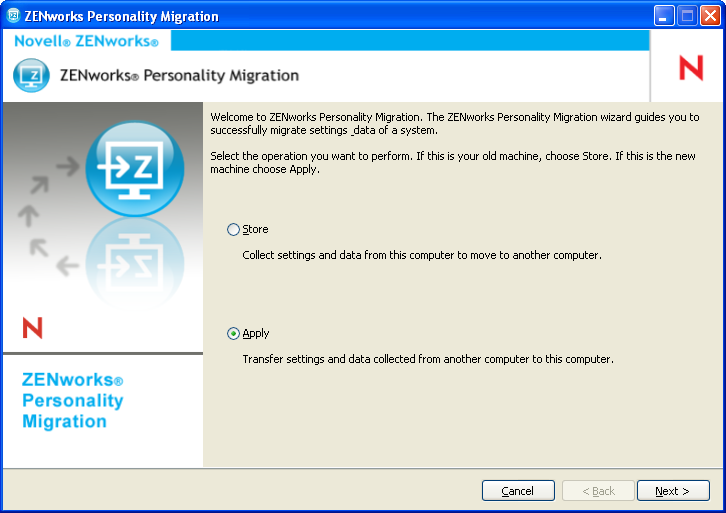
4.2 Applying a User’s Personality Settings and Data
-
Ensure that Personality Migration is installed on the destination device. For more information, see Section 2.2, Installing ZENworks Personality Migration on Windows.
-
Use one of the following methods to launch ZENworks Personality Migration on the system as follows:
-
Click the shortcut icon on the desktop.
-
Click > > >.
-
-
Click to apply the saved settings and data on the device.
-
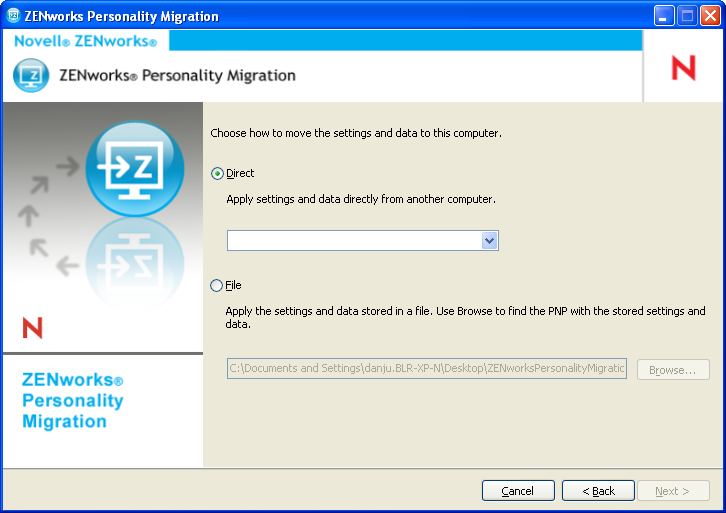
Click then select the mode to transfer the user’s personality settings and data:
-
Direct: Provides real-time migration of settings and data between systems in the same subnet. The utility identifies and lists all the machines in the network that are ready to migrate their personalities. Continue with Step 5.
-
File: Uses the migration settings and data stored in a PNP file. Click to browse to and select the PNP file saved during the store operation. Skip to Step 7.
-
-
Select the source system whose settings and data you want to apply.
-
Click then to select one of the following transfer options:
-
Typical: Lets you migrate all the selected settings and data of the user's profile from the source system to the destination system. If the user’s account does not exist on the destination system, it is newly created with a blank password, if the administrator is logged in to the destination system. If the administrator is not logged in to the destination system, the selected settings are migrated to profile of the user who has logged in to the destination system.Skip to Step 13.
-
Custom: Lets you customize the personality settings and data before migrating to the destination system. You can choose to migrate the personality to different users or create new users on the destination system. Continue with Step 7.
-
-
Click .
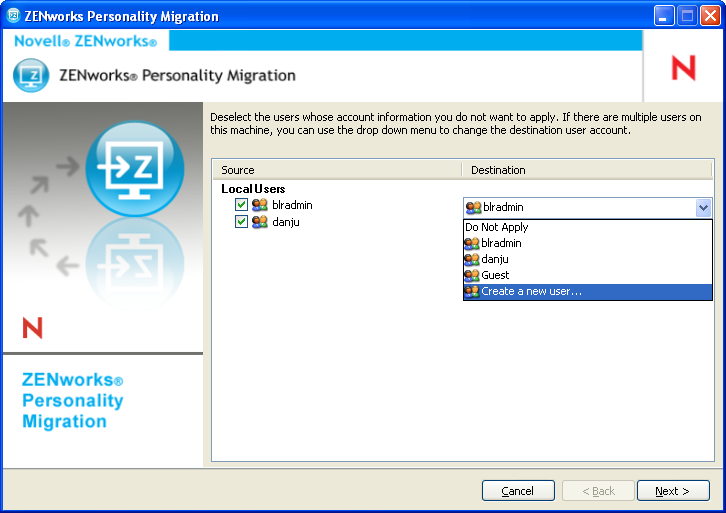
The column lists the user account information that was stored in the PNP file.
The column lists the user accounts available on the current device.
If the administrator is logged in to the destination device, and the source user does not exist on the destination device, the source user account is automatically created on the destination device with a blank password.
IMPORTANT:The source user account is not created on the destination device if the Password Complexity policy is enabled on the destination device.
If the administrator is not logged in to the destination device, the selected settings are migrated to the profile of the user who has logged in to the destination device.
You can also do any of the following in the column:
-
Select an existing user account to apply the personality settings to a different user.
For example, you can apply the personality settings of to the user.
-
Click to create a new user account and apply the personalized settings to this newly created user. You are prompted to enter the username and the password for the new user.
NOTE:If the Password Complexity policy is enabled on the destination device, ensure to specify a password that matches the Password Complexity policy of the destination device.
-
-
Click . Deselect the system settings you do not want to migrate.
-
Click . Deselect the application settings you do not want to migrate.
-
(Optional) Double-click the application name in the column and select a different application if you want to apply the personality settings across applications. For example, you can apply the FireFox bookmarks and settings to Internet Explorer or vice versa.
-
Click . Deselect the files settings you do not want to migrate.
-
(Optional) Double-click the filename in the Destination column to change the destination of the file.
-
Click to migrate the selected settings to the destination device. This step might take some time, depending on the amount of data migrated.
-
Review the results of the migration. Errors, if any, appear in red color.