7.3 Create a Custom Patch
The Patch Wizard assists in selecting existing patch bundles and modifying patch details to create a custom patch. If you are not using an existing bundle, you will need to create a bundle of the patch contents before creating a customized patch. For more information, see Creating Bundles
in the ZENworks Software Distribution Reference.
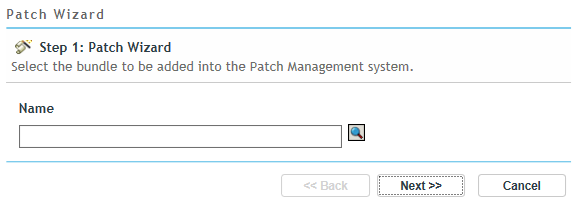
When you select the menu item on the Patches page or Recently Released Patches panel, the Patch Wizard appears as shown below:
To create a customized patch:
-
Click the menu item on the Patches page to open Step 1 of the Patch Wizard.
-
Click the icon and navigate to the desired bundle in the Browse for Folder dialog box.
-
After selecting the desired bundle, click to confirm the bundle selection and then click .
NOTE:You can associate only one bundle with a patch.
-
In the Define Patch Details screen, add or modify details about the patch and then click . Any of the fields can be modified. The fields include:
Item
Definition
The name of the patch.
The impact of the patch as determined by ZENworks.
The name of the vendor.
The ID number given to the product by the vendor.
The date on which the patch was released.
The size of the patch bundle.
The description of the patch; includes detailed information concerning the defect or issue resolved by this patch, deployment notes, and the prerequisites for deployment.
The URL of the Vendor’s website, which includes additional information about the patch.
Whether a reboot is required after patch deployment.
-
In the Define Applicability Requirements screen, specify the requirements that must be met for the patch to be applicable on a device. You need to define requirements through the use of filters. A filter is a condition that must be met by a device in order for the patch to be applied. For example, you can add a filter to specify that the device must have exactly 512 MB of RAM in order for the patch to be applied, and you can add another filter to specify that the hard drive be at least 20 GB in size. Specify the applicability requirement filters and click .
NOTE:For information about Filters, see Filter Conditions and Filter Logic in the ZENworks Software Distribution Reference.
-
In the Define Patched Requirements page, specify the requirements that must be met for the device status to be changed from Not Patched to Patched and then click . By default, when a patch bundle is installed successfully, the status is displayed as Patched.You can change the requirement or add additional requirements.
-
The Summary page of the Patch Wizard displays the summary of the details of the patch you have created in the previous steps. Summarizing the important details of the patch is the last step in creating a custom patch. The details include the following information:
-
Patch Name: The name of the patch.
-
Bundle: The name of the bundle that is included in the patch.
-
Impact: The impact of the patch as determined by ZENworks. See Patch Impacts.
-
Vendor: The name of the vendor or manufacturer of the patch.
-
Vendor Product ID: The ID number given to the product by the vendor.
-
Release Date: The date on which the patch was released.
-
Size (KB): The size of the patch bundle.
-
Description: The description of the patch; includes detailed information concerning the defect or issue resolved by this patch, deployment notes, and the prerequisites for deployment.
-
URL: The URL of the Vendor’s website that includes additional information about the patch.
-
Requires Reboot: Indicates whether the device needs to be rebooted or not after the patch is applied.
-
Applicability Requirements: Click the Back button to view the Applicability Requirements page and review or edit the defined requirements.
-
Patched Requirements: Click the Back button to view the Patched Requirements page and review or edit the defined requirements.
-
Run the subscription update to add the Custom Patch to the DAU bundle: Select this option to include the custom patch bundle in the DAU bundle and scan for applicable devices.
-
Define additional details: Select this option to define additional details for the patch.After the patch is created the Patch Details page is displayed, enabling you to make the required changes.
Click to complete the process of creating a custom patch.
-
NOTE:After creating a new patch, you cannot immediately deploy it to the applicable devices. A subscription update is required to complete after the custom patch is created in ZENworks Control Center. After the subscription update, a new Discover Applicable Updates (DAU) bundle version is created with the custom patch information. Applicability of the new custom patches to the managed devices will be based on their bundle system requirements evaluation after the DAU bundle is successfully applied and patch scan is completed.