Outages
An Outage is when an Item Status is unavailable due to expected or unexpected
events. For example, the Item may be out for repair or faulty. To move
an Item into an unavailable State, and therefore list it as inactive,
the Item Status selected for the Active State option within the Item
Category Lifecycle must be set to No, and the Offline State option
set to Yes.
Planned Outages
Planned Outages are used to manage Items' proposed unavailability. This
is useful for informing Customers and Users about planned changes to infrastructure
that may cause an Item to be taken offline or out of service.
If an Item has an SLA with a specified Blackout Period, ideally Outages
should be planned to fall within this time. The Blackout Period is an
agreement between the Customer and the service provider regarding a period
of time when the Customer has no service expectations. This can also be
the preferred time for Item upgrades and maintenance without affecting
service availability. To access the Blackout Period details for an SLA
associated with an Item, create the Planned Outage within the Outages
tab of the Item Information screen.
Outages List View
This Outages lists all the outages. Using the filter option, you can view planned, current, and concluded outages.
You can perform the following actions in this page:
Using the column headers, you can sort or search the outages at the header level.
To view an outage, click the required outage.
To edit an outage, click the required outage, and then click the  icon.
icon.
To delete an outage, select the required outage, and then click the  icon.
icon.
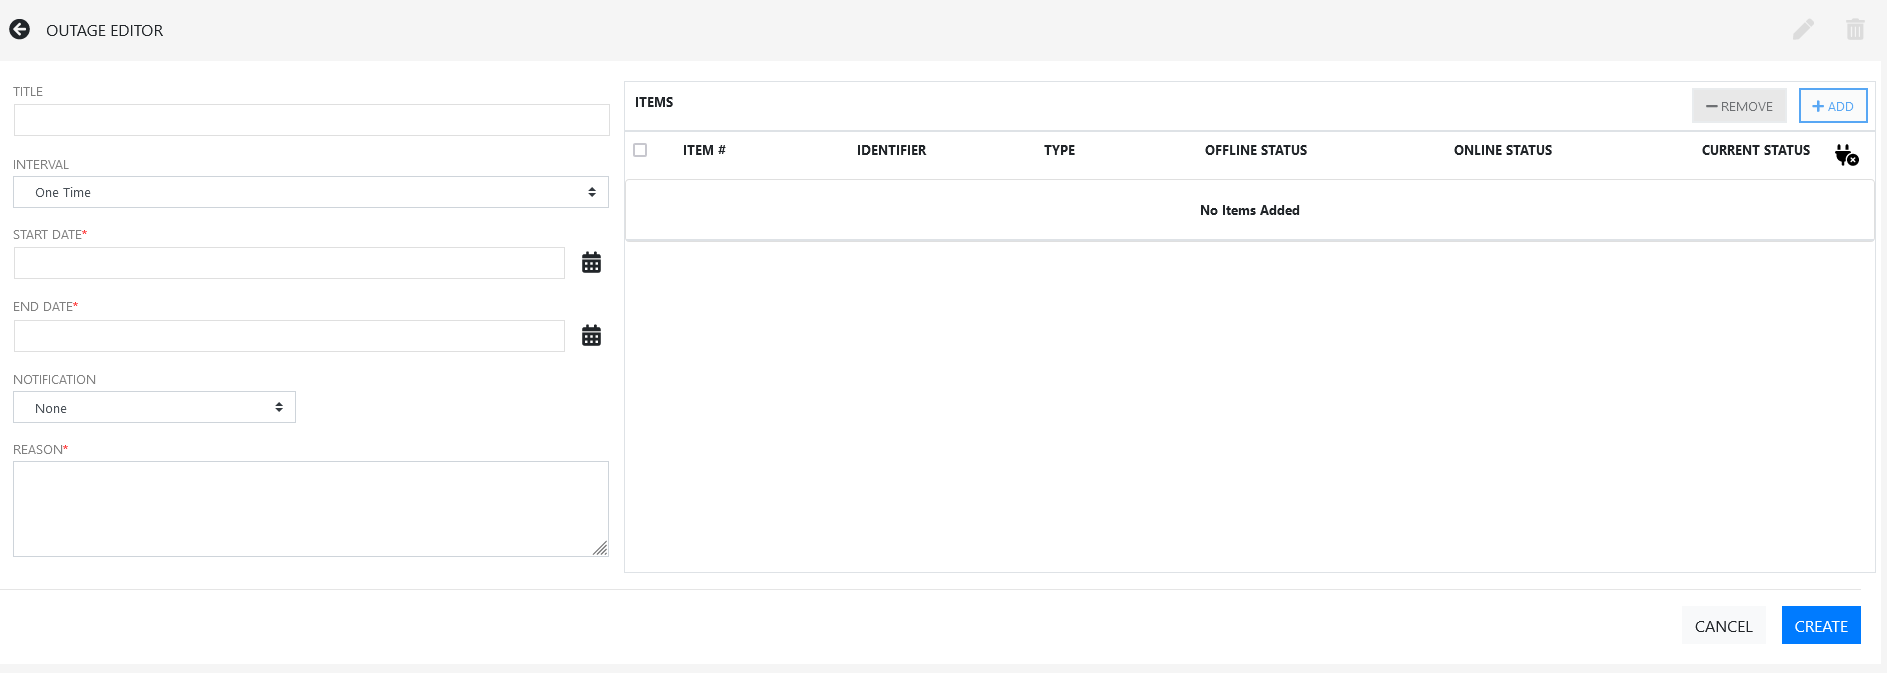
Creating an Outage
To create an Outage:
Click the  icon at the bottom of the page.
In the Outage Editor page, specify the following information:
The changes are applied only when you save the Outage.
Planned
Outages |
Details |
Description |
Title |
Specify a valid title for the outage. |
Interval |
Select
One Time if the Outage is a one off, or set regular outages
based on a weekly or monthly basis. |
Start Date |
Select
the Start Date within the calendar, and modify the Time accordingly
inside the calendar pop-up. |
End Date |
Select
the End Date within the calendar, and modify the Time accordingly
inside the calendar pop-up. |
Notification |
Select
Email or SMS Notification about the Outage is
to be sent to the Primary Contact of the Org. Unit, or
All Customers/Owners associated with the Item. |
Reminder |
This
option is displayed when a Notification is set for the Outage.
If a Reminder notification is to be applied to the Outage,
check the box and define the period of time prior to the Planned
Outage period that the reminder is to be issued. |
Reason |
Enter
a description that details why a Planned Outage is being scheduled. |
To associate an item to outage, perform the following:
In the Items section, click Add.
In the Advanced Item Search, specify the required keywords to search the required items.
Select the required items, and then click Select Item.
Define the Offline Status and Online Status for the Item
These are the States the Item will be automatically assigned in the CMDB when the Planned Outage commences and ends.
To view the blackout window, click the  icon.
icon.
Click Create.
Viewing Outages
To display Outages Tile, Planned Outages Page and Outages Page should be set to Yes in Setup > Privileges > System | Outage Options.
The Outage will be displayed only when the Mimimum Criticality for an Item Category is set to equal or higher criticality, and Item must be deployed.
For Item, Criticality must be equal to or higher to the Item Category Minimum Criticality setting.
To view the Outages Offline, go to the “Item Category” and ensure that the Offline State and Customer Visible is set to Yes.
Customer Portal View
In the Customer Portal the Planned Outages information is accessible
in the side bar menu of the Items and Services tab.

To view the Outage details, click the Outage No. link. To close the
window, click Done.
Login Page View
Planned
Outage information can also be accessed from the Login page, Click the
View Outages link to display a complete list of current outages. Select
the View Planned Outages link to access planned downtime details.


Planned Outage Page Options
Search for Outages based
on the Item Type
This functionality is enabled by the Administrator in Setup>Privileges>System
Search Outages.
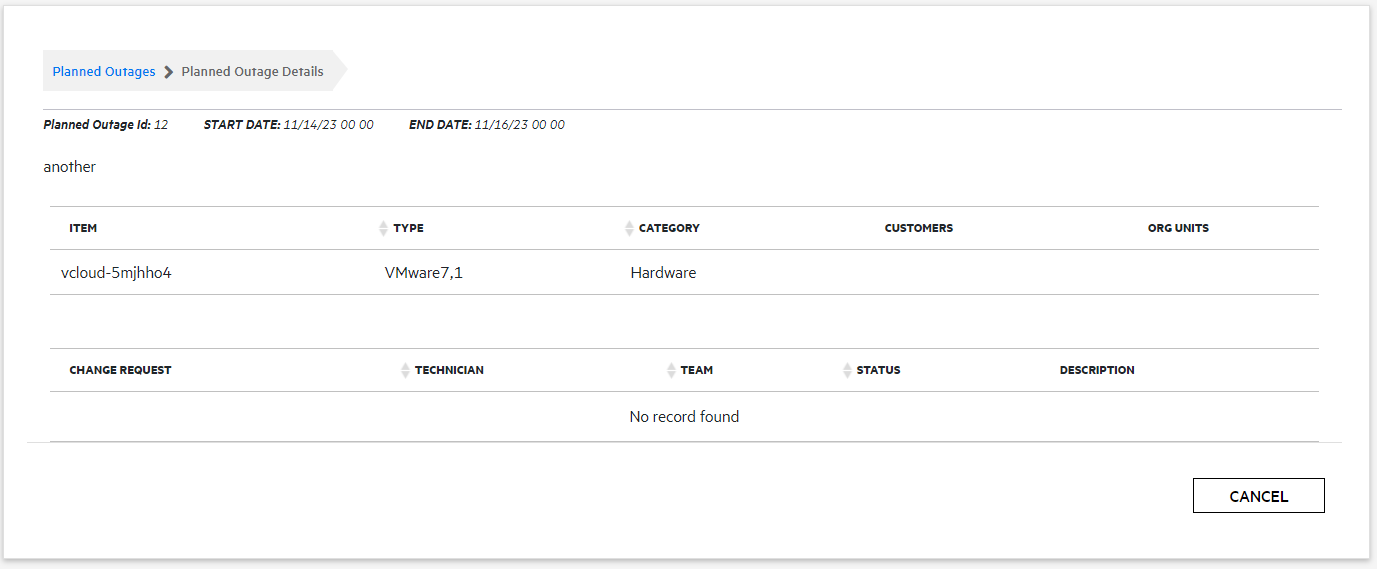
Within the Outage Details
window, click on the Item Number link to show the Item Relationship
Map
To enable this feature, the Show Affected Relationships option must
be activated by the Administrator in Setup>Privileges>System
Outages.
To return to the Planned
Outage list, click the Done.