" />" />" />" /> ZENworks Service Desk - Advanced Authentication Getting Started

ZENworks Service Desk - Advanced Authentication Getting Started

1.0 Overview

Advanced Authentication provides multi-factor authentication to protect sensitive data by using a series of authentication methods.

NetIQ Advanced Authentication can be integrated with ZENworks Service Desk to provide a more secure way to access the Service Desk portals. The multi-factor authentication can be enabled for all the users imported from an LDAP (non-Azure AD) server and can be configured for all the user roles.

NOTE:Advanced Authentication is not available for internal Service Desk and Azure AD users.

By default, ZENworks provides free limited entitlement to Advanced Authentication that supports One Time Password (OTP via Hard or Soft Token), SMS OTP, Email OTP, RADIUS Client, Emergency Password, and LDAP Password methods. However, if required, you can purchase the Full Advanced Authentication and use all the supported methods.

This document provides a detailed step-by-step procedure to deploy, configure, and use multi-factor authentication.

2.0 Deploying Advanced Authentication Server

The NetIQ Advanced Authentication enables you to go beyond usernames and passwords to authenticate and protect your sensitive data. For more information and key features of Advanced Authentication, see Introduction to Advanced Authentication.

IMPORTANT:ZENworks Service Desk supports Advanced Authentication 6.3.7 and above versions. Hence, ensure that you deploy Advanced Authentication 6.3.7 or above version to integrate with ZENworks Service Desk.

3.0 Installing Advanced Authentication

Depending on your requirements, Advanced Authentication can be deployed as a trial or full version. For more information on obtaining the Advanced Authentication, see Obtaining Advanced Authentication.

After obtaining the required version of Advanced Authentication, see the Installing Advanced Authentication for the installing instructions.

NOTE:

  1. Install the latest updates. For more information, see Getting the Latest Online and Offline Updates.

    ZENworks Service Desk supports Advanced Authentication 6.3.7 and later versions.

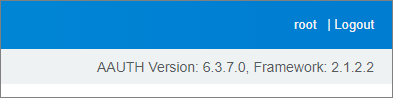
    After upgrading, the Advanced Authentication Appliance Console displays the version number.

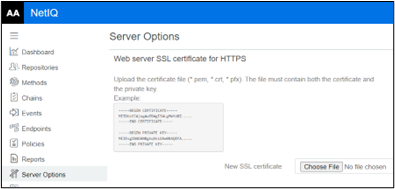
  2. Create and upload the web server certificate. For more information, see Uploading the SSL Certificate.

    Ensure that the web server certificate name that you upload should match the name of the AA server.

4.0 Configuring Advanced Authentication Server

After deploying, ensure that you perform the following steps in the Advanced Authentication Server:

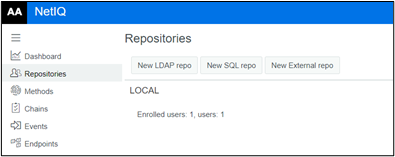
  1. Configure Repository: To configure a repository in Advanced Authentication Server, see Adding Repositories. Configure the LDAP source in which users are located. The LDAP source should be the same user source used in ZENworks Service Desk.

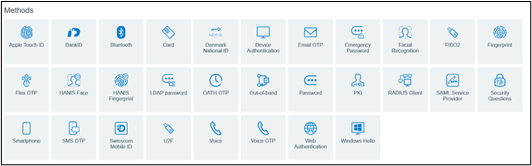
  2. Configure Methods: 2-factor authentication methods should be configured which can be used along with the default password authentication. For more information, see Configuring Methods.

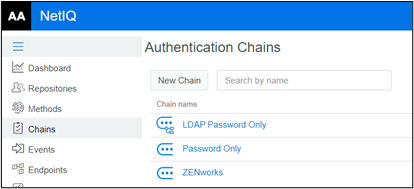
  3. Creating an Authentication Chain: A chain is a series of configured authentication methods, which the user should authenticate. To authenticate successfully, users should pass all the methods configured in the chain. For more information, see Creating a Chain. Ensure that you associate all the required repositories to the Authentication Chains.

  4. Configuring Events: Advanced Authentication provides authentication events for the supported applications or devices. You can configure an event to leverage the Advanced Authentication functionalities for an application or a device. For more information, see Configuring Events.

    For ZENworks Service Desk, ensure that you select the Event Type as Ouath 2/ Open ID Connect.

    NOTE:It is recommended that you use a dedicated event for ZENworks Service Desk.

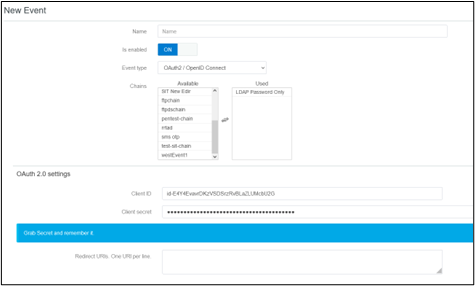
    NOTE:Ensure that you copy Client ID and Client Secret, as it will be used later while Configuring Advanced Authentication in ZENworks Service Desk.

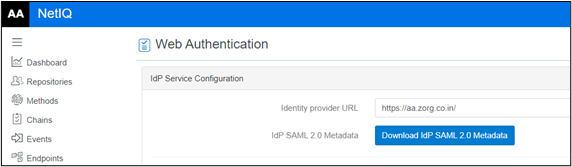
  5. Verify URL in Policies: Ensure that you verify the Identity Provide URL, which is your Advanced Authentication server nameURL in the Web Authentication page. Ensure that the Identity Provide URL is your AA server name. Example: https://aa.zorg.co.in/

    For more information, see Web Authentication.

5.0 Configuring Advanced Authentication in ZENworks Service Desk

After deploying and configuring the Advanced Authentication server, you can proceed to configure or integrate with ZENworks Service Desk.

5.1 Prerequisites

To configure or integrate Advanced Authentication in ZENworks Service Desk, ensure that you collect Event Name, Client ID, and Secret while configuring an event in the Advanced Authentication server.

5.2 Configuring Advanced Authentication in ZENworks Service Desk

To configure the AA server, perform the following steps:

  1. Log into ZENworks Service Desk as an Administrator.

  2. Go to the Admin portal, click Setup > AAF Sources.

  3. Click New.

  4. Specify the following details:

    • Name: Specify a unique name to identify the Advanced Authentication server.

    • Description: Specify a description for the Advanced Authentication server.

    • Server Host: Specify the hostname or IP address of the Advanced Authentication server.

    • Tenant: Specify the tenant’s name obtained while configuring the Advanced Authentication server. This is an optional field if the tenant’s name is not specified in the Advanced Authentication server.

    • Event Name: Specify the event name.

      Currently, ZENworks supports only OAuth2/OpenID connect event type.

    • Client ID: Specify the client ID of the event.

    • Client Secret: Specify the client's secret.

    • Redirect URIs: Displays the list of possible redirect URIs, you can either copy anyone or the complete URIs, and update the Redirect URIs field in the Advanced Authentication portal. These are the URIs through which Service Desk can be accessed. You can also add any additional redirect URIs in the following format:

      • https://<hostname>/LiveTime/WebObjects/LiveTime.woa/wa/aafCallback

      • https://<hostname>/servicedesk/login

        The list of URIs should be updated at the NetIQ Advanced Authentication Server to complete the configuration.

        NOTE:If you have specified Host Address in Setup > Privileges > System, then ensure that the address is a valid Service Desk host with HTTPS protocol, or you can clear the Host Address field empty.

    • User Sources: You can search and assign the user sources that should be linked with the Advanced Authentication server. User Source assigned to another AA configuration will not be available to link.

      NOTE:Advanced Authentication is not available for internal Service Desk and Azure AD users.

    • User Roles: You can enable AA for different user roles for each user source linked with the AA configuration.

      NOTE:By default, AA is enabled for Supervisor, Technician, and Administrator roles.

      If a user has multiple roles, and AA is enabled even for one of the assigned roles, then the user has to go through multi-factor authentication to access all the applicable portals.

  5. Click Save to complete the configuration.

5.3 Disable or Enabling the Advanced Authentication Server Configuration

To Disable or Enable the Advanced Authentication Server Configuration, open the required configuration, click Edit, and then click Disable or Enable.

5.4 Delete the Advanced Authentication Server Configuration

To delete the Advanced Authentication Server Configuration, open the required configuration, click Edit, and then click Delete.

6.0 Login Flow

After setting up the multi-factor authentication, if multi-factor authentication is enabled, then you will have to go through the following authentication screens to log into ZENworks Service Desk:

NOTE:If a user has multiple roles, and AA is enabled even for one of the assigned roles, then the user has to go through multi-factor authentication to access all the applicable portals.

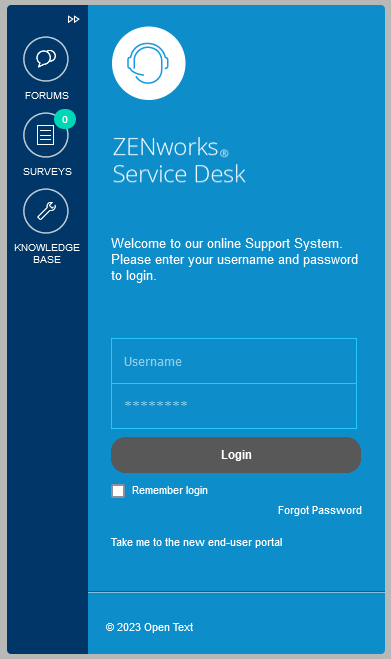
  1. Log into ZENworks Service Desk.

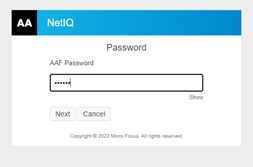
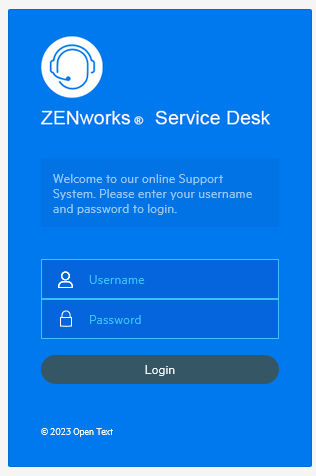
  2. Depending on the configured authentication method, you will be prompted with the Advanced Authentication login screen.

    After successful authentication, ZENworks Service Desk UI will be displayed.