5.12 Reports
5.12.1 Schedule Reports
Schedule Reports allow the Administrator to configure the system to automatically send reports via email to Supervisor, Technician, Finance, Partner and Manager Users on a regular basis. The content of the email is defined on a per Role basis with the reports drawn from the default system reports or those built using the system report builder.
Setting Up Scheduled Reports
To set up scheduled reports:
-
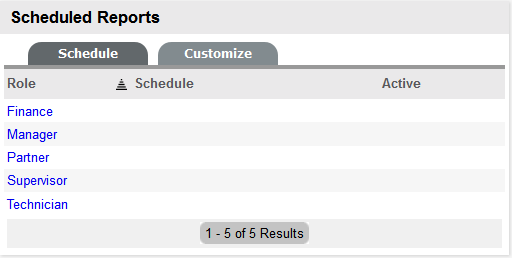
Select Setup>Reports
-
Select the relevant Role link
The screen defaults to the Details screen.
-
Click Yes within the Active field
Scheduled reports are enabled for all Users of selected Role.
email
Description
Send
Define if the automated reports are to be sent Daily, Weekly or Monthly.
Time
Using the 24 hour clock, set what time of day the report is to be emailed to the User Role group.
Content
Date Range
Set the number of previous days, weeks or months that the report is to be calculated over.
Page Size
Nominate A4, Legal or Letter as the page format size for the report.
Selected Reports


Add or remove reports in this section.
-
Complete the email details
Nominate the frequency and time of day the reports are to be sent.
-
Complete the Date Range for the emailed reports
The Date Range intervals include daily, weekly and monthly. Define the number and interval type for sending the reports.
-
Set the paper size
-
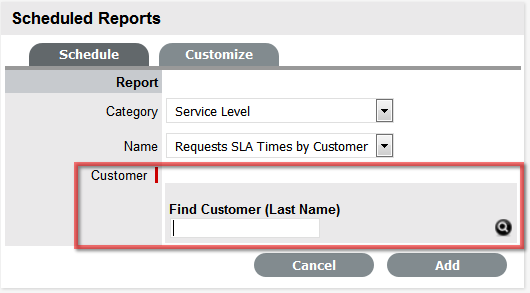
Click
to add reports to the scheduleThe screen defaults to the display Category and Name drop down lists.
-
Select the Report Category
The Name list is refined based on the Category selected. For example, if KPI is set as the Report Category the Names list includes all types of KPI summary reports included by default in the system.

-
Define the report Name and any other required options
Based on the Report Name selected, the options to create a trend report or define the results by specific parameters (i.e., Customer Name, Item Type, etc) are displayed.
-
Click Add
Repeats steps 7 to 10 to associate all the required reports with the scheduled reports email.
-
Select Test, if required
-
Search and select the User who is to receive the test report
-
Click Test
A test copy of the report is sent to the defined User with the test interval range based on one day, week or month, not the actual number defined in the Previous field for the scheduled reporting period.
-
Click Save.
Repeat the above process for all relevant User Roles.