2.9 Create Request
To create a Request, click the icon that is displayed in the menu bar.

The create request page is displayed as shown in the following image.
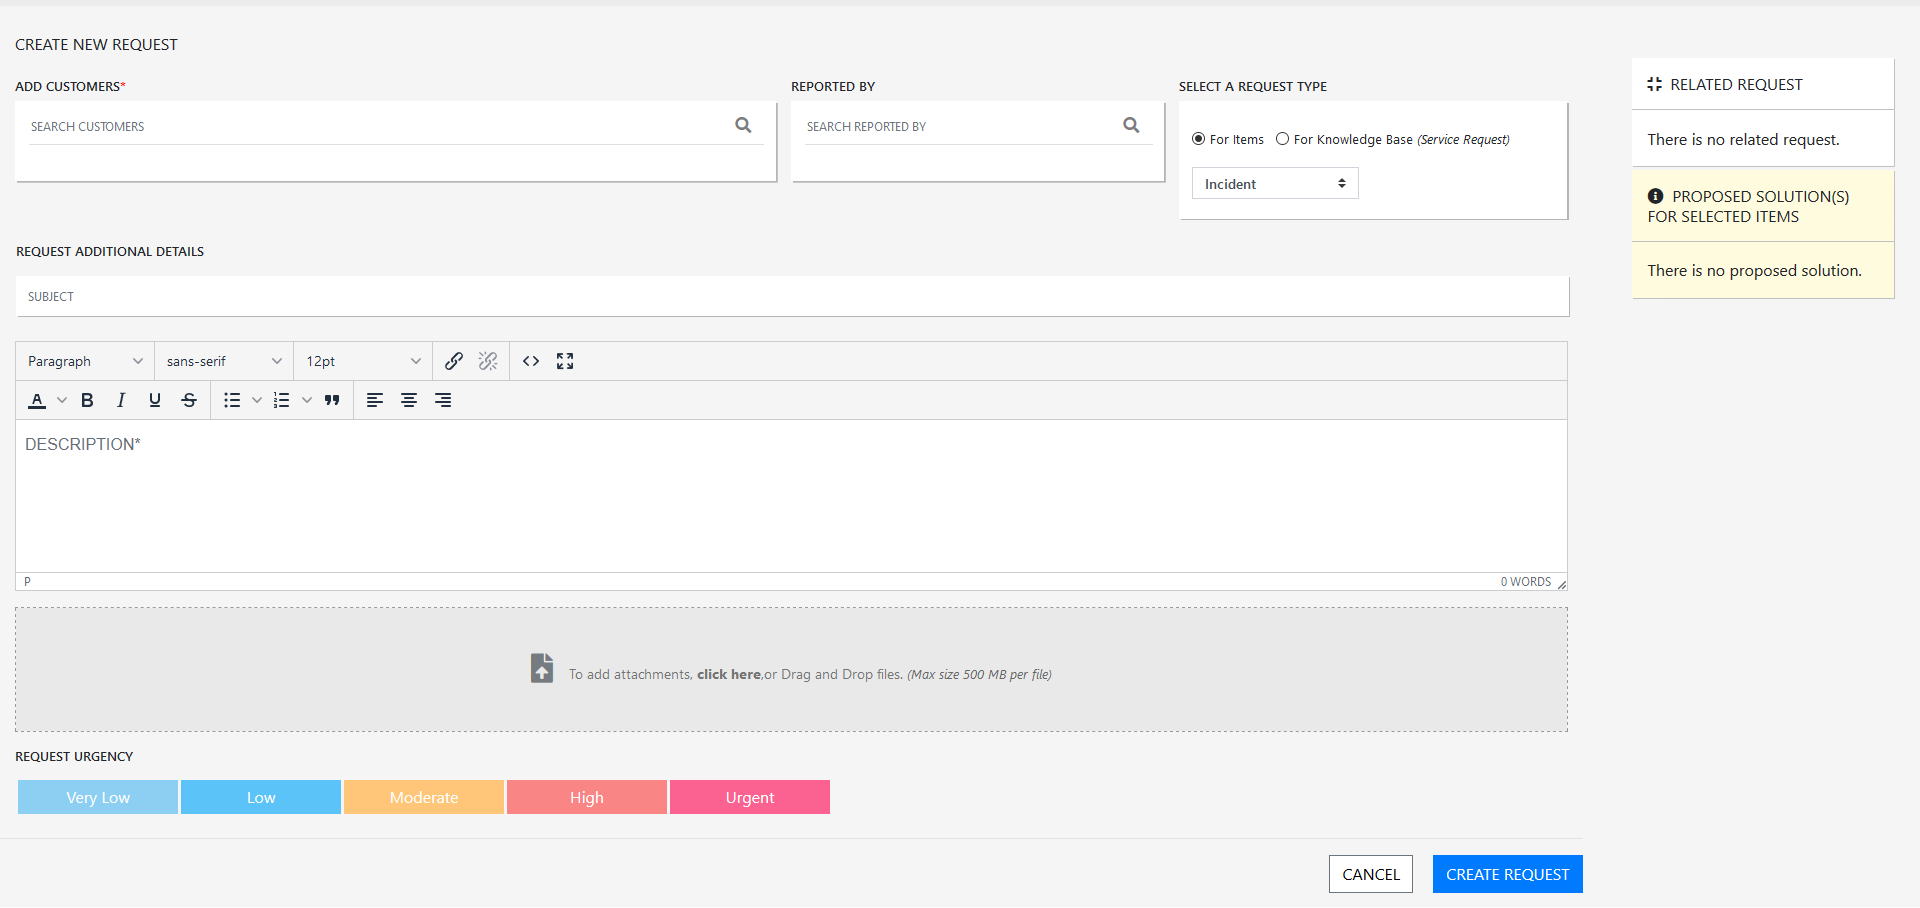
In the Create New Request page specify the following information, and then click Create Request:
-
Add Customer: In this field, specify the customer name and then select the required customer from the displayed result.
More than one customer can be added in this field, specify the name and from the displayed results select the required name.

-
Reported By: In this field, specify the name and then select the required name who has reported the issue.
Only one name can be added. If you try to add one more entry, then the previous entry will be replaced with the new one.
-
Select A Request Type: In this field, you can either select For Items or For Knowledge Base (Service Request)
-
For Items: Select this option to create a request on an Item. From the below drop-down, select the required request type. The available options are Incident, Service, Problem and Change.
-
For Knowledge Base (Service Request): Select this option to create a service request on a knowledge base.
NOTE:If you have updated any customer field, and when you change request type in For Items or change the option For Items to For Knowledge Base (Service Request) and vice versa, then the updated data will be cleared from the customer field. Hence, it is recommended that you do not make any change to the Select A Request Type field after updating the customer information. However, the select Customer and Reported By fields will be retained.
-
To view the customer information, click the + icon. Depending on the option selected in the Select A Request Type option, the items or knowledge base articles will be listed.
In the customer information panel, you can either use Item Search, or Select Categories and Select Item Types fields to search for the required item.
-
Select Categories: In this field, you can specify the categories to search for the item categories that you want to add to the request. After selecting categories, list of active category custom fields will be displayed. These fields can be used to further filter the items list.
NOTE:You can select multiple categories. For each selected category, the active category custom field section will be displayed.
-
Select Item Types: In this field, specify and search for the Item type. If one or more categories are selected, then you can search item types associated with the selected categories.
-
Item Search: In this field, search for the required item. This field is displayed on the right-top of the customer information panel. After selecting, if items are available in the list, then the item will be selected automatically. If the items are not selected, then the item will be selected and added to the top of the list.
On the mobile devices, barcode will be displayed.
Depending on the search criteria, the items will be listed. However, using the following fields, you can further minimize the number of item displayed.
-
Show Active Items only: Select this check-box to list all the active items. By default, this option will be selected.
-
Show Assigned Items only: Select this check box to list all the items assigned to the logged in user.
After selecting the required items, on the right-hand Related Requests and Proposed Solution for Selected Items are displayed.
Clear Fields: Click this button to reset the customer request data.
Pre-populate below field with information of customer: If you have selected more than one customer, and if you want to copy the information from one customer to another, select this check box and from the drop-down, select customer from whom you want to copy the information.

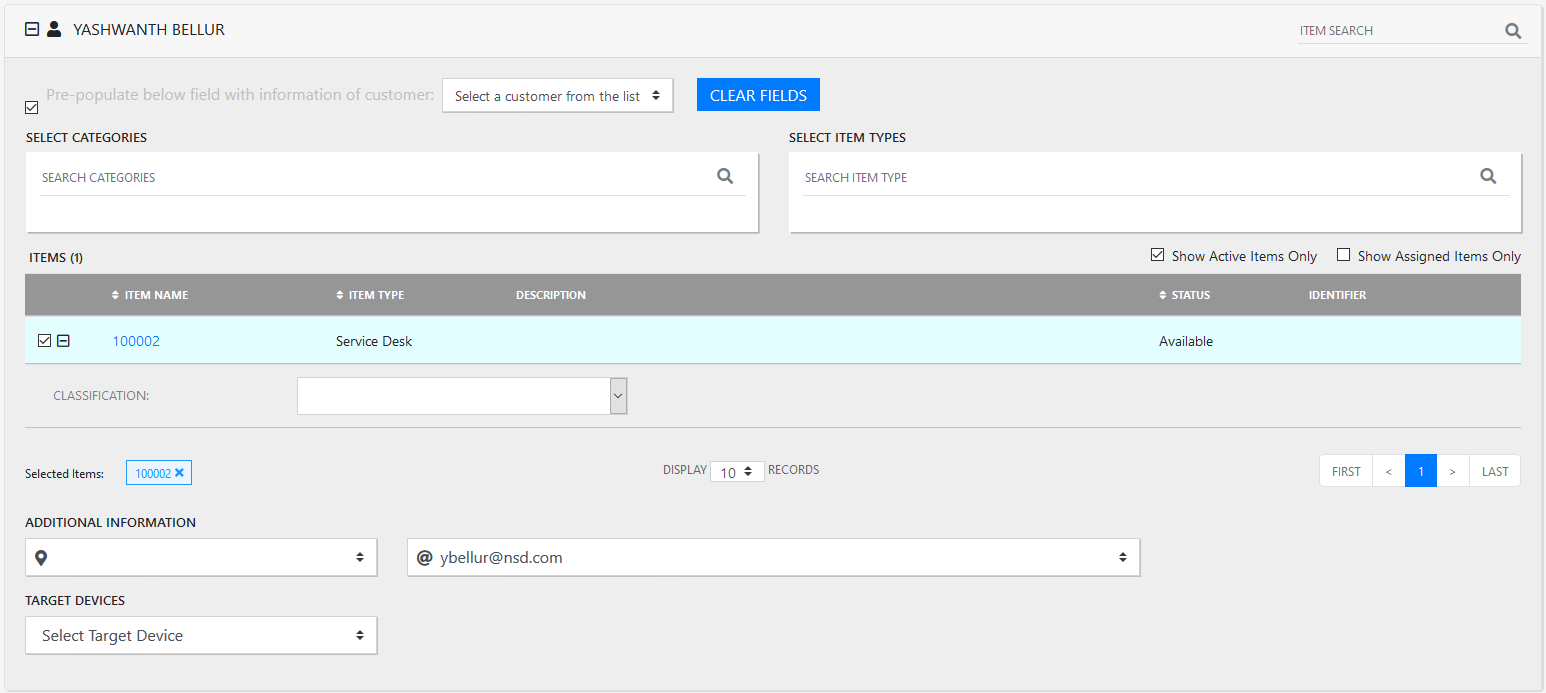
After selecting the Items from the search results, select the Classification field, custom fields, if any, and then specify the following fields.
If the classification field is not selected, then the default option will be selected.
-
Additional Information: In this field, select the location and email ID or phone number of the customer.
-
Target Devices In this field, select the target devices.
If you do not want to use the same customer information from other selected customers, then manually update the customer information and then specify the following information:
Request Additional Details
-
Subject: In this field, specify a subject for the request.
-
Description: In this field, specify a description for the request.
-
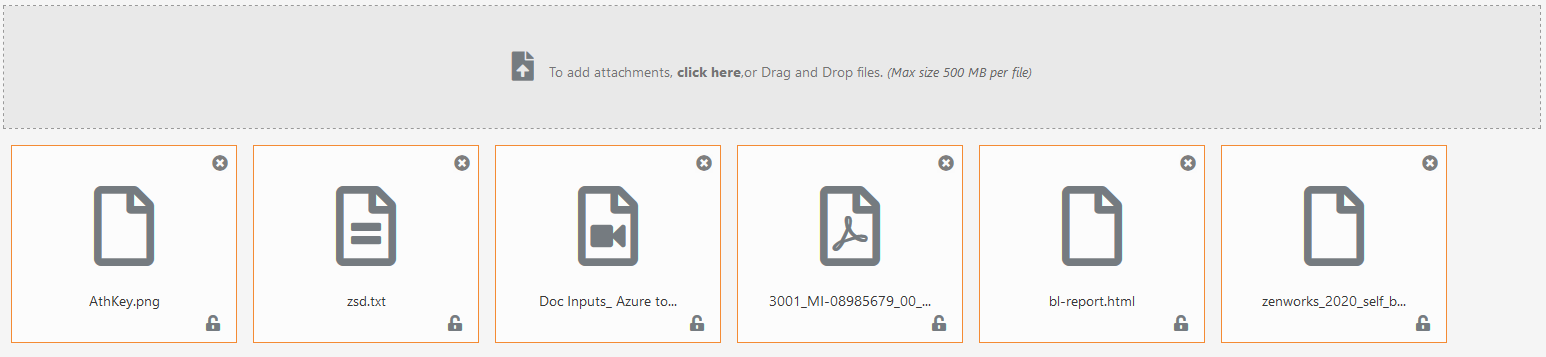
Attachment: In this field, to add attachments, you can either drag and drop files or click the field to upload the files.
After adding the attachment, depending on the type of file, icon will be associated with the attachment.
-
Request Urgency: In this field, select the request urgency. Depending on the urgency, the priority will be assigned to the request.
NOTE:Depending on the selected Urgency level, the priority for the request will be assigned. The priority for a request is always derived and cannot be added manually selected.
If Request Urgency is not selected, then the default urgency will be selected.

After specifying all the details, click Create Request.