Customizing the Portal
To customize the classic portal or new end-user portal, click the required following link:
Customizing the User Portal
The Customize
menu allows the Administrator to brand the application where system banners
can be replaced with the appropriate organizational banners. Graphics
included should be . PNG images. The Application
Banner should be 250 x 60 pixels and all other banners should be 500 x
60 pixels.
Adding a Customized Banner
To add a customized banner:
Select
Setup>Customize
Banner
Type |
Displayed |
Application |
Visible
on the Log in page of the system. |
User
|
Visible in the portals for Supervisor,
Technician, Administrator, Partner, Finance and Manager Users |
Public/Email |
Displayed on public portals for
Knowledge, Outages, Surveys and Forums. This banner is also
included in emails when the Setup>Email>Setup option
of Include Banner is set to Yes. |
Customer |
Visible in the Customer Portal.
Banners
for Partner Organizations can be uploaded in the Banners
tab of the User>Partner Organization screen. This will
override the system Customer Portal banner for Customers
associated with the Partner Organization. |
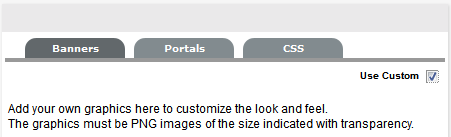
To
use Custom Banners, select the Use Custom checkbox at
the top of the Customize Banners
screen
To
upload a new banner, click New
A window with a browse function appears.

Browse
to the location of the image and click 
The image will be uploaded.
Repeat
the process until all banners have been replaced
Click
Save.
- When
the Purchase Orders functionality is enabled within the Setup>Billing
tab, the option to upload a logo that will be used for system generated
POs is displayed. The graphic should be saved as 150x150 PNG file.
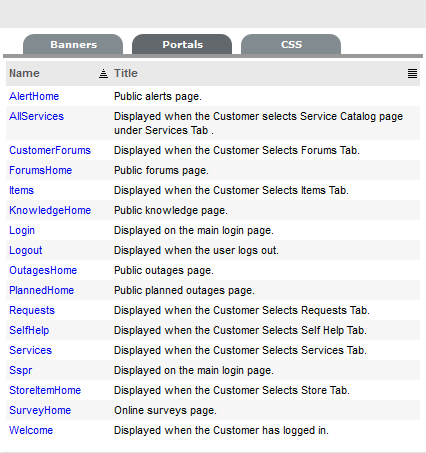
Portals Tab
All Public Access home page messages can
be fully customized under the Portals tab. Links
to documents and downloads may be added. The home page messages can be
customized for:
To customize a Public Access message:
Select Setup > Customize
Click the Portals tab
Select the Name hyperlink
The HTML editor appears.
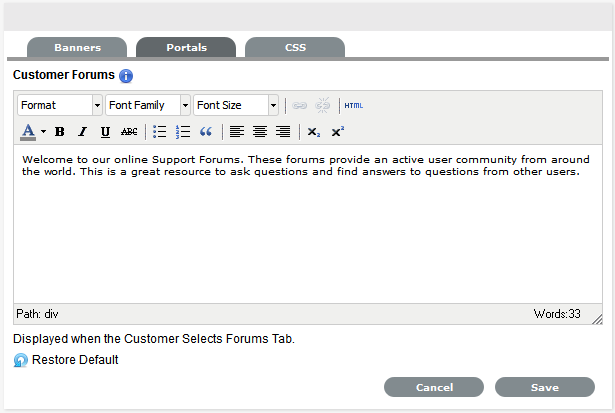
Edit the message as
required
Click Save.
Cascading Style Sheets
The system can be further customized using
cascading style sheets (CSSs) to amend:
Color
Fonts
Tabs
Graphics.
See: CSS Tab.
Customize the Customer (New End-user) Portal
The Customize tab allows the Administrator to brand the new end-user portal, where system banners
can be replaced with the appropriate organizational banners. Graphics
included should be PNG images. The Application
Banner should be of appropriate pixels.
Adding a Customized Banner
To add a customized banner:
Select
Setup > Customize
Banner
Type |
Description |
Login Page Logo
|
Replace the default ZENworks Service Desk logo on the login page. The login page logo should be of 240 x 90 pixels.
|
Application Header
|
Replace the header logo in the new end-user portal. The Application Header should be of 56 x 56 pixels.
|
Portal Banner
|
Replace the banner in the new end-user portal. The portal banner should be of 1900 x 350 pixels.
|
Note: Image with transparent background is not supported for banners.
In the mobile view, full banner might not be displayed. Depending on the display size and screen resolution, only partial image will be displayed.
To
use Custom Banners, select the Use Custom checkbox.
To
upload a new Login Page Logo, Application or Portal banner, click New.
Click Browse
and select the required image, and then click
The image will be uploaded.
Repeat
the process until all banners have been replaced.
Click
Save.
- When
the Purchase Orders functionality is enabled within the Setup>Billing
tab, the option to upload a logo that will be used for system generated
POs is displayed. The graphic should be saved as 150x150 PNG file.
Portals Tab
All messages in the new end-user portal can
be customized in this tab. The home page messages can be
customized for:
To customize the message:
Click Setup > Customize
Click the Portals tab.
Click the required name. The HTML editor page is displayed.
Edit or replace the message and then click Save. To restore the default message, click Restore Default.
Note: All the legends in the pages that are newly developed allow customers to customize only text, but not the styling (font color, size, and style).
Cascading Style Sheets
The end-user portal can be further customized using the
cascading style sheets (CSSs) to amend:
Color
Fonts
Tabs
Graphics
See: CSS Tab.