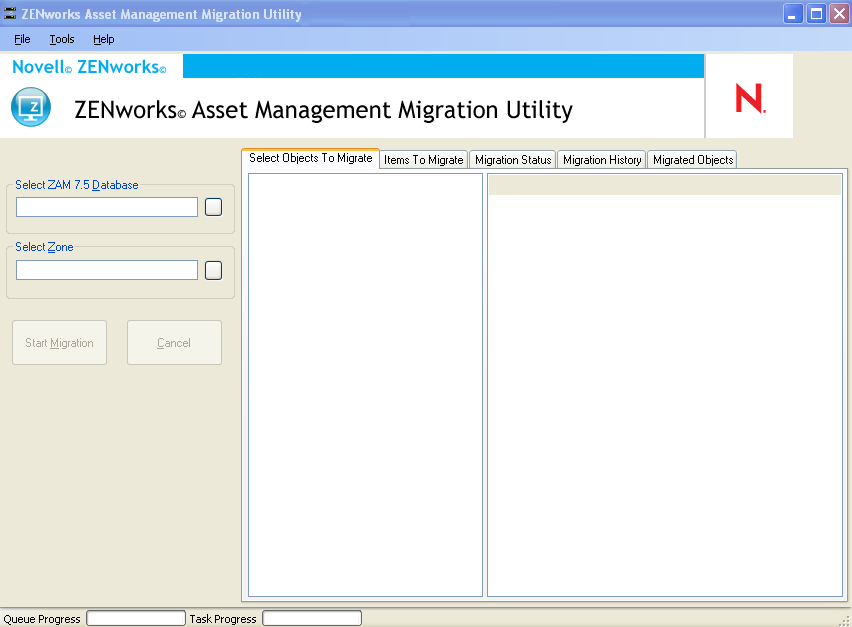
1.4 Selecting the Migration Source
The migration source is your ZENworks Asset Management 7.5 database. The migration utility requires that you log in to the migration source with create, modify, and delete privileges. To log in to your database:
-
Click > > .
-
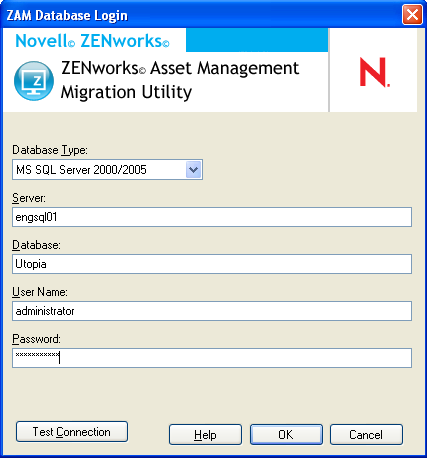
Click the button to the right of the field. For Microsoft SQL migration, you see the following screen:
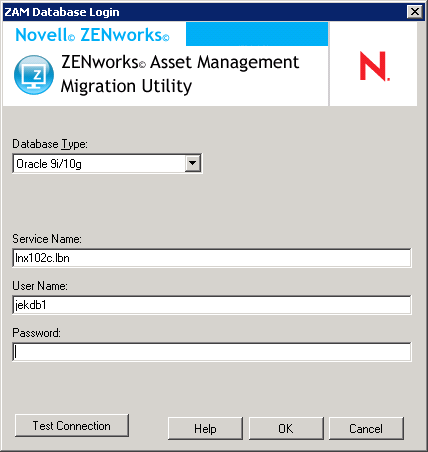
For Oracle migration, you see the following screen:
-
Fill in the following fields:
Database Type: Specify the database type. For example, specify for both external and embedded MS SQL Server databases. Or specify for the latest Oracle database type.
Server: Specify either the DNS name or IP address of the database server. Each time you use this dialog box, the last server you logged in to is displayed here.
Database: Specify the database name. Each time you use this dialog box, the last database you logged in to is displayed here.
Service Name: For Oracle migration, specify the service name. Each time you use this dialog box, the last service you logged in to is displayed here.
User Name: Specify the username. Each time you use this dialog box, the last username you used is displayed here.
Password: Specify the password. This must be specified every time to authenticate.
-
Click to connect. You can click first to verify that you can connect to the database.
-
Continue with Section 1.5, Selecting the Migration Destination.