5.4 Using Alerts Monitoring
Alerts monitoring allows the ZENworks Endpoint Security Management administrator to effortlessly gauge the security state of all ZENworks Endpoint Security Management managed endpoints throughout the enterprise. Alerts triggers are fully configurable and can report either a warning or a full emergency alert. This tool is accessed either through on the taskbar or by using the menu.
Figure 5-6 Alerts Dashboard
Alerts monitoring is available for the following areas:
-
Client Integrity: Notifies the administrator of unremediated integrity test results.
-
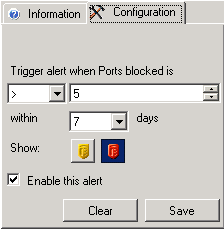
Communication Port Security: Notifies the administrator of potential port scan attempts.
-
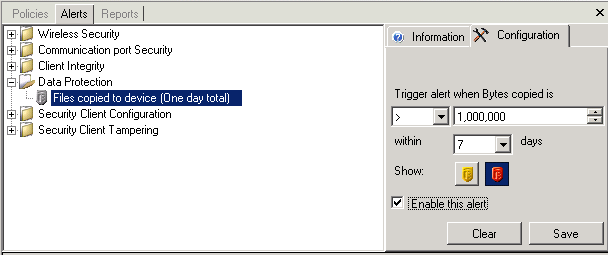
Data Protection: Notifies the administrator of files that are copied to removable storage devices within a one-day period.
-
Security Client Configuration: Notifies the administrator of incorrect security client versions and incorrect policies.
-
Security Client Tampering: Notifies the administrator of user hack attempts, uninstall attempts, and usage of the override password.
-
Wireless Security: Notifies the administrator of unsecure access points, both detected and connected to by the end user.
The following sections contain additional information:
5.4.1 Configuring Endpoint Security Management for Alerts
Alerts monitoring requires reporting data be collected and uploaded at regular intervals to give the most accurate picture of the current endpoint security environment. Unmanaged Endpoint Security Clients do not provide reporting data, and will therefore, not be included in the Alerts monitoring.
The following sections contain more information:
Activating Reporting
Reporting should be activated in each security policy. See Section 6.2.4, Compliance Reporting for details on setting up reporting for a security policy. Adjust report send times to an interval that will give you consistent updates on endpoint status. Additionally, an alert will not activate without a report. Any activity you want to be alerted to must have an appropriate report assigned to it in the security policy.
Optimizing Synchronization
By default, the ZENworks Endpoint Security Management Reporting Service syncs every 12 hours. This means that reporting and alerts data are not ready until 12 hours have passed from installation. To adjust this time, open the Configuration tool (see Scheduling) and adjust the Client Reporting time to the number of minutes appropriate for your needs and your environment.
When data is needed immediately, the Service Synchronization option in the Configuration tool immediately lynches the Policy Distribution Service (which collects the reporting data from the endpoints) and the Reporting Service, which updates all alerts based on the newly collected data. See Section 5.3.3, Service Synchronization for details.
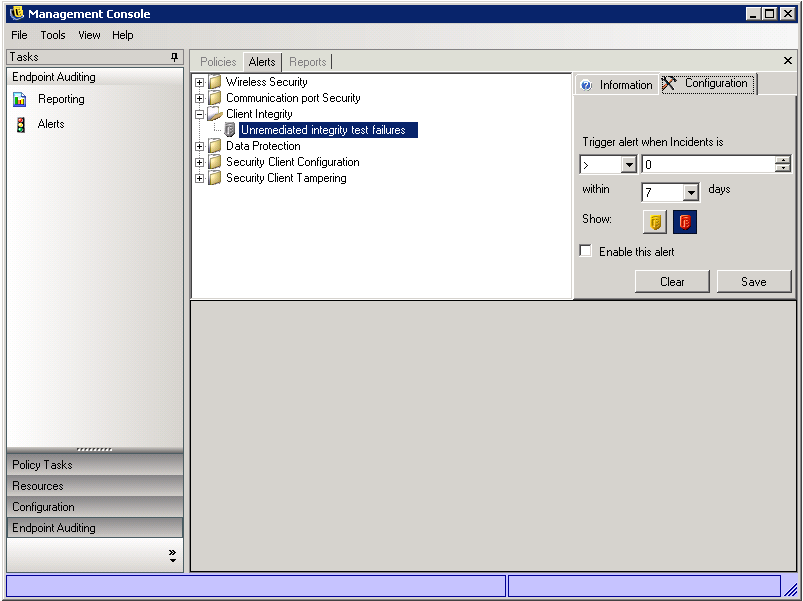
5.4.2 Configuring Alert Triggers
Alert triggers can be adjusted to thresholds that fit your corporate security needs.
To adjust alerts from their defaults:
-
Select an alert from the list and click the tab.
-
Adjust the trigger threshold by selecting the condition from the drop-down list. This states whether the trigger number is:
-
Equal to (=)
-
Greater than (<)
-
Greater than or equal to (<=)
-
Less than (>)
-
Less than or equal to (>=)
-
-
Adjust the trigger number. This number varies, depending upon the type of alert.
-
Select the number of days that this number must be met.
-
Select the trigger type, whether it’s the warning icon (
 ) or the emergency icon (
 ).
).
-
Click .
-
Click .
5.4.3 Managing Alerts
Alerts notify you of issues that need to be remedied within the endpoint security environment. Remediation is normally handled on a case-by-case and individual or group basis. To help identify the issue, Alert reports are displayed when the alert is selected.
Figure 5-7 Alert Reporting
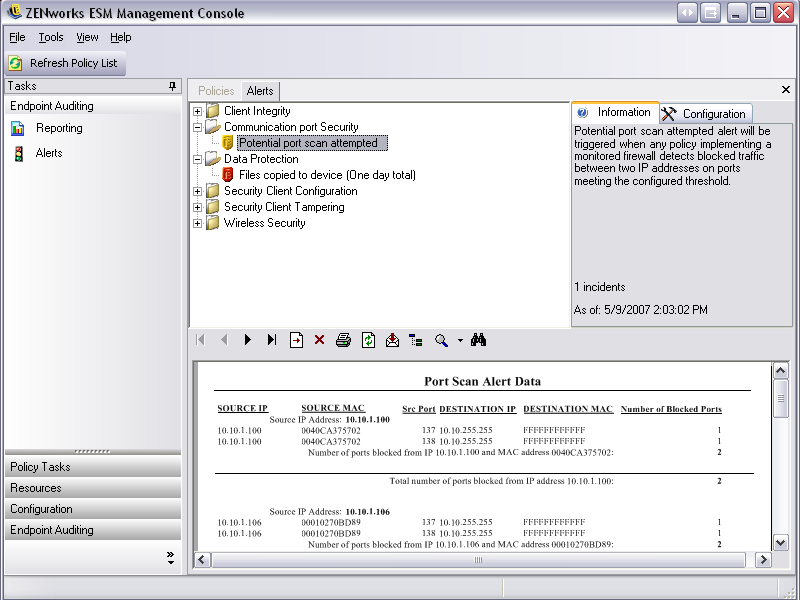
This report displays the current trigger results, displaying information by affected user or device. The data provides the necessary information to take remediation actions to correct any potential corporate security issues. Additional information can be found by opening .
Once remediation actions have been taken, the alert remains active until the next reporting update.
To clear an alerts:
-
Select an alert from the list, then click the tab on the right.
-
Click to clear the reporting data from Alerts (this data is still available in the reporting database), and will not reactivate until new data is received.