NetIQ eDirectory 8.8 SP8 (Patch 6)
NetIQ iManager 2.7 SP7 (Patch 5)
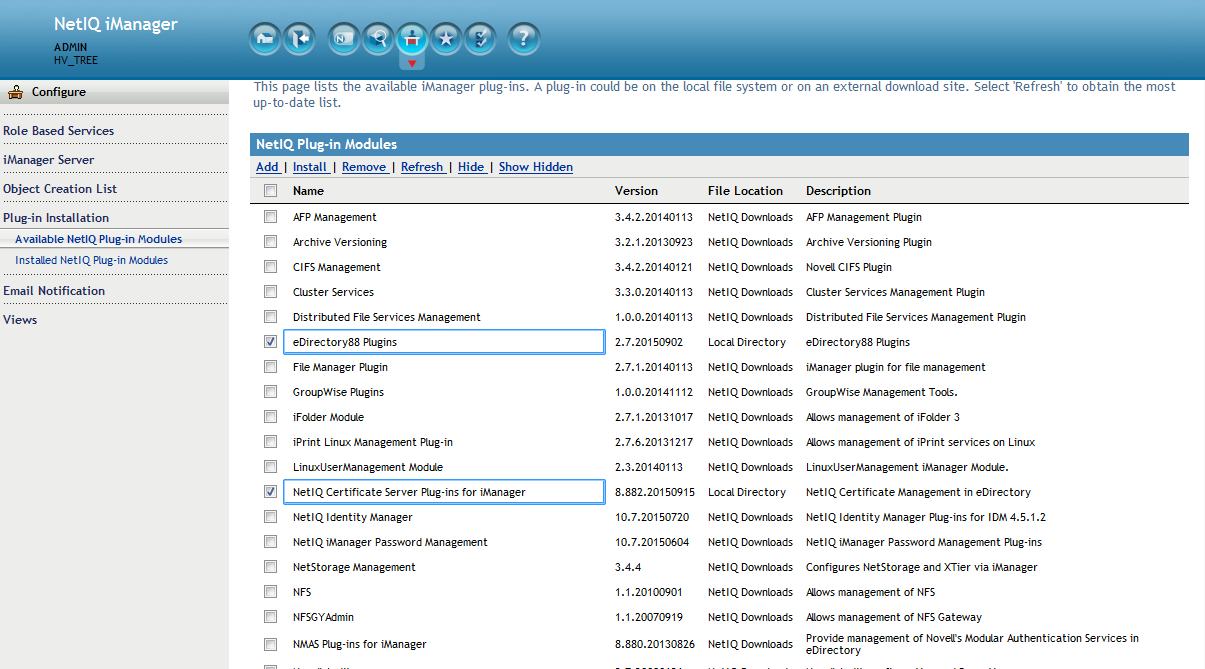
eDirectory88 Plugins 2.7.20150902
NetIQ Certificate Server Plug-ins for iManager 8.882.20150915
Digital signatures prove ownership. They provide proof that a user is in fact talking to the CA authority who signed a certificate and not some man-in-the-middle.
When encrypting data the public key is used to encrypt the data for the entity holding the private key. However, in this case the roles are reversed. A private key can be used to prove ownership of a public key. The holder of the private key encrypts a small amount of data with the private key then sends that data (in the clear) along with the encrypted data itself. The public key holder uses that key to decrypt the data and compare it to the token (unencrypted) data sent. Only the private key holder can send this type of data to verify its signature on the certificate. This token/encrypted data pair is called a digital signature. Digital signatures cannot effectively sign large amounts of data. Therefore, a hash function is used to take all the certificate variable data and reduce it to a digest containing a small fixed amount of data. This hash is then encrypted with the private key. The verification process afterward is thus:
- The signature is included along with the certificate
- The signature is decrypted with the public key to get the hash
- The certificate is then hashed with the same algorithm
- The two hashed values are then compared
There have been a number of prior hashing algorithms. As computational power increased, the possibility of reversing the hash in an acceptable amount of time has also increased. Prior to SHA-1 MD5 was used until a flaw was found in 2004. Since then SHA-1 has been used. Now the possibility of it also becoming compromised due to increased processing power has spurred the industry to adopt SHA-2.
In support of this major browser manaufacturers are taking steps to begin phasing out SHA-1 signed certificates. Many already are not allowing SHA-1 certificates if they are valid beyond January 2017 (the final cutoff date for support). Some vendors will not accept them past January 1, 2016.
eDirectory has had the ability to manually mint SHA-2 signed certificates for some time. However, two challenges remained:
1. The RootCA in the certificate chain is still signed with a SHA-1 signature. Some browsers will ignore a Root's signature and others will not.
2. Whenever a server's certificates were auto-created due to self provisioning being enabled they continued to be signed using SHA-1.
To fully address the issue eDirectory and iManager must be patched and configured to begin minting certificates using the SHA-2 signature. After patching this is done by deleting the existing SHA-1 signed RootCA and recreating it with a SHA-2 based signature. Then the CA is configured to force servers to follow its signing algorithm whenever their certificates must created.
NOTE: The following only applies if this is an eDirectory 8.8 SP8 server running the standalone (non-OES) version of eDirectory. This capability also exists for OES based installations. (Standalone eDirectory CA's can service OES servers and visa versa.) For more information please refer to
KB 7017122:
https://support.microfocus.com/kb/doc.php?id=7017122.
Below are the basic steps involved:
1. Upgrade eDirectory to 88SP8 Patch 6 & iManager to 2.7SP7 Patch 5
2. Install the new eDirectory and PKI plugins
3. Backup the existing CA
4. Create a Trusted Roots object from the CA's public key
5. Delete the RootCA
8. Recreate RootCA
9. Setup Certificate Server so that the signing algorithm of the RootCA is followed by the servers
10. Force a PKI health check to recreate the server certificates and export them to the file system
11. Refresh NLDAP
Detailed Steps
1. Upgrade eDirectory to 88SP8 Patch 6 & iManager to 2.7SP7 Patch 5
2. Install the new eDirectory & Certificate Server plugins in iManager.
The plugins can be found in the eDirectory patch. They are named eDir_88_iMan27_Plugins.npm and pki.npm. After they are installed restart Tomcat.
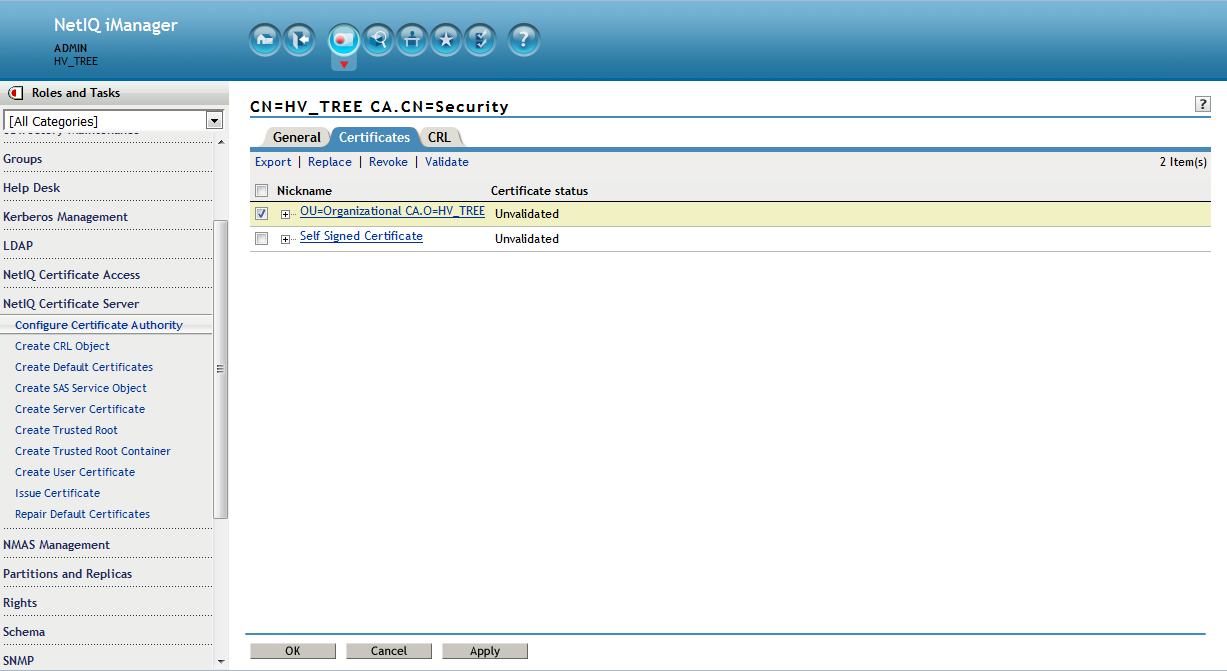
3. Backup the existing CA to a pfx file - Save to filesystem (cert.pfx)
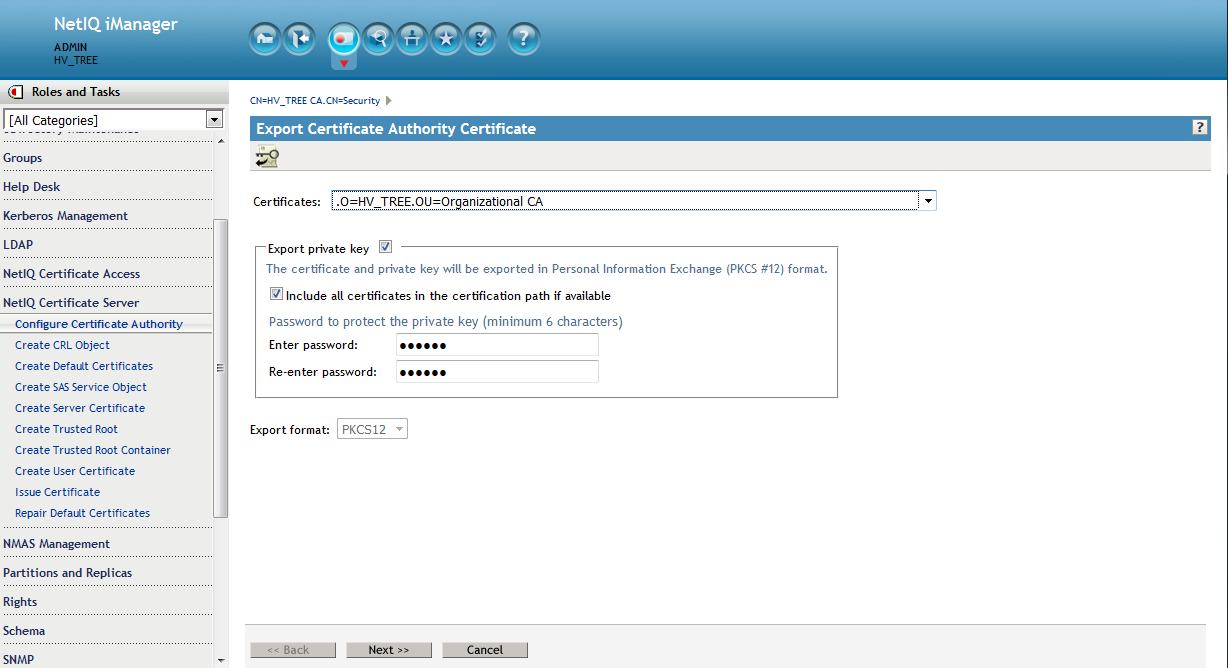
From the Roles and Tasks menu in iManager , click Novell Certificate Server > Configure Certificate Authority. Click Certificates, then select either the Self Signed Certificate or the Public Key Certificate. Both certificates are written to the file during the backup operation. Click Export. This opens a wizard that helps you export the certificates to a file. Choose to export the private key, specify a password with 6 or more alphanumeric characters to use in encrypting the PFX file, then click Next.
On the following screen select to save to a file. This is a complete backup of the CA "just in case".
4. Export the public key - Save to filesystem (cert.der).
This will be used to create a Trusted Root object later.
Deselect "Export private key"
On the following screen select to save to a file.
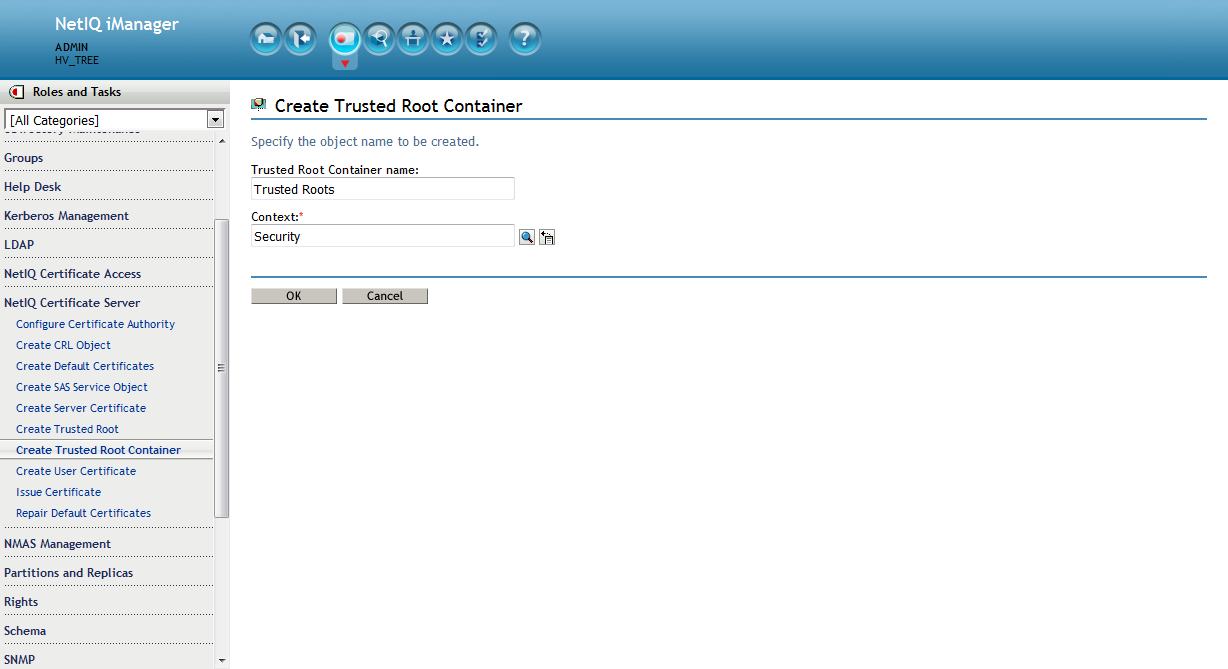
5. Create Trusted Roots container (optional)
Creating the Trusted Roots container and creating a Trusted Roots object from the existing RootCA is optional but recommended. Server certificates contain the entire chain of certificates. However, user certificates do not. If any users are using user created certificates they will no longer function after the RootCA is deleted. Creating these two objects prevents this from happening until they can be recreated in a controlled fashion.
From the Roles and Tasks menu in iManager , click Novell Certificate Server > Create Trusted Root container. This must be called " Trusted Roots " and must reside in the Security container.
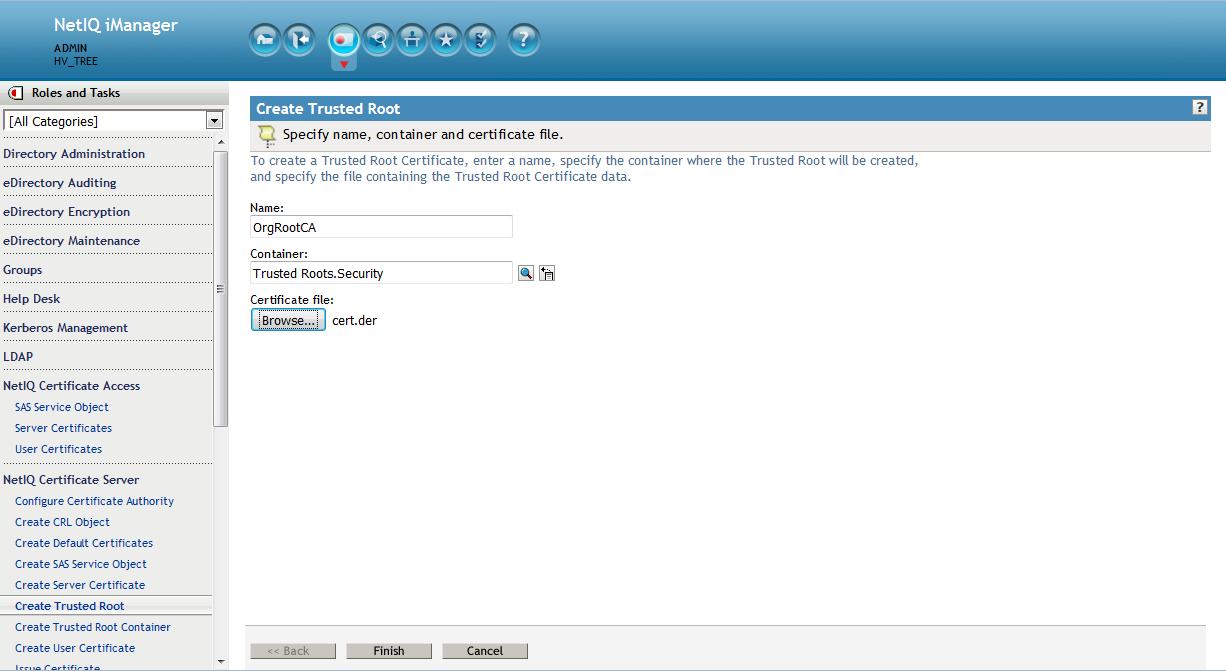
6. Create Trusted Root object (Optional)
This will be done using the original RootCA's public key file, cert.der, created earlier. From the Roles and Tasks menu in iManager , click Novell Certificate Server > Create Trusted Root object.
7. Delete CA
Make sure all backups have taken place. The Org CA for eDirectory will now be deleted.
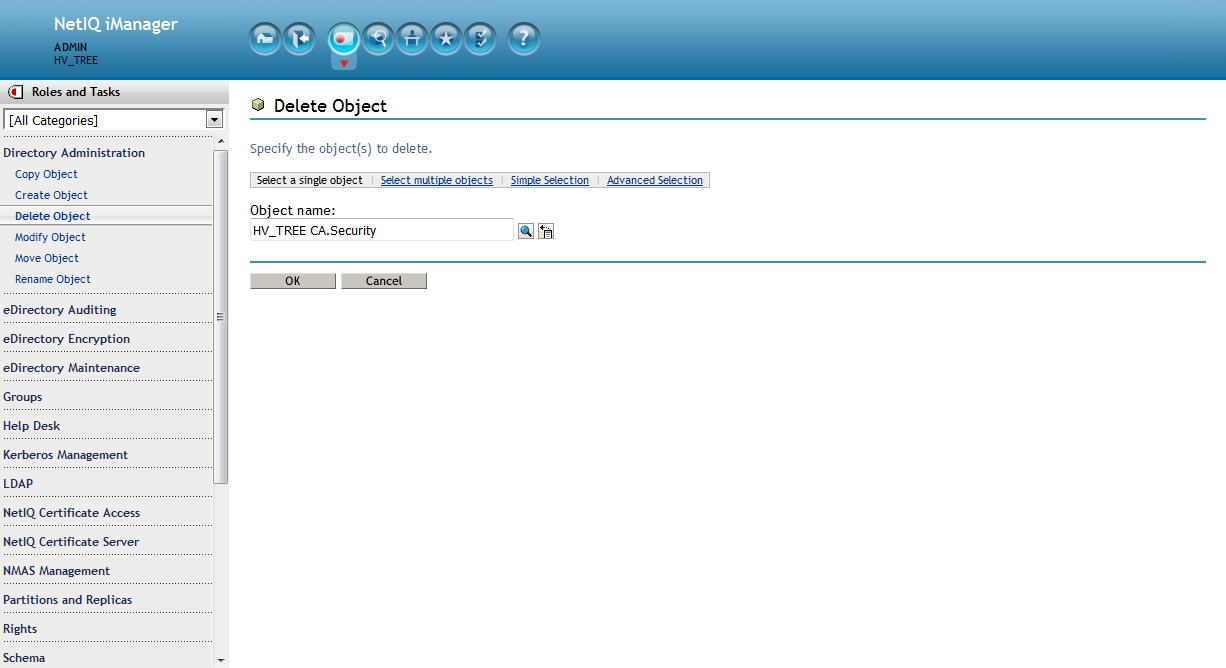
In iManager from the Roles and Tasks menu in iManager , click on Directory Administration > Delete Object > Browse to the
Organizational CA object in the Security container. This will be named " YOURTREENAME CA ". Click on OK.
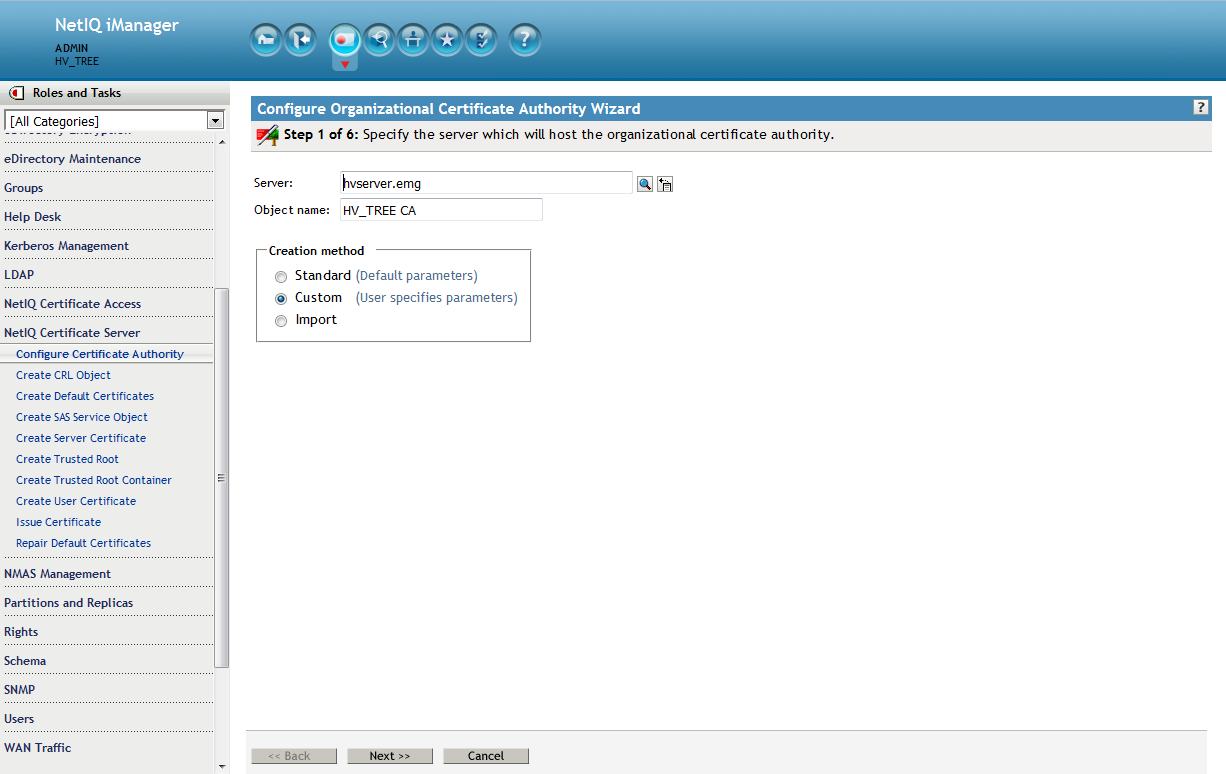
8. Recreate CA
From the Roles and Tasks menu in iManager , click Novell Certificate Server > Configure Certificate Authority. The plugin will detect that the CA is missing and kick off the CA creation wizard. Browse to the CA server and make its object name the same as the one just deleted: " YOURTREENAME CA " then for the Creation method select Custom.
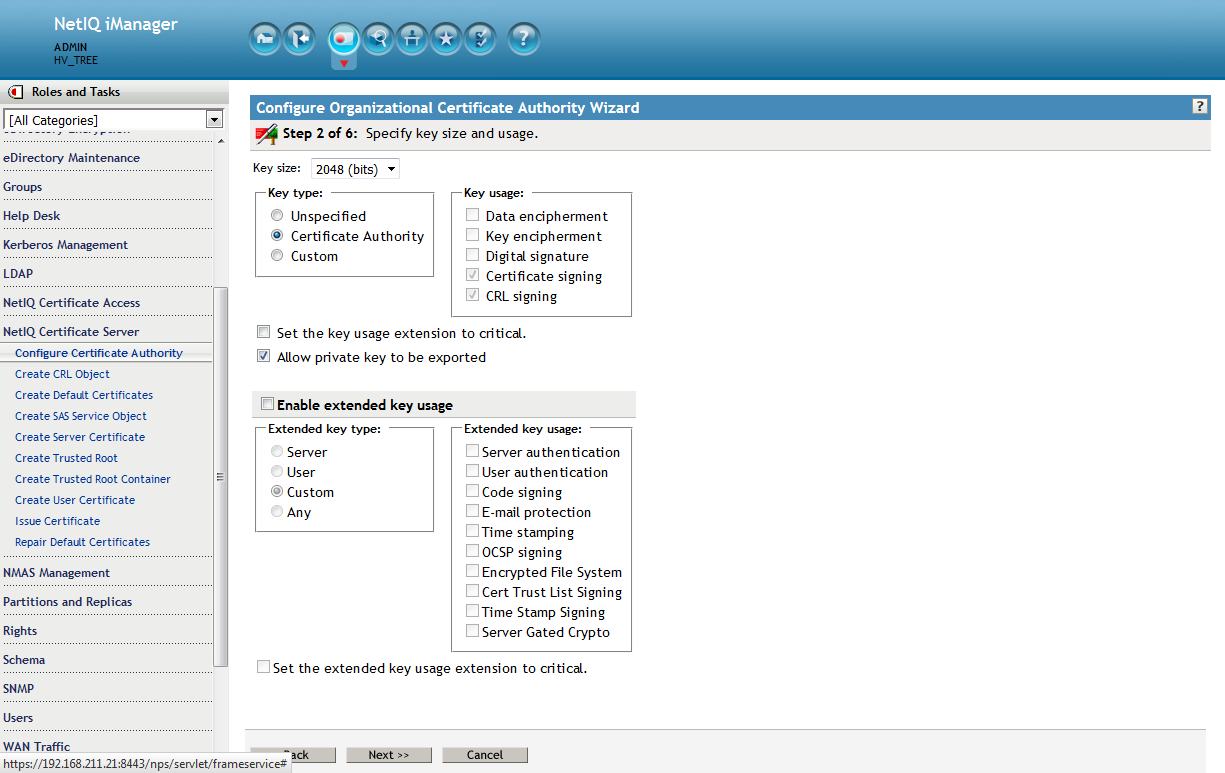
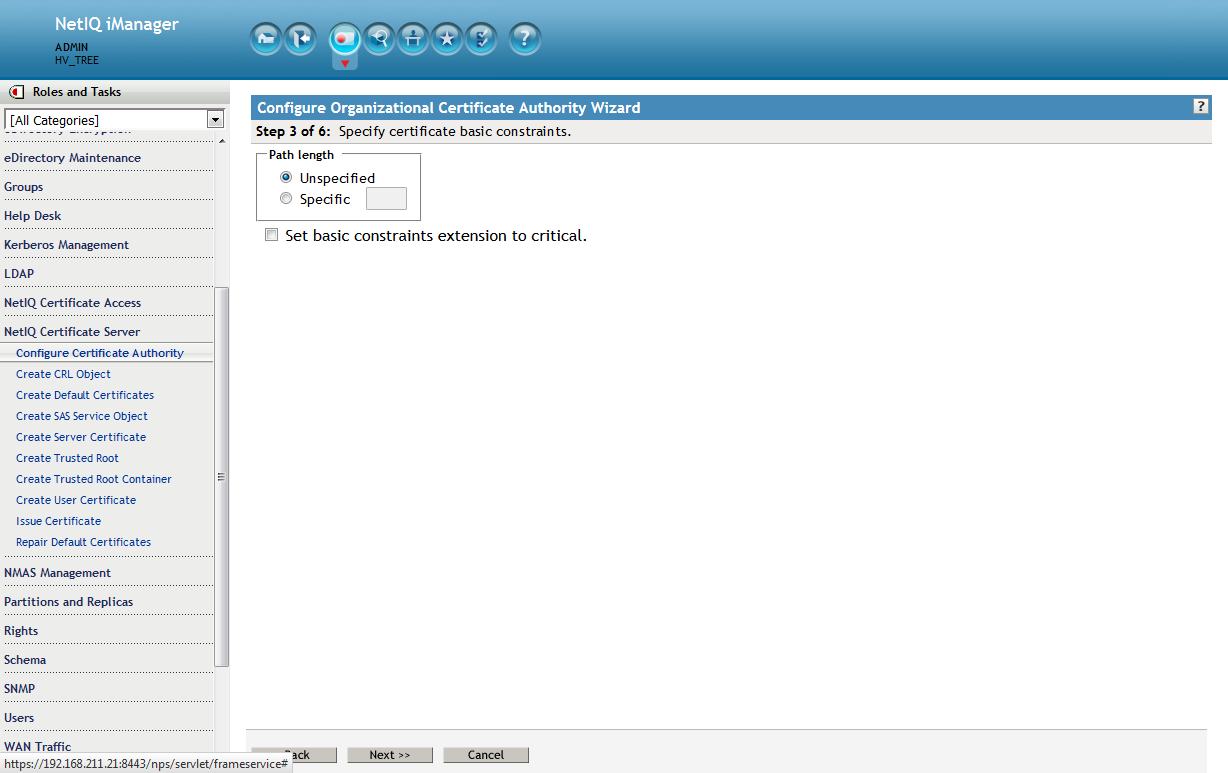
Accept the defaults on this next screen.
Accept the defaults on the third screen as well.
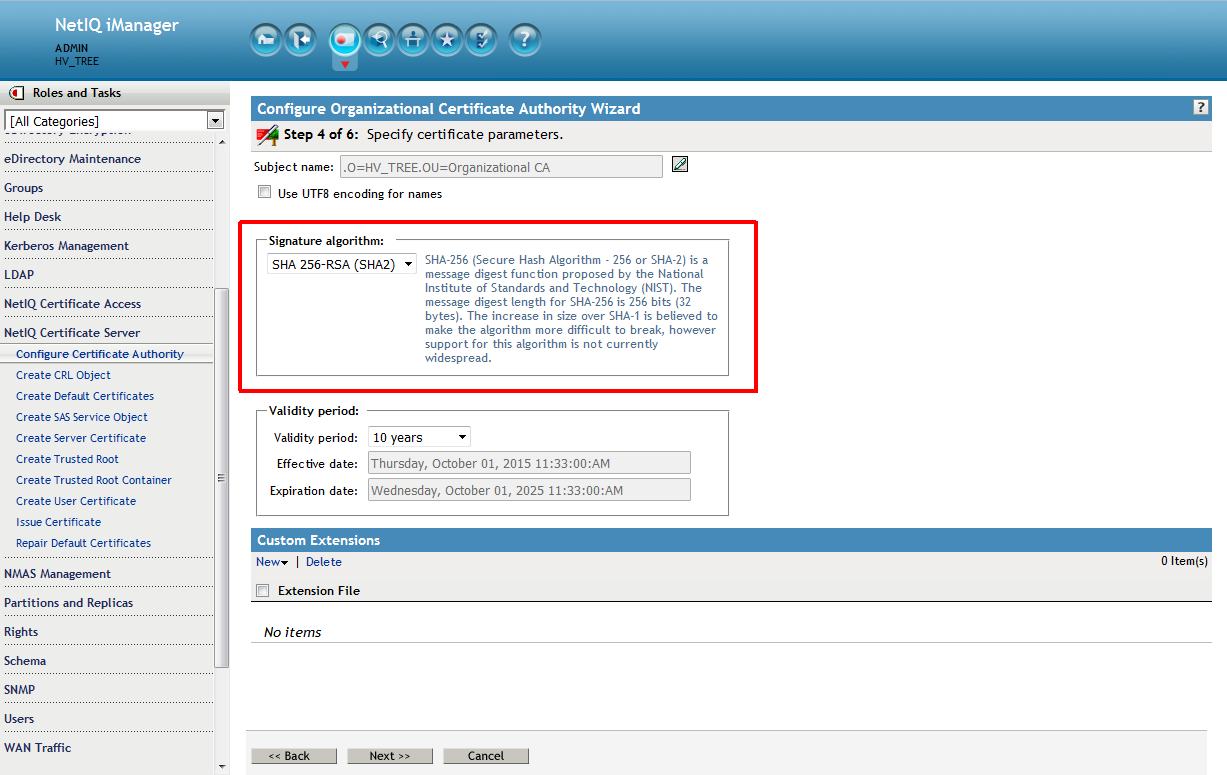
It is on the fourth screen that the Signature algorithm of SHA256 (SHA-2) can be selected. Accept the rest as defaults.
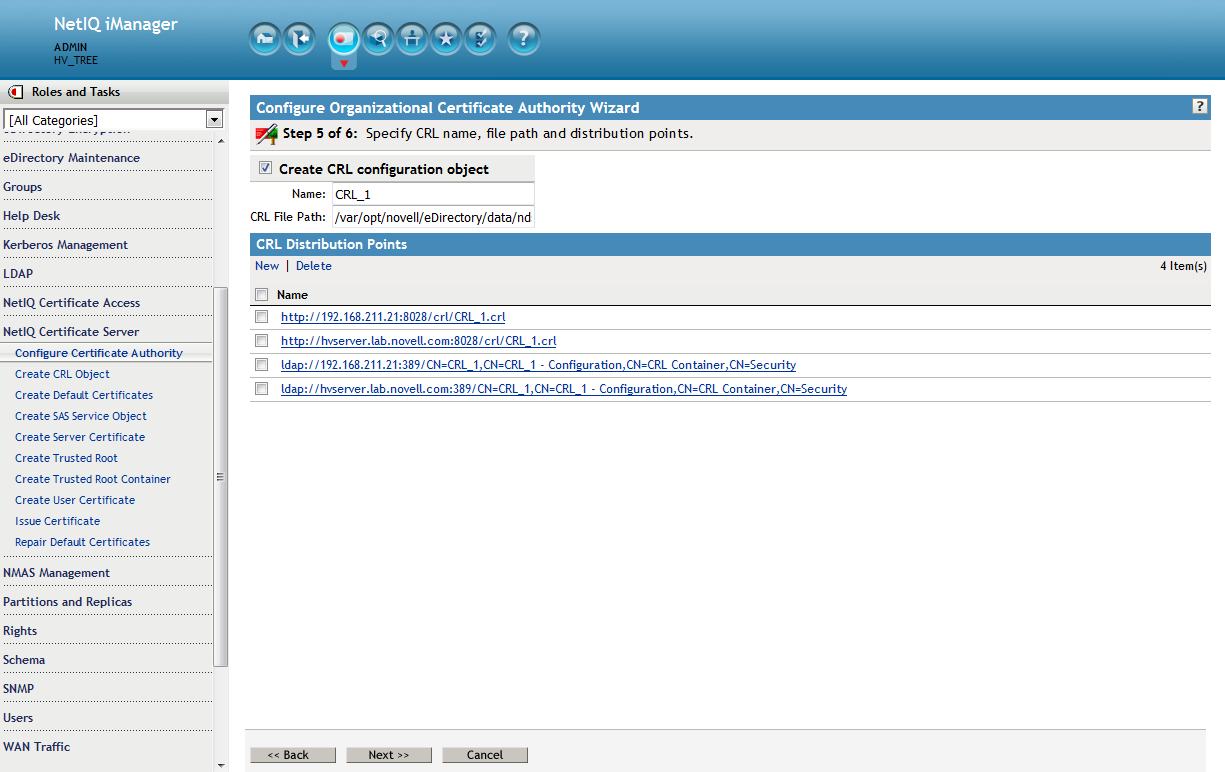
Either accept the defaults on the fifth screen or choose to not use CRLs. In this example CRLs are chosen to be created as they provide more security.
9. Setup CA to force servers to follow the its signature algorithm, require read rights on CA's private key and enable self provisioning.
Once this is set all server certificates will be recreated with the RootCA's signature of SHA-2 and sent to the file system once the Certificate Server health check is run.
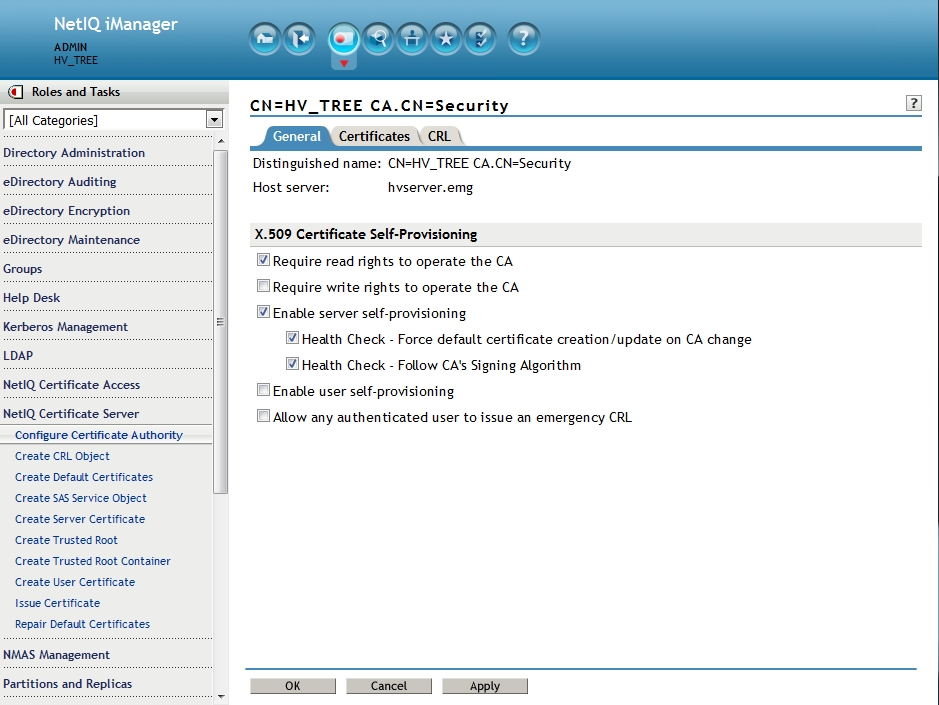
Select NetIQ Certificate Server - Configure Certificate Authority - General. Enable the following:
- Enable: Require read rights to operate the CA (More information on this option can be found in th Additional Information section at the end of this TID.)
- Enable server self-provisioning
- Health Check - Force default certificate creation/update on CA change
- Health Check - Follow CA's Signing Algorithm
Then select OK.
10. Force the PKI health check
Run the following commands from the command line:
ndstrace -c "unload pkiserver"
ndstrace -c "load pkiserver"
The server certificates have now been recreated.
11. Refresh NLDAP
ndstrace -c "unload nldap"
ndstrace -c "load nldap"
This will allow the LDAP service to begin using the new certificate that is now associated to it.
12. Optional: disable SSLv3
If the LDAP clients are capable of TLS it is recommended to disable SSLv3 in the LDAPS protocol:
- In iManager click on LDAP > LDAP Options > View LDAP Server, select the LDAP Server.
- Click the Connections tab, enable the Disable SSLv3 option and click Apply.
NOTE:In non-English environment you cannot access the Disable SSLv3 option. To access this option change the preferred display language to English.
- Refresh LDAP
If on Linux. run the following command against the LDAP server to verify that the certificate now being used is using the SHA-2 signature:
openssl s_client -connect 192.168.211.21:636 < /dev/null 2>/dev/null | openssl x509 -text -in /dev/stdin | grep "Signature Algorithm"
If the return is: Signature Algorithm: sha256WithRSAEncryption then it is a RSA signature being protected by a SHA256 (SHA-2) accompanying hash function.
The certificate file laid down on the filesystem can be verified with the following command:
"openssl x509 -in /var/opt/novell/eDirectory/data/SSCert.der -inform der -text -noout"
Self Provisioning Requirements
By default, a non-CA server must have write rights to the RootCA's private key in order for it to create its own certificates as part of self provisioning. Though this right is not granted by default servers do have read rights. There are a couple of exceptions to this rule that will allow for the certificate creation to succeed without the required write rights:
1. The admin has enabled the following option on the CA: Require read rights to operate the CA. This is done via the Configure Certificate Authority task.
2. The write right is not required if all of the following is true:
- The certificate has the CN component of the subject name as the server's DN, DNS address or IP address of the NCP server. The DNS Name or IP address is verified by the CA server through a reverse DNS lookup. Therefore, the CA server should have a properly configured DNS server or the correct entries in its hosts file.
- Non CN components of the subject name should match non CN components of CA certificate’s subject name.
- Subject alternative name should only have ip-address/DNS name which again is verified by CA through reverse DNS lookup.
Since servers, by default, have read rights on the CA's private key it is recommended to use the "Require read" rights option. However, if requiring write rights is desired then each server will have to be given write rights to the CA's "NDSPKI:Private Key" attribute.
Known Issues:
- If iFolder is running on an OES server the certificates it uses must remain signed by SHA-1.
- Non-CA servers getting self provisioned SHA-2 signed certificates may need an additional restart of ndsd. Otherwise, the certificates may be seen as in an import state when seen in iManager.
- A new server coming into the tree will still receive a SHA-1 signed certificate. The server's certificates will have to be deleted and recreated to get them signed via SHA-2. Engineering has been notified. (Bug 951818)
- A CRL will still get a SHA-1 signature. Engineering has been notified.