5.2 Installing iManager and Identity Manager on One Node in Each Peer Cluster
On one node in each peer cluster, install iManager and Identity Manager. This node will be referred to as the IDM node throughout the guide.
Each IDM node must be online in its peer cluster and Identity Manager must be running properly whenever you attempt to modify the BCC configuration or manage the BCC-enabled cluster resources.
5.2.1 Installing iManager and the Plug-Ins Used by BCC
-
Install the iManager Server software on one node in each peer cluster:
-
Log in to the server as the root user.
-
In YaST, select Open Enterprise Server > OES Install and Configuration.
-
On the Software Management page, scroll down to select the iManager pattern.
-
Click Accept.
-
On the OES Configuration page, enable configuration of iManager, then click the iManager link.
-
On the iManager Configuration page, select Don’t install plug-ins now, then click Next.
-
Click Next and complete the installation.
-
-
In a Web browser, access iManager, then log in to iManager as an administrator user.
https://server_ip_address/nps/iManager.htmlReplace server_ip_address with the IP address or DNS name of the node where you installed iManager in Step 1.
-
On the iManager Management page, install the plug-in modules.
For instructions, see
Downloading and Installing Plug-in Modules
in the iManager 3.2.1 Administration Guide.BCC requires the following iManager plug-ins to be installed on the IDM node in each peer cluster. Install the plug-ins in the following order:
-
iManager Base Content
-
iManager Framework
-
iManager Framework Content
-
Storage Shared (storagemgmt.npm, the common code for storage-related plug-ins)
-
Storage Management (nssmgmt.npm)
-
Cluster Services (ncsmgmt.npm)
-
Any other plug-ins
You will install the Identity Manager plug-ins later as part of the Identity Manager software installation.
-
-
View a list of installed plug-ins.
-
Exit iManager and close the browser.
-
Restart Tomcat. Enter
rcnovell-tomcat restart
Or
systemctl restart novell-tomcat.service
-
Repeat this procedure on the IDM node in each peer cluster in turn.
-
Continue with Section 5.2.2, Installing and Configuring the Identity Manager Components Used by BCC.
5.2.2 Installing and Configuring the Identity Manager Components Used by BCC
The procedure in this section installs and configures only the Identity Manager components used by BCC.
Install Identity Manager on the same node in each peer cluster where you installed iManager:
-
Log in to the node as the root user, then open a terminal console.
-
Securely copy the Identity Manager ISO file (Identity_Manager_4.8_Linux.iso) to the first node in the peer cluster.
-
Mount the downloaded.iso.
-
From the root directory of the .iso file, run the following command.
./install.sh
-
Read through the license agreement and enter y to accept the license agreement
-
Decide the Identity Manager server edition you want to install. Enter y for Advanced Edition and n for Standard Edition.
-
From the list of components available for installation, select Identity Manager Engine component to install engine.
-
Navigate to the location where you mounted the Identity_Manager_4.8_Linux.iso file.
-
Specify the following command at the command line to run the configure.sh script:
./configure.sh
-
Decide whether you want to perform a typical configuration or a custom configuration. Enter '2' to continue with the custom configuration. Again, press 'Enter' to confirm.
-
Specify the component you want to configure. Enter '1' to continue with the Identity Manager Engine configuration. Again, press 'Enter' to confirm.
-
It prompts for Do you want to set a common password (y/n)?, enter 'y' to continue.
-
Enter a common password and then re-enter the same password to confirm.
-
Specify the component you want to install. Enter '3' to continue with the Add to an Identity Vault existing on local machine configuration mode. Again, press 'Enter' to confirm.
-
It prompts for Enter Identity Vault Tree Name, press 'Enter' to continue with the default tree name or enter tree name.
-
It prompts for Enter Identity Vault Administrator name, press 'Enter' to continue with the default administrator name (cn=admin,ou=sa,o=system) or enter the administrator name.
-
It prompts for Enter Identity Vault Administrator password, enter password.
-
It prompts for Enter LDAP SSL port, press 'Enter' to continue with the default port (636) or enter the port number.
-
It prompts for Do you want to install a new driverset (y/n), enter 'y' to continue.
-
It prompts for Enter Identity Vault driver set name, press 'Enter' to continue with the default driver set name (driverset1) or enter the driver set name.
-
It prompts for Enter Identity Vault driver set deploy context, press 'Enter' to continue with the default context (o=system) or enter the driver set deploy context.
-
It prompts for Enter custom driverset ldif file path, press 'Enter' to continue with the default file path (/opt/sample-driverset.ldif) or enter the file path of the sample driver set available at IDM/LDIF/sample-driverset.ldif.
For more information on configuring your component, see Understanding the Configuration Parameters in the NetIQ Identity Manager Setup Guide for Linux.
The sample Identity Manager configuration is as follows:
# ./configure.sh Verifying installed components... ############################################################### Identity Manager Configuration Wed Jun 6 10:38:00 IST 2018 ############################################################### Select the configuration mode. Typical configuration is for new installation and demo setup. Custom configuration is for advanced users. 1 ) Typical Configuration 2 ) Custom Configuration Choose ONLY ONE option. To continue, press Enter:2 ============================================================================= The selected component(s) are highlighted below. To confirm, press Enter. To deselect a component, type the value of the component that you want to deselect. ============================================================================= 1 ) Typical Configuration 2+) Custom Configuration Choose ONLY ONE option. To continue, press Enter: The following Identity Manager components are available for configuration : 1 ) Identity Manager Engine Specify the component(s) that you want to configure. To configure multiple components, specify the values as a comma-separated list [For example, 1, 2, 3]. To confirm, press Enter: 1 ============================================================================== The selected component(s) are highlighted below. To confirm, press Enter. To deselect a component, type the value of the component that you want to deselect. ============================================================================= 1+) Identity Manager Engine Specify the component(s) that you want to configure. To configure multiple components, specify the values as a comma-separated list [For example, 1, 2, 3]. To confirm, press Enter: Do you want to set a common password (y/n)? [y]: Enter a common password: Confirm Password: Select the configuration mode : 1 ) Create a new Identity Vault 2 ) Add to an Identity Vault existing on remote machine 3 ) Add to an Identity Vault existing on local machine Specify the component(s) that you want to install. To install multiple components, specify the values as a comma-separated list [For example, 1, 2, 3]. To confirm, press Enter: 3 ============================================================================= The selected component(s) are highlighted below. To confirm, press Enter. To deselect a component, type the value of the component that you want to deselect. ============================================================================= 1 ) Create a new Identity Vault 2 ) Add to an Identity Vault existing on remote machine 3+) Add to an Identity Vault existing on local machine Specify the component(s) that you want to install. To install multiple components, specify the values as a comma-separated list [For example, 1, 2, 3]. To confirm, press Enter: Enter Identity Vault Tree Name [blr*_***_**_tree]:IDM_PATCH_OES Enter Identity Vault Administrator name [cn=admin,ou=sa,o=system]:cn=admin,o=acme Enter Identity Vault Administrator password: Enter LDAP SSL port [636]: Do you want to install a new driverset (y/n) [y]: Enter Identity Vault driver set name [driverset1]: Enter Identity Vault driver set deploy context [o=system]:o=acme Enter custom driverset ldif file path [/opt/sample-driverset.ldif]:/tmp/sample-driverset.ldif Refer log for more information at /var/opt/netiq/idm/log/idmconfigure.log -
-
Repeat this procedure on the IDM node in each peer cluster in turn.
-
When Identity Manager is running on one node in every peer cluster, continue with Section 5.2.3, Installing the Identity Manager Plug-in for iManager.
5.2.3 Installing the Identity Manager Plug-in for iManager
On the IDM node in each peer cluster, ensure that the Identity Manager plug-ins are installed:
-
In a Web browser, access iManager running on the IDM node in the peer cluster, then log in to iManager as an administrator user.
-
Verify that the Identity Manager plug-in has been added to iManager (an icon appears in the toolbar, or iManager opens by default to the Identity Manager page):
-
If Identity Manager is present, you are done with this task on this node. Repeat this procedure on the IDM node in each peer cluster in turn, then continue with Section 5.2.4, Adding Peer Clusters to Your My Clusters List.
-
If the Identity Manager plug-in is not present, continue with the next steps to install it.
-
-
In iManager, click the Configure icon in the toolbar.
-
Click Plug-In Installation > Available Novell Plug-In Modules.
-
Select NetIQ Identity Manager Plug-Ins for IDM 4.8, then click Install.
If this option is not in the list, click Add, browse to select the Identity Manager .npm file, then click OK.
-
Read the License Agreement, select I Agree, then click OK.
-
After the installation is complete, click Close twice.
-
Log out of iManager and close the browser.
-
Restart Tomcat. Enter
rcnovell-tomcat restart
Or
systemctl restart novell-tomcat.service
-
Repeat this procedure on the IDM node in each peer cluster in turn.
-
After the iManager plug-in is installed for the iManager instance running on the IDM node in each peer cluster, continue with Section 5.2.4, Adding Peer Clusters to Your My Clusters List.
5.2.4 Adding Peer Clusters to Your My Clusters List
Add the peer clusters to the My Clusters page on the iManager instance on the IDM node in each peer cluster:
-
Log in to iManager on the IDM node as a cluster administrator.
-
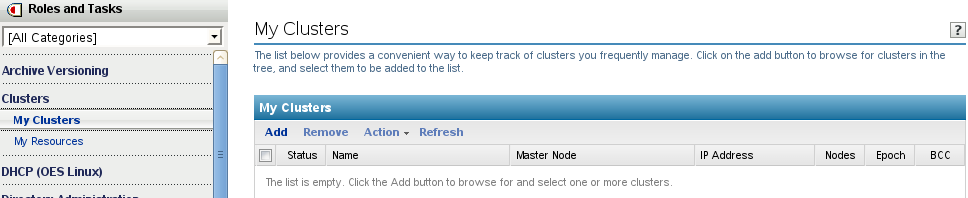
In Roles and Tasks, select Clusters > My Clusters.
The list of clusters is initially empty.
-
Click Add to open the eDirectory browser pop-up window.
-
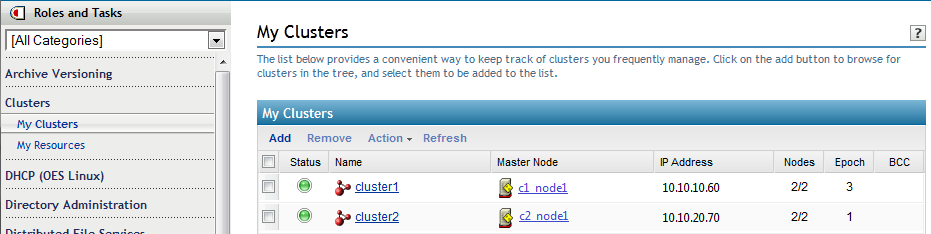
Browse the tree where you are currently logged in to locate and select the Cluster objects for each of the peer clusters, then click OK.
Newly selected clusters are added to your personalized list.
-
Repeat the setup for the iManager instance on the IDM node in each peer cluster.
-
After a My Clusters list is set up in iManager on the IDM node on each peer cluster, continue with Section 5.3, Configuring a BCC Administrator User and Group.