2.3 Configuring Your Vibe Site to Work with the Vibe Connector
Before you install the Vibe Connector, you must configure your Vibe system to interact successfully with the Vibe Connector.
2.3.1 Accessing Your Vibe Site
-
In a Web browser, log in to the Vibe site as the Vibe administrator.
http://vibe_server
Replace vibe_server with the IP address or DNS hostname to display the Vibe Login page.

-
Specify the Vibe administration user ID and password, then click .
-
Continue with Setting Up the Vibe Connector as a Remote Application.
2.3.2 Setting Up the Vibe Connector as a Remote Application
-
After logging in to Vibe as the site administrator, click the icon
 on the right side of the Vibe masthead, then click
  .
.

-
On the menu, click , then click .

-
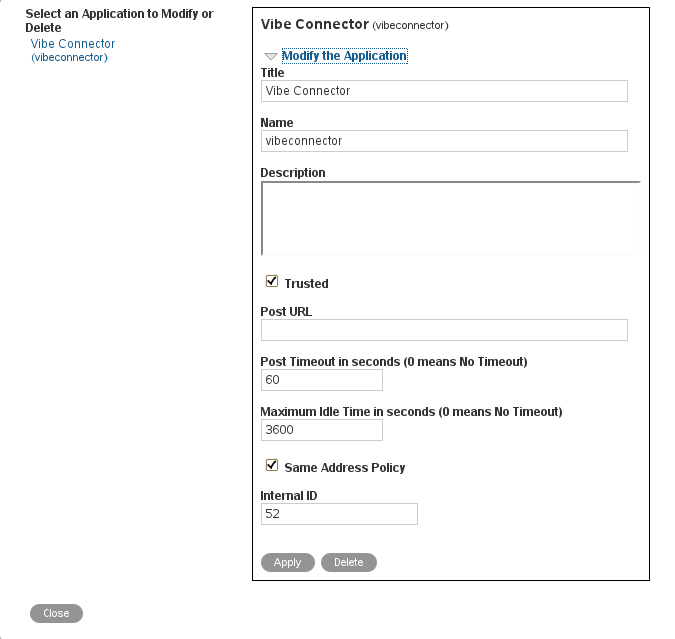
Fill in the following fields, based on the information you gathered under Vibe Remote Application Information on the Vibe Connector Installation and Configuration Summary Sheet.
-
Title
-
Name
-
Description (optional)
-
Trusted
-
-
Click .

-
Click the Vibe Connector that your just added, then click .
-
In the Vibe Connector Configuration section of the Vibe Connector Installation and Configuration Summary Sheet, make a note of the application ID number in the field.
You need this number when you configure the Vibe Connector to communicate with your Vibe system.
-
Click to close the Applications page, then click in the Action toolbar to return to the main Vibe window.
-
Continue with Setting the Password for the Vibe Synchronization Agent.
2.3.3 Setting the Password for the Vibe Synchronization Agent
-
After logging in to Vibe as the site administrator, click the icon
 on the left side of the Action toolbar, then click .

-
In the field, begin typing synchronization agent, then click it when it appears in the drop-down list.

The Profile page for the Synchronization Agent appears.

-
Click to display the User page.

-
In the and fields, specify a password for the Synchronization Agent.
-
Click .
-
Continue with Granting Access to the Synchronization Agent.
2.3.4 Granting Access to the Synchronization Agent
For synchronization to occur, you must give the Synchronization Agent access to make Web service calls on behalf of Vibe users.
-
After logging in to Vibe as the site administrator, click the icon
on the right side of the Vibe masthead, then click .
-
In the section, click .
-
In the Access Control table, click .
-
In the field, begin typing Synchronization Agent, then click when it appears in the drop-down list.
-
In the Access Control table, in the row, select the check box in the column.
-
Click > .
-
Continue with Installing the Vibe Connector Software.
2.3.5 Working with Novell Access Manager
If you have configured your Vibe site so that users log in through Novell Access Manager, as described in Configuring Single Sign-On with Novell Access Manager
in Advanced Installation and Reconfiguration
in the Novell Vibe 3.2 Installation Guide, you must reconfigure your Vibe site to communicate directly with the Vibe Connector. The typical configuration forces all HTTP communications with the Vibe server to be routed through the reverse proxy. An exception is required so that the Vibe Connector can communicate directly with the Vibe server.
-
Rerun the Vibe Installation program, as described in
Setting Configuration Options after Installation
inAdvanced Installation and Reconfiguration
in the Novell Vibe 3.2 Installation Guide. -
On the Reverse Proxy Configuration page, add the IP address of the Vibe Connector server, so that the Vibe site accepts logins directly from the Vibe Connector.