25.5 Issues When Generating Documents
There are two main issues that occur when generating documents:
25.5.1 Memory Issues
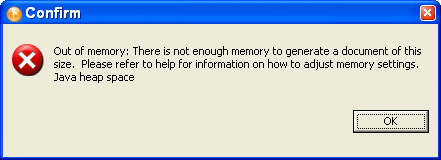
When generating documentation for a project, Designer puts all model/project information into the document. If the Designer’s memory parameters are not being used or if your computer does not have enough memory available to run the document generation process, you see the following error message:
Figure 25-7 Out of Memory Message
Solution 1: Ensure that Memory Parameters Are in Place
The amount of memory that the default JVM* instance of Designer uses is defined in the memory parameters -vmargs -Xms256m -Xmx512m. The -Xms256m parameter is the minimum amount of memory (in megabytes) that is set aside for Designer, and the -Xmx512m parameter is the maximum setting. These are the only parameters that need to be adjusted. In Windows, these settings are included as part of the Shortcut Properties and are implemented when Designer loads.
Figure 25-8 Windows Shortcut
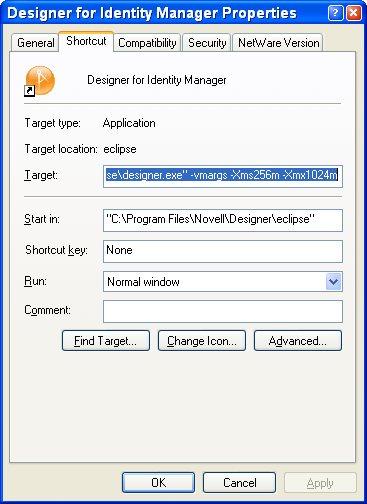
You can run into memory issues if you have deleted the parameters in your Designer shortcut and forgot include them again. Or you might be clicking the Designer executable file directly, so Designer won’t use these designated memory parameters. To ensure that the memory parameters are in your Windows shortcut, right-click the desktop shortcut for Designer and select . On the line in the Shortcut window, you should have the following:
C:\Program Files\Novell\designer\eclipse\designer.exe” -vmargs -Xms256m -Xmx512m
For Linux workstations, the parameters are located in the /designer/eclipse/StartDesigner.sh file. This file should contain the following line:
/home/user/designer/eclipse/Designer -vmargs -Xms256m -Xmx512m
Solution 2: Change Memory Parameters
The default memory parameter should be adequate for most document generation. However, if you have enough available memory, change the -Xmx512m parameter to -Xmx768m or -Xmx1024m. This changes the maximum setting.
NOTE:These settings are adjusted in megabytes.
Solution 3: Disable Schema Generation
If you are using the maximum amount of memory you can on this workstation and are still receiving Out Of Memory errors when generating documents, disable the schema when generating documents. To do this, click on the heading in the Style Editor.
Under the heading, deselect the . When deselected, icons under the Style Editor view change to reflect the new settings. You should now be able to generate a document without memory errors.
NOTE:This issue is being addressed in later versions of Designer.
25.5.2 Editing Extra Identity Vault Schema Items from Your Report
If you import a project with the entire Identity Vault schema and run document generation on that project, you can have an extra 600 pages or more of schema information. This happens because you have all of the Identity Vault’s base schemas included in the document. Follow these steps if you do not want to document all of the Identity Vault’s base schemas:
-
Go into the workspace folder for this project and delete the .data file.
For example, on a Windows workstation, the Blanston1_files directory is found at C:\Documents and Settings\Novell User\workspace\Blanston1\Blanston1_files. By clicking , you will see all of the .data files shown together. The largest .data file holds the base Identity Vault schema.
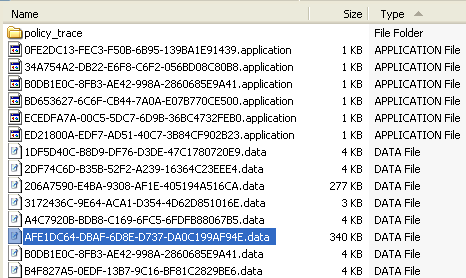
If you have more than one Identity Vault in your project, you see more than one large .data file in the project’s folder.
-
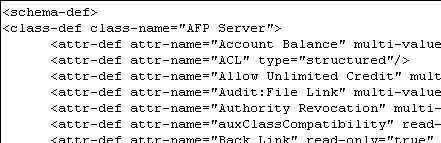
Open the .data file in a text-based editor (in this instance, Wordpad) to make sure you have the schema file. You see < schema-def> at the top of the file:
-
Assume that you don’t want the Identity Vault’s entire base schema, only the schema differences between your project and the Identity Vault. To get the schema differences, delete any large .data files and re-import the project’s schema, using the following steps:
-
Bring up the project in Designer’s Modeler view. Right-click the Identity Vault and select .
-
On the Select Source for Import page, select if you are connected to an actual Identity Vault, or select if you have saved the schema files locally.
-
On , type the host name, user name, and password connection information. Click .
-
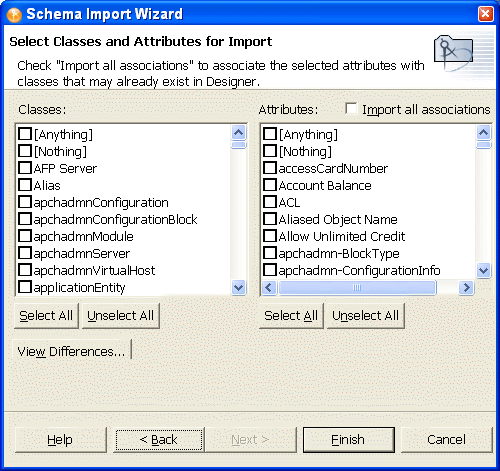
On the Select Classes and Attributes for Import page, click .
-
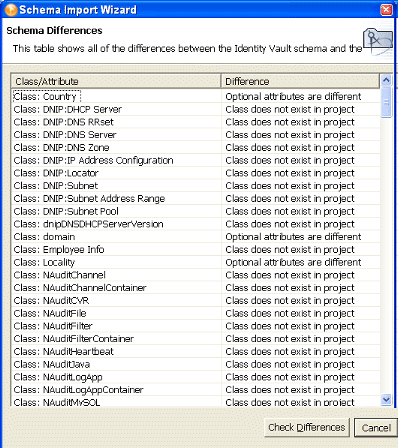
On the Schema Differences page, you see the schema differences between Identity Vault and your project.
-
Select . This brings you back to the Select Classes and Attributes for Import page with the differences now selected under the Classes and Attributes headings. By default the box is also selected. Leave it selected and click .
-
On the Import Summary page, click .
-
When you run document generation on this project, you only document the schema differences that you imported, not the whole Identity Vault schema. Your present choices are to import the entire Identity Vault schema or just the schema differences between the Identity Vault and the project. You can also choose to not include the schema in your document by deselecting , as described in Solution 3: Disable Schema Generation. This document generation of the schema a known problem and will be fixed in the future.