20.10 Exporting To a File
You can use the export feature to export everything you create in Designer, from projects containing all Identity Vaults and their driver sets down to a single policy. If you export a driver configuration file that contains only a policy, Designer creates the parent containment objects, such as a channel, a driver, or a driver set, as part of the exported policy object. Such parent containment objects do not contain attributes; they are only the framework of the channel, driver, or driver set.
The exported . xml files are compatible with those used by the iManager driver configuration file plug-ins for Identity Manager 2.0.2 and above. This allows you to export configuration files from Designer and import those files through iManager or through Designer’s import feature.
You can export a driver configuration to a file from a number of places, including:
20.10.1 The Export Context Menu
To export all driver sets, drivers, channels, and policies found in the Modeler view:
-
Right-click the driver set in the Outline View.
-
Select .
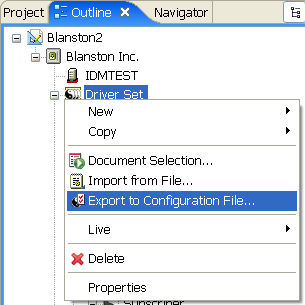
Designer takes the name of the driver sets and uses that name for the . xml file.
-
For future reference, name each driver set to denote that it is a driver set and denote the Identity Vault it comes from. You can also add a date to the name. Click .
-
To close the Export Configuration Results window, click .
20.10.2 Exporting Configuration Files from the Modeler View
To export a driver set configuration file:
-
Double-click the icon under a project name in the Project view to open the project model in the Modeler view.
-
Right-click the Driver Set object inside an Identity Vault icon, then select .
-
In the Export Driver Configuration window, select a filename and location to use in future references. You can also add a date to the filename if you save a lot of driver iterations.
By default, Designer uses the name of the driver or driver set corresponding to the object selected. If you right-click an Identity Vault or Driver Set object, you see the Driver Set name in the File Name entry. If you have more than one Driver Set object in the Identity Vault, you see the Export Driver Configuration window with the name of that driver set in the File Name entry for each Driver Set object.
-
Select the directory where you want to store the file, then click .
20.10.3 Exporting Configuration Files from the Outline View
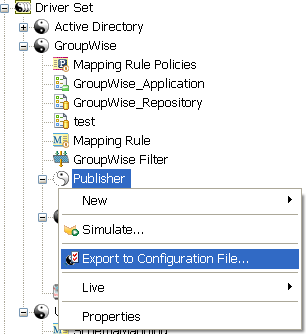
You can use the Outline View to save driver sets, drivers, channels, and policy configuration files to local, removable, or network directories. The following procedure documents steps for exporting channels and policies.
-
Double-click the icon under a project name in the Project view. This brings up the project in the Modeler view.
-
Click the tab.
-
Right-click a channel object under a driver object, then select .
-
From the Export Driver Configuration window, select a filename and location to use in future references. You can also add a date if you are backing up multiple iterations of the file.
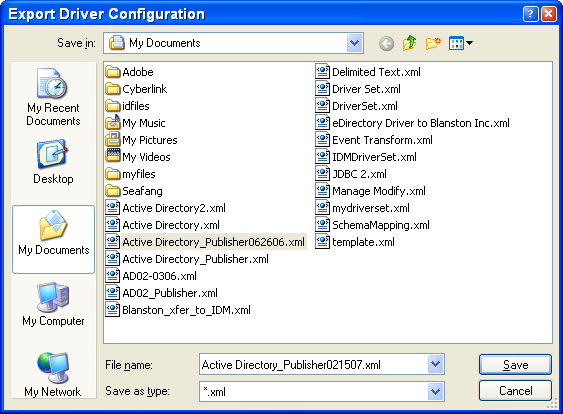
By default, Designer uses the name of the driver or object corresponding to the object selected. You might also need to designate that it is the Publisher channel of an Active Directory driver, along with the date when you saved the file.
-
Click .
-
In the Export Configuration Results window, click .
To export one or more policies from a driver or channel:
-
From the Outline view, right-click a Policy object and select .

You can also use the Ctrl key to select more than one policy, then right-click them as a group and select .
-
From the Export Driver Configuration window, select a filename and location to use for future reference. You can also add a date if you are backing up multiple iterations of the file.
-
Click for each policy selected; each policy is saved to its own . xml file. By default, Designer uses the name of the policy or rule selected.
-
In the Export Configuration Results window, click .