16.1 Importing Projects
Designer’s Import feature allows you to import projects from the File System or from an Identity Vault (eDirectory). What you are able to import depends on the level you are at within a project. To import an eDirectory object, you must have sufficient rights to access the eDirectory tree that is associated with the Identity Vault you are designing.
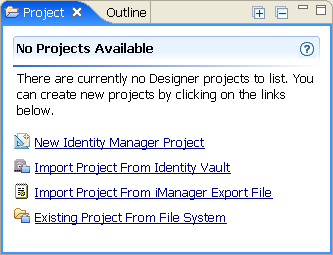
When you initially open the Designer utility and close the Welcome view, you have no projects that are currently available:
Figure 16-1 Initial No Projects Available View
For information on creating a new project, see Section 6.0, Creating a Project. For information on importing projects, see the following sections:
16.1.1 Importing a Project from the Identity Vault
-
In Designer, click .
or
Click from the No Projects Available page in the Projects view, then skip to Step 3.
-
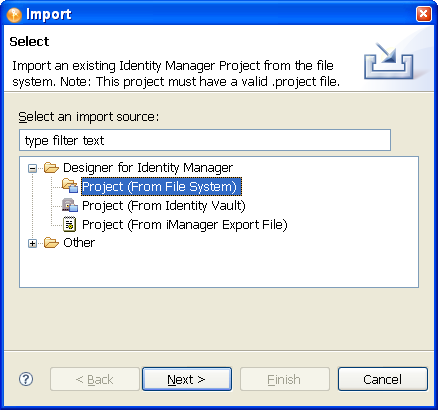
From the Import window, select under the Designer for Identity Manager heading. Click .

The Import window allows selections under a number of tabs, including Designer for Identity Manager. Selections under the Designer for Identity Manager tab include:
-
Importing an existing Identity Manager project from the file system (the project must have a valid . project file).
-
Importing an existing Identity Manager project from an Identity Vault.
-
Importing an existing Identity Manager project from an iManager export file (Driver Set or Driver).
-
-
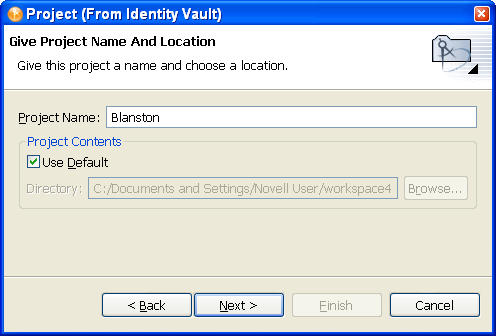
In the Project (From Identity Vault) window, give the new project a name. Select where the contents of this project are to reside (for Windows workstations, the default is C:\Documents and Settings\Username\workspace). Click .
-
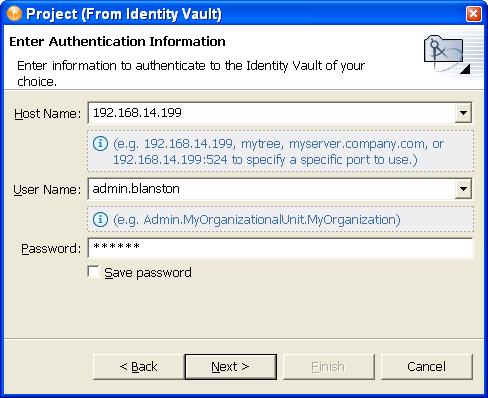
In the Import Project From Identity Vault window, specify the information needed to authenticate to the Identity Vault (eDirectory) of your choosing. In the field, you can use either a tree name or the IP address of the Identity Vault.
-
Fill in the and the fields.
If you select , Designer remembers your password. Otherwise, the next time you close Designer, you need to re-authenticate when you import, deploy, or compare Designer objects with the Identity Vault.
You can use history drop-down lists to choose a previously entered value from a list.
-
Click .
-
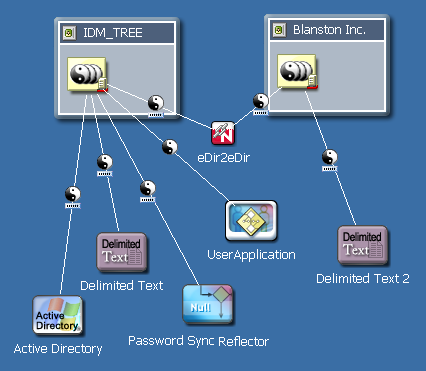
In the Import Project From Identity Vault window, type the Distinguished Name of the driver set or driver you want to import, or click the button to select the object within eDirectory. Click , then click .
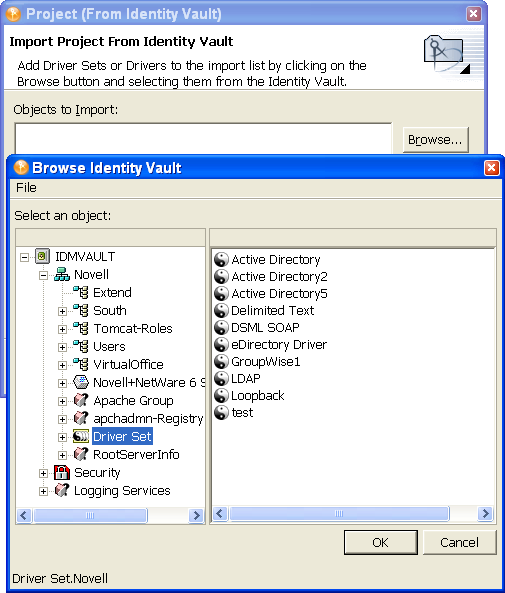
You can import multiple driver sets during the import operation. Just browse to the various objects that you want to import and add them to the list.
Driver sets that are not associated with a server have a red minus sign in the lower right portion of the driver set icon. These driver sets need a server association in order to be deployed.
-
(Conditional) If you are importing more than one eDirectory driver, select the eDirectory driver in the Objects to Import window and click the button to display the Connect to Identity Vault window, where you can import the associated driver in the other eDirectory trees. Novell® recommends that you import both eDirectory drivers, especially if you have SSL/TLS enabled. Provide the user name and password, then click . (Skip this step if you only want to import one eDirectory driver.)

-
(Conditional.) If you specify the user name and password and select to import both eDirectory drivers, you then see a Browse Identity Vault window where you select the corresponding eDirectory driver. Select the driver and click .

You are returned to the Project (From Identity Vault) window, where you can select or deselect the drivers, allowing you to choose only the drivers in a driver set that you want to import.
-
Click . By having both drivers available, you can view the complete data flow between the two eDirectory drivers, as well as the other drivers you selected.
16.1.2 Importing a Project from the File System
-
In Designer, click .
or
Click from the No Projects Available page in the Project’s view, then skip to Step 3.
-
From the Import window, select , then click .
-
Type the project name or browse to the directory where the project was saved.
-
Select the directory where the exported project is saved with the Project extension.
There must also be a valid Project file in the selected directory, or the project does not display in the Projects window. If you have multiple projects you want to import and they are under the same directory, select the directory above the projects and Click . In the Projects window, you can select or deselect any of the projects, then click .
-
Make sure the option is selected to copy the contents of the project into the workstation’s local workspace.Earlier versions of Designer did not copy the contents into the workspace, but pointed to the location where the project was imported. Any changes made to the project were saved to the imported location and not to the local workspace, which caused some confusion because all other imports were copied into the local workspace.
You can also use the feature to import a project from another workspace.
You can also import multiple projects at the same time by entering the base or root directory where you want to start your search. The Import Wizard searches the selected directory and all of its subdirectories for valid Designer projects to import. You can then select the projects that you want to import into Designer by using the check boxes. If a project by the same name already exists in Designer, you can’t import that project and you won’t be able to select it from the list.
-
You can also import projects from ZIP or TAR archives. Click the selection and select the directory where the exported project is saved with the . zip or . tar extension. The whole archive is searched for valid Designer projects to import.
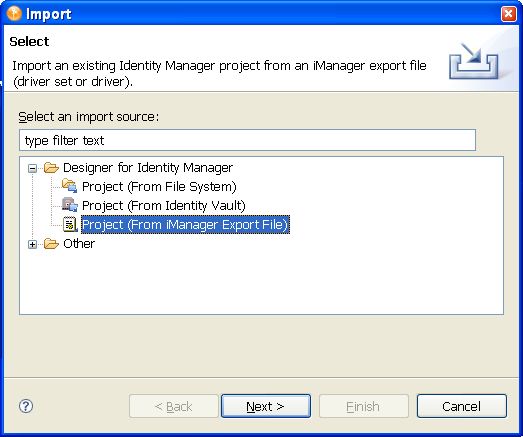
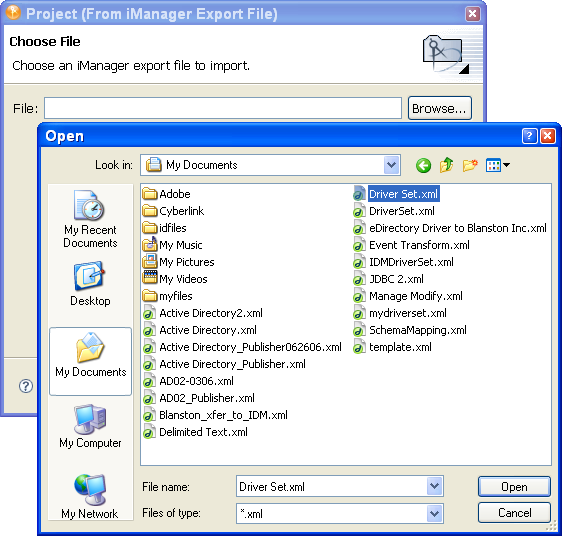
16.1.3 Importing a Project from iManager
You can create a new Designer Project by selecting an iManager . xml export file. These include driver set and driver exports as well as Novell sample configuration files.
-
Click .
or
Click from the No Projects Available view, then skip to Step 3.
-
Type a project name. Use the default workspace directory for the project, or type or browse to the directory where you want to import the project. Click .
-
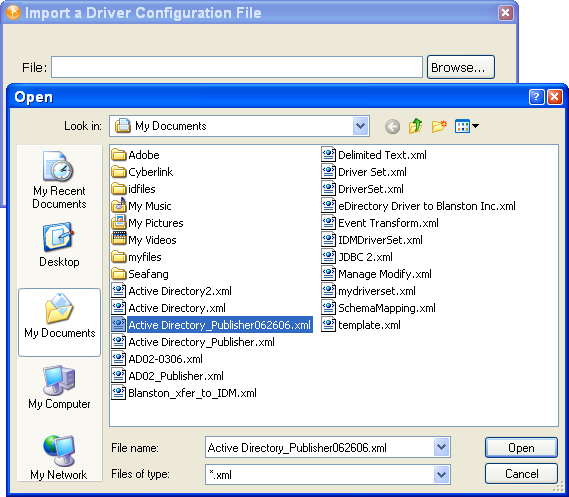
Select the directory where the exported project is saved with the . xml extension, click , then click .
-
When importing a driver set or driver into a project, you are asked if you want to validate the values within the drivers you are importing. If you do not want to validate the driver configuration at this time, click .
Otherwise, click and continue importing the project.
You can only import the driver functionality that you saved to the . xml file. This file does not contain default driver configurations unless that is what you have saved.
-
Fill out the information requested in all of the Import Information Requested windows that you see for each driver in the driver set, or for each driver selected. The Import Information Requested windows contain different driver information from each selected driver. Click or (depending on the number of pages presented).
-
Click to close the Import Configuration Results window.