9.5 Configuring Driver Sets
A driver set is a container that holds Identity Manager drivers. Only one driver set can be active on a server at a time. As a result, all active drivers must be grouped into the same driver set. To view or change settings, double-click a driver set in the Modeler.
9.5.1 Driver Set General Options
When you create an Identity Vault, a driver set is added to the vault by default.
Figure 9-4 A Driver Set in an Identity Vault
You can add other driver sets by dragging the Driver Set object from the palette to the Modeler.
From the page, you can specify or change driver set values.
Figure 9-5 Driver Set Properties
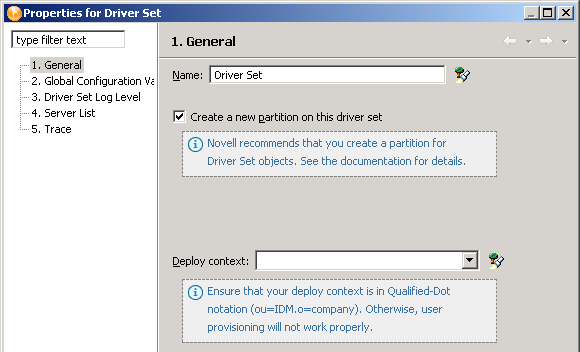
Table 9-3 Driver Set Settings
|
Field |
Description |
|---|---|
|
Name |
The name of the Driver Set object (for example, DriverSet1.) |
|
|
We recommend that you select this option. For details, see Planning the Technical Details of your Identity Manager Implementation |
|
|
The Identity Vault assigns the default DN container value to all driver sets. If you specify a DN container here on the Driver Set object, that setting takes precedence over the Identity Vault setting. You can manually enter this value or browse for it. |
9.5.2 Driver Set Global Configuration Values
Global configuration values (GCVs) are settings that are similar to driver parameters. Global configuration values can be specified for a driver set as well as an individual driver. If a driver does not have a GCV, the driver inherits the value for that GCV from the driver set.
GCVs allow you to specify settings for Identity Manager features such as password synchronization and driver heartbeat, as well as settings that are specific to the function of an individual driver configuration. Some GCVs are provided with the drivers, but you can also add your own. You can refer to these values in a policy to help you customize your driver configuration.
To view or change the driver set's GCV settings, double-click the driver set. From the Global Configuration Values page, you can add, edit, or remove values, or edit the XML file for the driver set.
9.5.3 Driver Set Log Levels
The options enable you to view high-level information. For lower-level information, use Driver Set Trace.
Figure 9-6 Driver Set Options for Logging
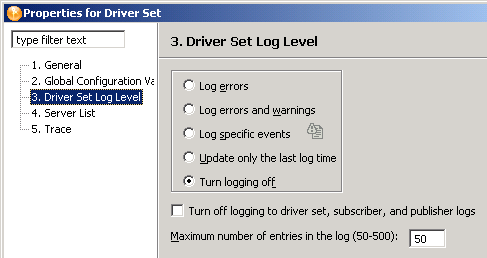
By default, logging is turned off. To track errors, messages, or events, change the default.
-
Double-click the driver set.
-
Select
-
Select a logging option.
The log option that you select determines which messages are available in the log.
To configure audit instrumentation, select , click the event selector button, select events, then click .
The option updates the time stamp to indicate the last activity of the driver.
-
Specify the number of entries in the log.
The default is 50 entries (lines) in the log. If you want a longer history, increase the number.
-
Save changes by clicking .
The driver set log contains messages from the engine when it tries to start or stop drivers. To view the log, use iManager. Select the icon above the Identity Vault in the .
9.5.4 Driver Set Server List
After adding one or more servers to the Identity Vault, you can view or change the driver set’s server association.
Figure 9-7 Server List
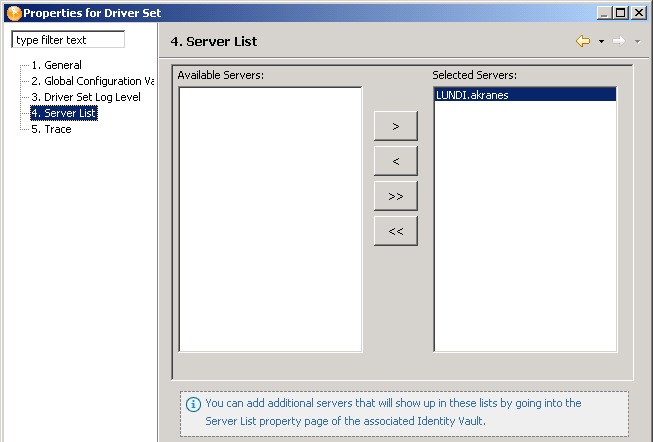
Select a server in the list, then use the arrows to move the server to the list. If a server is not in the Available Server list, you must first add it by editing the Identity Vault properties. See Section 9.3, Configuring Identity Vaults.
9.5.5 Driver Set Trace
Although a driver set has nothing to trace, you can add a trace level to your driver. The setting specifies the trace level for all drivers in the driver set that use the driver set trace settings.
With the trace level set, DSTRACE displays the Identity Manager (DirXML®) events as the engine processes the events. The trace level affects each driver in the driver set. Use the trace level for troubleshooting issues with the drivers when they are deployed. DSTRACE displays the output of the specified trace level.
Table 9-4 Driver Set Trace Settings
The following methods help you capture and save Identity Manager trace information.
NetWare
Use dstrace.nlm to display trace messages on the system console or trace messages to a file ( sys:\system\dstrace.log). Dstrace.nlm displays the trace messages to a screen labeled DSTrace Console.
Use the following commands at the server console:
DSTRACE SCREEN ON: Allows trace messages to appear on the DSTRACE Console.
DSTRACE FILE ON: Captures trace messages sent to the DSTRACE Console to the dstrace.log file.
DSTRACE FILE OFF: Stops capture trace messages to the log file.
DSTRACE -ALL: Turns off all Trace flags.
DSTRACE +DXML DSTRACE +DVRS: Displays the Identity Manager (DirXML) events.
DSTRACE +TAGS DSTRACE +TIME: Displays the message tags and times tamps.
Windows
Open the Control Panel, select , then click > . A window named NDS Server Trace Utility opens.
To set the filters to capture the DirXML trace information:
-
Click > > .
-
Click the boxes next to and , then click .
To save the information to a file:
-
Click > .
A dialog box prompts for a filename.
-
Enter a filename with the extension of . log.
-
To stop capturing information, click > .
The file is saved.
UNIX
Use the ndstrace command at the console to display the Identity Manager events. The exit command quits the trace utility.
Table 9-5 ndstrace Commands
iMonitor
Use iMonitor to get DSTRACE information from a Web browser.
Table 9-6 Platforms and Commands for Web Browsers
|
Platform |
Command |
|---|---|
|
NetWare® |
ndsimon.nlm |
|
Windows |
ndsimon.dlm |
|
Linux/Solaris/AIX/HP-UX |
ndsimonitor |
-
Access iMonitor from http://server_ip:8008/nds (the default port).
-
Click .
-
Click .
-
Click and .
-
Click , then click .
-
Click the document icon to view the live trace.