4.3 Configuring Identity Vaults
To view or change an Identity Vault’s settings, double-click the ID vault object in the Outline view or the Modeler.
Figure 4-3 Identity Vault Properties
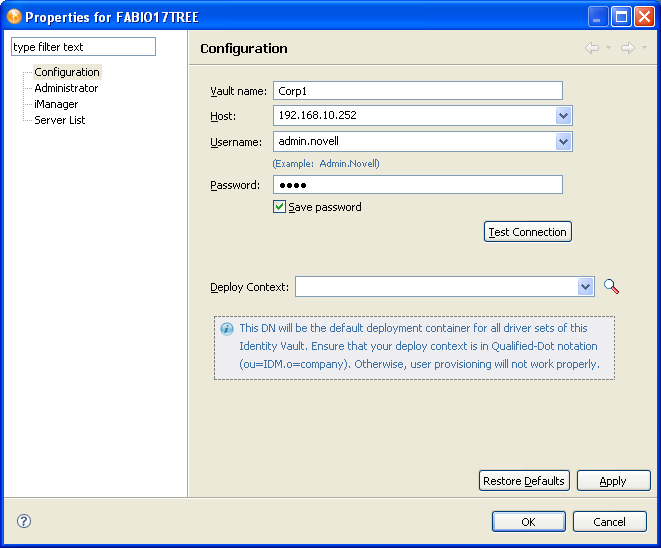
The Identity Vault Properties page has three options. In addition, you can configure a hostname in the hosts file.
4.3.1 Configuration Settings
Table 4-2 Configuration Settings for an Identity Vault
4.3.2 Administrator
The option is divided into three sections. Entering information in these sections is optional.
-
Personal Information: Lets you enter information specific to the Identity Vault, such as Name, Title, Department, and Location.
-
Contact Information: Lets you enter information such as Email, Phone, Cell Phone, Pager, and Fax.
-
Notes: Allows you to type any reminders you might need for future reference.
4.3.3 Server List
The option displays the servers that are associated with the selected Identity Vault. You can add, edit, or remove the server entries.
NOTE:If you select the option to allow a default server to be created, that server shows up as Default Server.default_container in the list. You cannot deploy a driver set into an existing eDirectory tree if you have Default Server.default_container in the Server List. You must first remove this reference and add a Metadirectory server in an eDirectory tree.
4.3.4 iManager
The option displays the URL that Designer uses to launch the Novell iManager administrative tool. You can modify this URL as needed.
To launch iManager from Designer, select > .
4.3.5 Local Hostname
If desired, Designer supports designating a hostname for your Identity Vault by adding an entry to the hosts file of your local OS. After assigning a hostname to the Host address of your Identity Vault, you can use the hostname instead of an IP address or DNS name to access the Identity Vault.
For example, if your Identity Vault has a host address of 192.168.100.254, you can associate the name ID-VAULT to that address in your local hosts file. Then, in Designer, you can refer to the Identity Vault by the name ID-VAULT instead of using the IP address.
For more information about using your local hosts file, consult your operating system’s documentation.