3.9 Organizing by Domain Groups
3.9.1 About Domain Groups
Figure 3-19 The Domain Group Option on the Palette
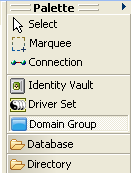
Domain Groups enable you to organize your model into logical groupings that help to keep your diagram clean. Domain Groups have no technical function, and they have no impact on how items and relationships are stored in the Identity Vault. This option is just a tool to help you better organize and view items in the Modeler.
Using Domain Groups is the key to modeling your entire enterprise, no matter how large it is. You can create a model that is manageable, useful, and logical, according to how you want to organize and diagram your enterprise.
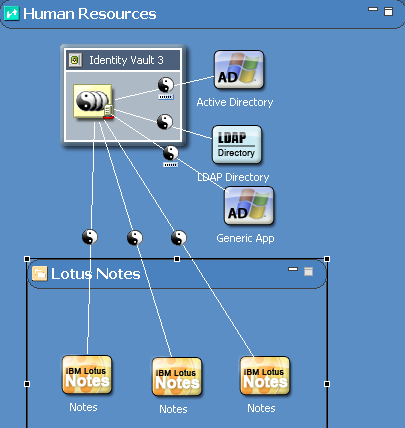
Figure 3-20 A Domain Group in the Modeler
3.9.2 Key Features
-
Change a group name through the Properties view.
-
Drag and drop items in and out of groups.
-
Minimize or restore groups.
-
Move everything in a group.
-
Remove everything in a group.
-
Nest groups within groups (no limit).
-
Resize groups. A minimum size is enforced.
-
Ungroup. Remove the group but leave the children.
3.9.3 Creating a Domain Group
-
Drag and drop a Domain Group from the palette to the Modeler space.
-
Organize items inside Domain Group items.
To add another Domain Group, drag and drop one from the palette.
To add an Identity Vault, do one of the following:
-
Drag an Identity Vault from the palette.
-
Right-click in the Domain Group, then select > .
The Add Server to Identity Vault dialog box appears. If you select , Designer provides a dialog box that enables you to select an eDirectory server or specify a server manually.
To add a driver set:
-
Right-click inside an Identity Vault.
-
Select .
To add an application:
-
Right-click a Driver Set object.
-
Select .
The application is added to the right of the right-most connected application. If this is the first application, it is placed under the driver set.
The application defaults to a generic application type. To change the type:
-
Right-click the application, then select .
-
Select a different application, then click .
When you add selected items to a Domain Group, the Domain Group expands.
Figure 3-21 A Domain Group
If you move an item to the edge of the Domain Group, the boundaries expand, so that the items remain inside the Domain Group. You can drag an item from the Domain Group to remove it from the group.
You can have nested domains. If you expand a nested domain, the outer (hosting) domain auto-increases in size. You aren’t required to manually resize parent domains. By expanding, the hosting domain displays the nested domain, so that the nested domain isn’t cut off.
3.9.4 Minimizing (Collapsing) Domain Groups
To minimize a Domain Group, click the  button. When a Domain Group is minimized, it defaults to a random icon. You can use Properties to change the icon. (See Changing a Domain Group Icon.) The icon and minimized state of the group are saved in the Project file.
When a group is minimized, you can’t see its contents, nor can you drag new items into the group. However, you can move, rename, or delete it.
When you minimize a group, lines that were connected to items in the group now connect to the group. This functionality enables you to see that there is a relationship with items in the group and items outside the group. Depending on your objects, their relationships, and state of other related groups, multiple lines might collapse into one line.
Figure 3-22 A Collapsed Group
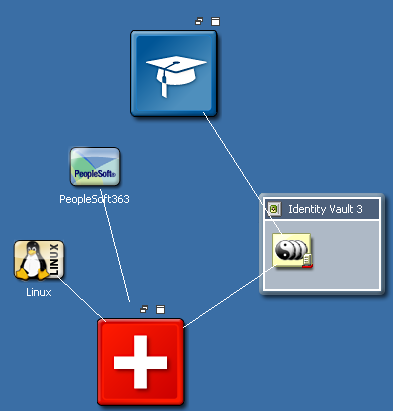
When you expand the group, the lines are moved back to the actual items they connect with. This functionality works for any level of nesting of groups.
3.9.5 Restoring Domain Groups
To restore the Domain Group to its original size, click the  button.
3.9.6 Maximizing Domain Groups
To maximize a Domain Group, click the  button. The group expands to a much larger size. To return it to the original size, click the button.
You can maximize only first-level groups. For inner groups, the Maximize function is disabled.
3.9.7 Auto-Placement of Neighbors
To push or pull the neighboring items when you expand or contract Domain Groups, hold down the Ctrl key while you expand or contract the Domain Group. Any item that is to the right or below a Domain Group is affected.
3.9.8 Grouping into a New Domain Group
-
In the Modeler, select multiple items.
-
Right-click, then select .
The Modeler creates a new Domain Group and adds those items, preserving their relative spacing to each other. This process removes the items from wherever they previously existed and places them in the proper area in the new group.
The following figure illustrates two Applications that have been added to a new Domain Group and removed from their previous groups.
Figure 3-23 Grouping into a New Domain Group

3.9.9 Ungrouping a Domain Group
Figure 3-24 Ungrouping a Domain Group
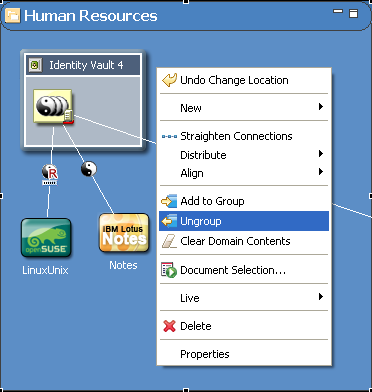
To ungroup a Domain Group, right-click it, then select .
This process removes the Domain Group but leaves all contents where they are, so that they won’t be deleted. This is just a way to ungroup the items. Depending on what level you are in the Modeler, the ungrouped items are automatically added to the host group or to the main Modeling space.
3.9.10 Clearing Contents
Figure 3-25 Clear All Items
To remove all contents from the Modeler, click , then select .
To remove all contents from a Domain Group, right-click, then select .
Designer prompts you before clearing the Modeler space.
3.9.11 Changing a Domain Group Icon
-
Right-click a Group Domain item in the Modeler, then select .

-
Browse to and select an image (for example, finance.png).
Icons for Domain Group components reside in the Group directory in the Modeler plug-in directory. By default, Designer opens the Group directory.
Designer supports .GIF, .JPEG, .PNG, and Windows .BMP formats. You can add your own icons to the Group directory.
-
Click , then click .
The minimized 16x16 version of the image also now appears in the Domain Group title bar.
As you add Domain Group items, Designer randomly assigns icons from the Group directory to the new Domain Group.