Setting Up Your Environment
There are five steps to set up your environment:
- Creating a New MFC Project
- Running the AppWizard
- Adding File Locations
- Configuring the Build
- Adding Project Files
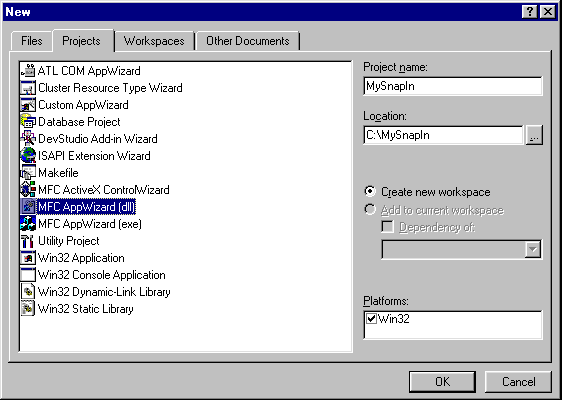
Running the AppWizard
-
Select the type of DLL you would like to create.
We recommend the first option, Regular DLL with MFC statically linked, because it links the MFC DLL at build time and does not require the MFC DLLs to be redistributed.
The second option, Regular DLL using shared MFC DLL, decreases the overall file size of the DLL but requires the MFC DLLs to be redistributed.
The third option, MFC Extension DLL (using shared MFC DLL), is not supported because it allows only MFC-based applications to call its functions directly.
-
Select any DLL features.
We recommend that you do not select any DLL features. OLE Automation and Windows Socket support are not included in this tutorial and should remain unchecked.
-
Select whether AppWizard should generate source file comments.
If you are new to Visual C++ and MFC programming, we recommend you select Yes for this option.
-
Click Finish to complete the AppWizard.
-
If everything in the resulting dialog box is acceptable, click OK to continue. Otherwise, click Cancel to return to the AppWizard.
Adding File Locations
-
Select the Tools > Options > Directories tab.
-
From the Show Directories For box, select Include Files.
-
Add Novell's NDK include directory to the list of available directories.
By default, the include directory is c:\Novell\NDK\include.
-
From the Show Directories For box, select Library Files.
-
Add Novell's NDK library directory for Visual C++ to the list of available directories.
By default, the library directory is c:\Novell\NDK\nwsdk\lib\win32\mscvc.
This step will be eliminated from future snap-in modules as this directory becomes part of the default settings in Visual C++.
-
Click OK.
Configuring the Build
-
To build a release DLL version, select Build > Set Active Configuration > Win32 Release > OK.
-
To configure the project not to use precompiled headers, select the Project > Settings > C/C++ tab.
-
Change the Category to Precompiled Headers and select Not Using Precompiled Headers.
-
Click the Link tab and change the file extension from .dll to .pc2 in the Output File Name field so that NetWare Administrator will recognize the file.
AppWizard will now build a copy of the snap-in control in a release subdirectory located off the source project directory.
NOTE: If you were building a Windows 3.1 snap-in, you would have to change the file extension from .dll to .pc1 so that NetWare Administrator would recognize the file.
-
Link the NDPS library files to the project by typing the library file names in the Object/library Modules field as follows:
dppwin32.lib dpawin32.lib dplwin32.lib
If multiple libraries are required, separate each filename with a space.
-
Click OK.
-
Select Win32 Debug from Settings For and repeat Steps 3 through 6 to apply these same settings to the debug snap-in version.
Adding Project Files
-
Copy snapin.cpp and npc.h to the source project directory.
By default, these files are located in c:\Novell\NDK\samples\ndps\printer_ctrl_snapin.
-
Include these two files in the project by selecting Project > Add To Project > Files from the main menu.
-
Control-click the snapin.cpp and npc.h files.
-
Click OK.