5.1 Contacts and Cards
Contacts are the individuals you have chosen to add to your address book so you can keep track of information about them and send e-mail to them. In Evolution, an individual contact is called a card.For more information on organizing your contact list see Section 5.3, Organizing your Contacts. To learn about configuring the contacts tool, refer Section 9.9, Contact Management.
5.1.1 The Contact Editor
If you want to add or change cards, use the contact editor. You can edit email address, telephone numbers, mailer addresses and all other contact information you have entered for a particular contact.
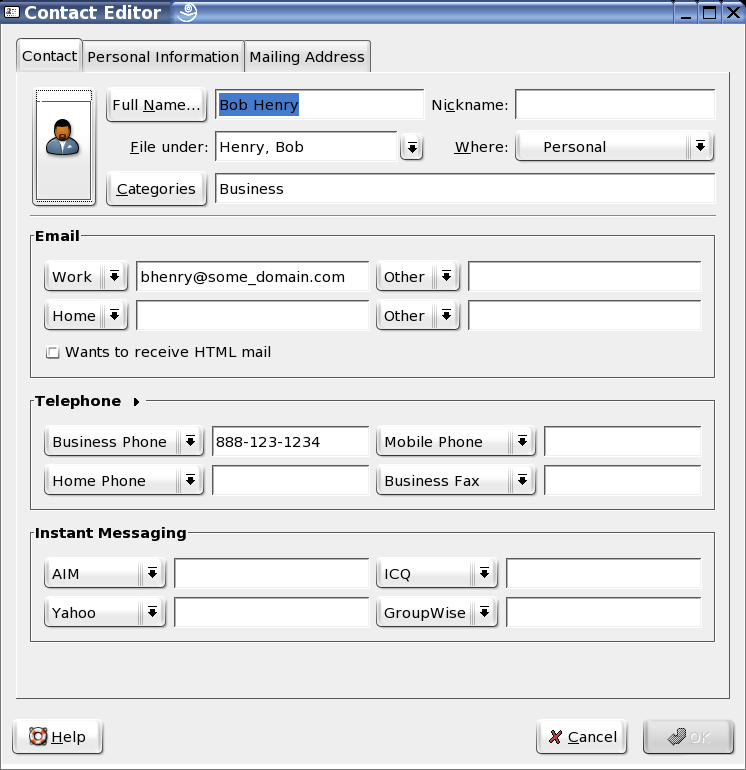
The contact editor window has three tabs:
Contacts: Contains basic contact information.
Personal Information: Contains a more specific description of the person, including Hurls for calendar and free/busy information.
Mailing Address: Contains the individual's mailing address.
You can also use Action Menu to find Forward Contact, which opens a new message with the card already attached, and Send Message to Contact, which opens a new message to the contact's e-mail address.
From the Contact Editor toolbar, you can save and close, print, close, or delete the contact.
You can add card from within an e-mail message or calendar appointment. In an open e-mail, right-click any e-mail address or message, and click Add to Address Book or select Add Sender to Address Book from the Message menu.
Most of the items in the contact editor simply display the information you enter, but some of them have additional features:
Full Name: Specify the name of your contact here. You can type a name into the Full Name field, but you can also click the Full Name button to bring up a small dialog box with text boxes for first and last names, titles like “Mr.” or “Her Excellency,” and suffixes like “Jr.” The Full Name field also interacts with the File Under box to help you organize your contacts and to handle multi-word surnames.To see how it works, type a name in the Full Name field. As an example, we'll use Miguel de Icaza. You'll notice that the File Under field also fills in, but in reverse: Icaza, Miguel de. If you had entered John Q. Doe, the contacts editor would have correctly guessed that the entry should be filed under “Doe, John Q.” However, Miguel's surname, “de Icaza”, has two words, and to sort it correctly you must enter de Icaza, Miguel in the File As entry.
Where: Select one of your address books as the location for this contact. You might not be able to write to all available address books, especially those on a network.
Categories: Click the Categories button to select categories for this card. If you assign contact categories, you can then search for contacts using those categories. For more information on contact categories, see Section 5.3, Organizing your Contacts
Free/Busy and Calendar URLs: Click the Personal Information tab to enter Web addresses for the contact. If the contact publishes Free/Busy or calendar data online, using a server other than Exchange or GroupWise, you can specify the addresses for those servers here. After you do so, you can check their schedules when creating appointments in the calendar.
Creating and Editing Contacts
Follow the steps given below to create a new card.
-
Click the down arrow key next to the New button in the toolbar
-
Select Contact from the drop-down list or press Shift+Ctrl+C to appear Contact Editor.
-
Enter the contact information to the entry boxes provided.
-
Click OK.
If you want to change a card that already exists,
-
Press Contact tool from the Switcher to appear the Contact list.
-
Double click on the card you want to edit.
-
Edit from the Contact Editor window.
-
Click OK.
You can also edit the contact information from the message list.
-
Right click on the address from Message Header
-
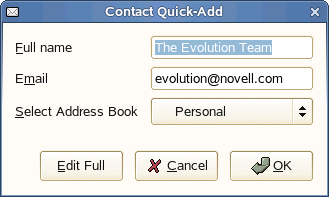
Select Add to Address Book to appear Contact Quick-Add window
-
Press Edit Full tab at the bottom left to appear Contact Editor window
-
Edit the required information from Contact Editor and press OK.
5.1.2 Google Contacts
Evolution allows you to access your Google Address Book. You can view the Google contacts offline and create, modify, and delete the contacts online.
To configure your Google Address Book in the Evolution contacts:
-
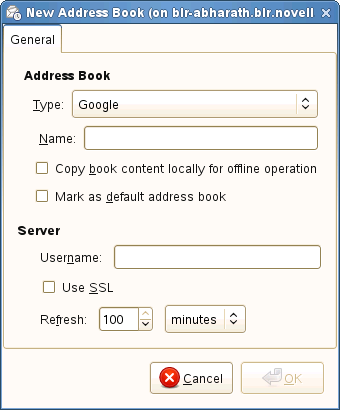
Select New > Address Book to open the New Address Book window.
-
Select Google from the Type drop-down list.
-
Specify a name for the address book.
-
Select or deselect the following options and provide the username for the Google account:
-
Mark as default address book: Select this option to make Google address book as your default address book.
-
Copy book content locally for offline operations: Select this option to copy the address book to your machine. You can use this even when you are not connected to the network.
-
Username: Specify the username of your Google account.
-
Use SSL: Select this option to enable secure communication (HTTPS) between the Google server and Evolution.
-
Refresh: Set the time to automatically refresh the Google address book. You can set it to a time in minutes, hours, days or weeks.
-
-
Click OK to confirm the new address book.