|  |
 |
 |
 |
 |
 |
 |
 |
 |
Portal Guide
CHAPTER 20
This chapter explains how to create custom themes using the exteNd Director development environment. It contains the following sections:

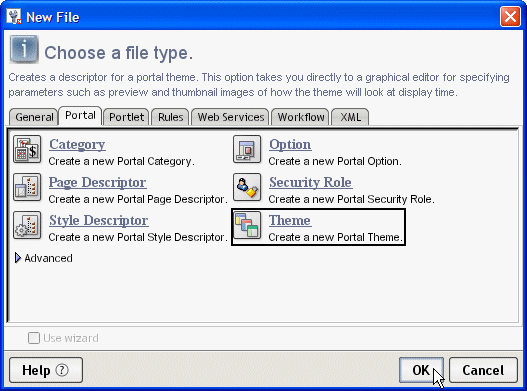
You create a new portal theme by using the Portal Themes Wizard, which is available in the exteNd Director development environment.
The Portal Themes Wizard creates a theme descriptor file, which includes the following information about the theme:
In the theme descriptor editor, specify the settings for the theme descriptor file.
 For details about the elements of the theme descriptor file, see Theme descriptor file.
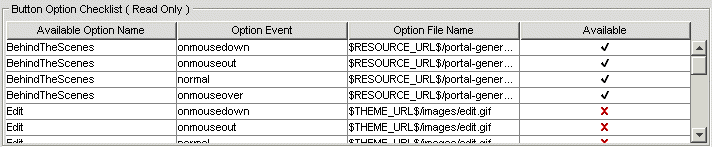
In the Button Option Checklist (Read Only) box, review the list of portal options in the current resource set to be sure the theme has provided the necessary images.
Whenever an image file has been provided for an option in the current theme, the Available column shows a check mark. Whenever an image file is not available in the current theme, the Available column shows an X.
Each theme can supply a unique set of images for the various events associated with a portal option. However, the file names for these images should be the same in each portal theme. By using a consistent naming convention across themes, you can ensure that each user event will have an image to display, regardless of which theme has been selected.
The theme descriptor file must have the name theme.xml. Each theme used by a portal application must have a separate theme.xml file.
exteNd Director saves the theme descriptor file in a theme folder, which is a subdirectory of the portal-theme directory within a resource set. The name of the theme folder matches the display name of the theme and provides a key for the theme and is used to uniquely identify the theme.
For more information about where files are located in a resource set, see the section on subdirectories for resources and Java classes in Developing exteNd Director Applications.
Open an existing theme CSS file and save it to the theme directory for your custom theme.
Edit the file to suit the requirements of your theme.
You can define your own styles by defining new classes and editing the settings for the standard exteNd Director classes (those classes that contain the nv label).
IMPORTANT: Do not remove or rename any of the standard classes. These classes are required by many of the core portlets that ship with exteNd Director.
If you decide to create your own custom classes, you should use these classes consistently throughout every theme in your application. In other words, each theme should provide appropriate settings for each of these custom classes, just as the installed themes provide settings for each of the standard exteNd Director classes.
The theme CSS file must be saved in the theme folder. The theme folder is a subdirectory of the portal-theme directory within a resource set.
For example, if your new theme is called GreenAndGold, follow these steps:
Create a subdirectory called GreenAndGold in the portal-theme directory.
Save the theme.css file for the new theme in portal-theme/GreenAndGold.
For more information about where files are located in a resource set, see the section on subdirectories for resources and Java classes in Developing exteNd Director Applications.
Copyright © 2004 Novell, Inc. All rights reserved. Copyright © 1997, 1998, 1999, 2000, 2001, 2002, 2003 SilverStream Software, LLC. All rights reserved. more ...