Novell exteNd 5 Guided Tour
LESSON 2

Novell exteNd Composer is a development (and runtime) environment for the rapid design and deployment of Web Services and XML integration to applications—applications that can connect to diverse back-end (legacy) systems and data sources. exteNd Composer offers a flexible, intuitive, point-and-click GUI (graphical user interface), giving the business analyst or application developer a powerful tool for creating robust XML integration solutions in minimum time.
This project provides an exteNd Composer component that extracts information from an LDAP directory. The component (using the LDAP Connect) provides basic user information such as name, phone, and title. In this lesson you will complete the application by completing an exteNd Composer service for later deployment as a Web Service. The Web Service will receive a request with a user ID and provide the information supplied by the component.
Start exteNd Composer by going to the Start>Programs>Novell exteNd 5.2>Composer menu and selecting Composer Designer.
In the interest of time, you will use a template project that has some of the artifacts you need already coded. You will review some of the artifacts and complete the steps required to finish this part of the application.
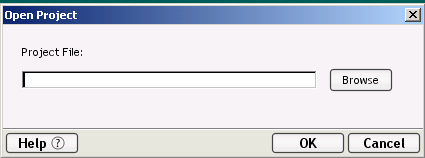
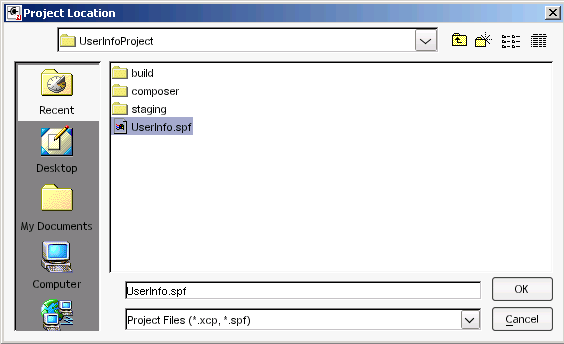
Navigate to the project folder by clicking the Browse button. The project folder is: D:\GuidedTour\template\RequestUserInfoProject\UserInfoProject.
In this exercise you will review the component that retrieves the information from the exteNd LDAP server. This component was created using exteNd Composer LDAP Connect.
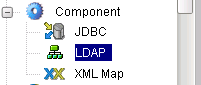
In the Category Pane of the Navigation Pane, select Component and then LDAP.
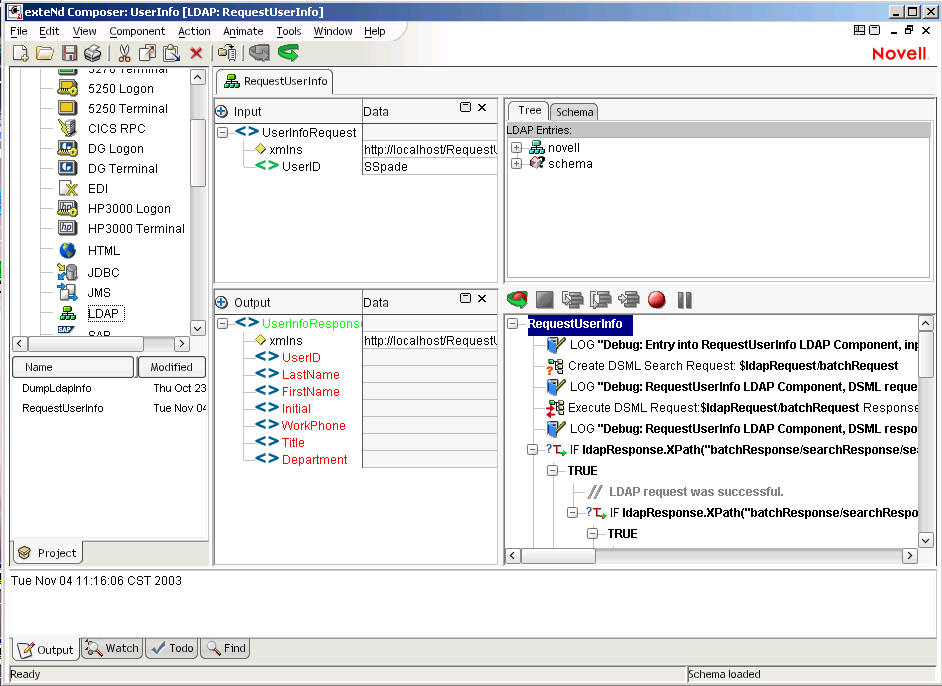
In the Detail Pane of the Navigation Pane, double-click RequestUserInfo. This opens the component in the Editor Pane.
Now you will take a look at the exteNd Composer functionality that allows you to quickly build and test solutions that access legacy data sources.
Step 2 of the previous exercise shows the exteNd Composer Designer with an LDAP Component open in the Editor panel. The Editor Pane is divided into three subpanes:
In the XML Documents or DOM Pane (DOM stands for Document Object Model), you can view and edit the XML documents being manipulated by the component. To make it easier to work with the exteNd Composer Designer, you can control which of these DOMs are visible at any time.
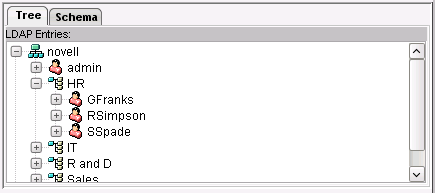
The Native Environment Pane is used by the Novell exteNd Connect products to provide a native view into the data source for which the exteNd Connect product provides the integration interface. So in exteNd LDAP Connect you see a graphical view of the Directory tree.
In the Action Model pane, you work with the exteNd Composer actions associated with the current component.
An exteNd Composer action is similar to a programming statement. It takes input in the form of parameters and performs specific tasks.
An exteNd Composer component consists of a set of instructions for processing XML documents or communicating with non-XML data sources. This set of instructions is called an Action Model. In exteNd Composer components and services, the Action Model performs all data mapping, data transformation, and data transfer tasks.
Action Model toolbar The toolbar above the Action Model gives you access to exteNd Composer's animation tools. These tools allow you to test and troubleshoot the actions associated with your services and components. You can step through a service or component Action Model one step at a time and see the result of each action. By doing this, you will become aware of any action failures as well as be able to verify that the output of the component is what you expected.
The animation tools allow you to set breakpoints so you can test individual sections of an Action Model. Using breakpoints, you can easily troubleshoot an Action Model by stopping execution just before any action that is causing trouble, and stepping through that and subsequent actions one at a time.
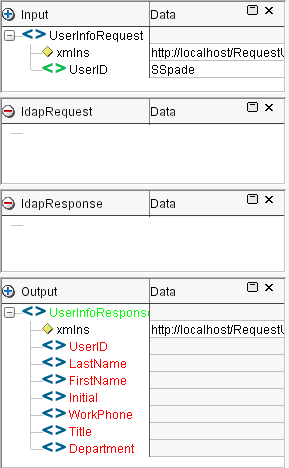
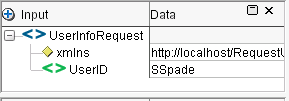
The Input XML document is an XML template containing a sample of the data required to make a request for user information. You use this template as a guide for writing the Action Model and testing the execution of the model.
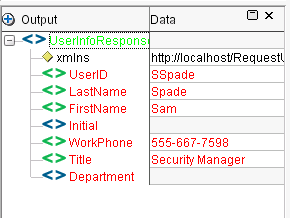
The Output XML document is also an XML template. It contains a sample of the data that will be provided to fulfill the request.
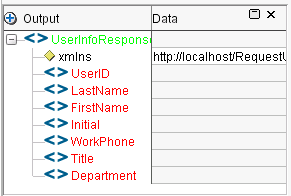
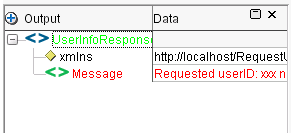
The sample of the Output XML is what is sent if the component is successful in connecting to the directory and finding the requested user information. If the user does not exist, an error message is sent. You will now view the sample data and the XML structure in the Output XML document.
In the Output XML document in the Component Editor, right-click to open the context menu.
Click the Sample dropdown list then select UserInfoResponse_message.xml.
The LDAP component requires a connection resource to connect to an LDAP server. The connection resource provides the specific information required to establish a connection to the exteNd LDAP directory server you are using. Now you will view the resource used by this component.
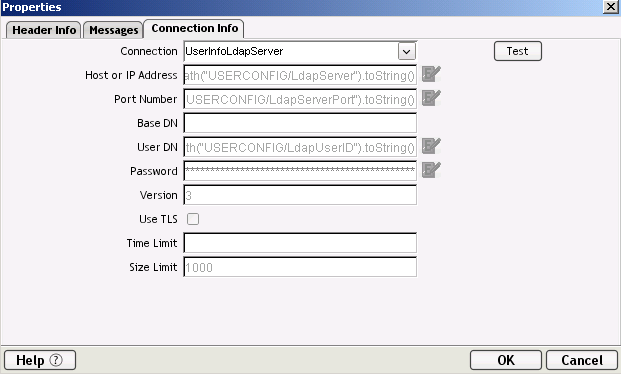
Select the Connection Info tab.
The Connection Info tab provides the information for the connection resource being used in a read-only mode. By clicking the Test button you can verify that a connection to the exteNd LDAP server can be established. Note the icon next to some of the field values: this indicates that an ECMAScript expression is used to create the required value. The actual values are stored as project variables in your project, where you can easily change them in one place or even dynamically before the component is executed.
The Action Model is the collection of instructions that are executed in sequence to process the input to produce the output. In this exercise you will review some of the key actions in the LDAP component that will be executed by the Web Service you are going to complete.
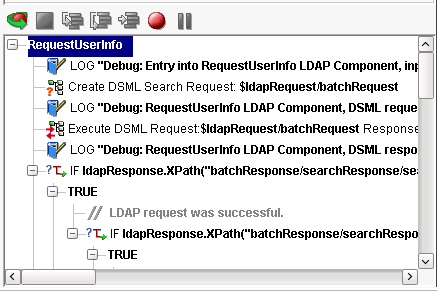
The first, third, and fifth actions are Log actions used to report debug-level information. This logging can be turned on by setting exteNd Composer's Designer or Server Log threshold. After deployment to an application server, these Log actions may be helpful in tracking down problems with a deployed application. It is good development practice to be proactive about adding them to your code. If you want to see the results of the debug Log actions in this project, you must set the Log Threshold in the Preferences to 4 or lower.

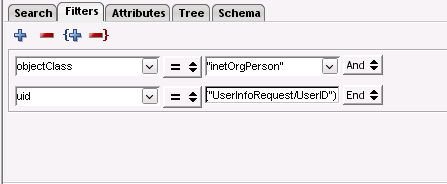
The second action is a Create DSML Search Request action, used to create an LDAP request as a DSML XML document. This action creates the actual query details (the where clause) and identifies the attributes that are to be returned.

When you select this action, the Native Environment Pane allows you to review and edit the details of the search request. The UserID in the Input XML Document is used to query the uid attribute in the directory.
The result of executing this action is an XML document that is placed in a temporary XML DOM.
Now you will view this document in the XML Documents panel.
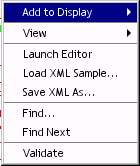
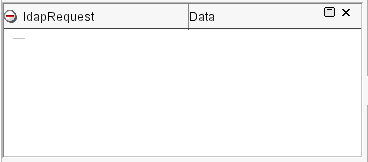
Right-click in the XML Document panel, select the Add to Display submenu, and select ldapRequest. This is the temporary XML DOM used to hold the XML created by the Create DSML Action.
Click the Execute Current Action icon  on the toolbar. This executes the action and displays the XML created for the request in the XML Document panel.
Now click the Execute All icon  on the toolbar. This causes the entire component to be executed, providing you the results of a successful query.
The fourth action is an Execute DSML Request action. This action takes the request created by the Create DSML Search Request action and connects to the server to execute the request. The result is placed into another temporary XML document called ldapResponse.

Here is what the Native Environment Pane looks like when the action is selected, after execution:

Here is the ldapResponse XML document.
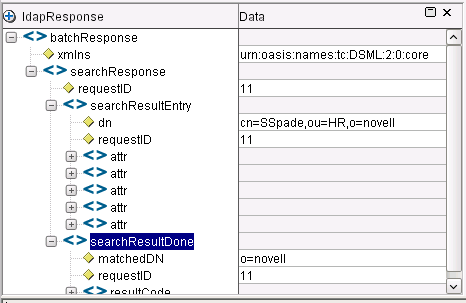
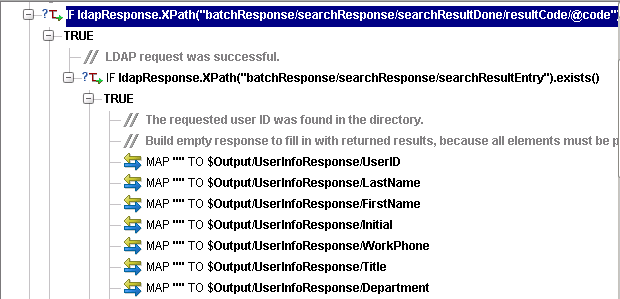
The sixth action is a Decision (IF) action. This action checks for a successful request. If the request is successful, the TRUE block of actions will be executed. This sequence of actions is used to produce the required output you saw in the Output XML Document earlier.
First the XML document is created with no data to ensure that the structure of the XML document conforms to the schema. exteNd Composer will always create well-formed XML, but it is your responsibility to ensure that the XML is valid when an XML Schema or DTD is specified.
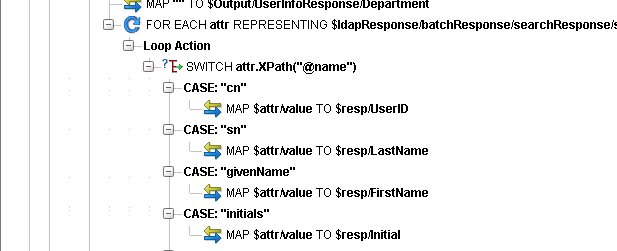
The next step is to handle each of the attributes returned in the result and place the data in the XML document. The DSML response will contain a repeating element for each of the attributes that was requested and is available for that specific entry in the directory. The Action Model must loop through each of these repeating elements and check the attribute name, placing the value into the correct element in the output XML document.
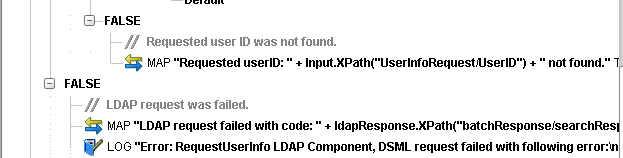
The FALSE blocks of the Decision actions contain Map actions that create message structures used in the event of failure, and a Log action used to log the failure of an LDAP request.
The final action is an Apply Namespace action that adds a reference to the XML Schema namespace that can be used to validate this document.

With the exteNd Composer Designer, you can test the execution of the component without having to deploy to a J2EE application server. You will now test the component—first with a valid user ID and then with an invalid ID.
The valid user ID is already provided for in the default XML Input sample. Click the Execute All icon on the toolbar.
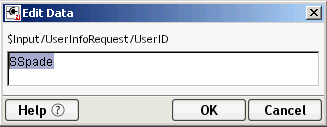
To enter an invalid User ID you need to change the Input sample. Double-click the value SSpade.
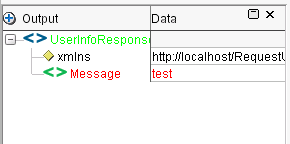
Review the Output XML Document.
You have now finished reviewing the LDAP component. To close the LDAP component:
Click on the Close icon in the editor to close the component.
With exteNd Composer, a service is required to act as the interface to the outside world. An application that uses the LDAP component you reviewed must invoke a service through a Service Trigger (more on this later) that will execute the component or even possibly other components. A service has its own Action Model. In this exercise you will complete the service that accepts the requested user ID and returns the information supplied by the RequestUserInfo component.
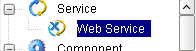
In the Category Pane of the Navigation Pane, select Service and then Web Service.
Although the service you selected is classified as a Web Service, it does not necessarily mean that it has a WSDL and SOAP binding. It is a Web Service only in the sense that it will normally be invoked as part of a Web application and that it responds to the request/response model used with HTTP.
The service trigger (or triggers) for invoking the service are created when it is deployed to a J2EE application server (like the Novell exteNd Application Server). One of the deployment options available to you is to use a Web Service with a WSDL and SOAP binding.
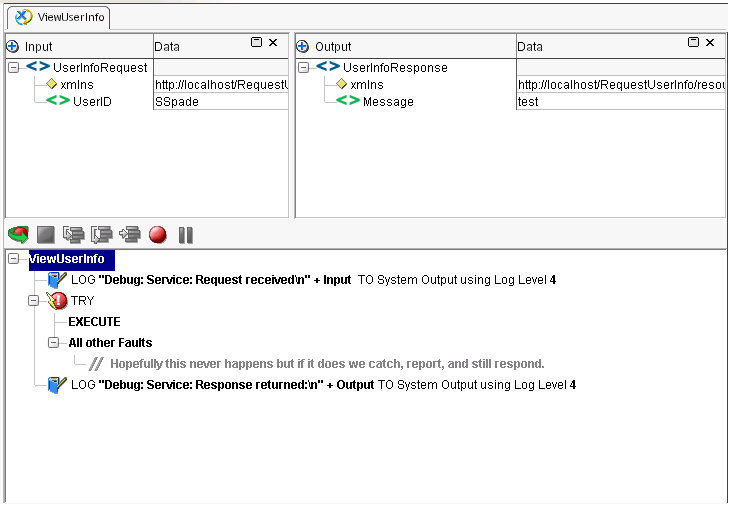
In the Detail Pane of the Navigation Pane, double-click ViewUserInfo. This opens the service in the Editor Pane.
Note that the XML Output sample used for the service is the message response. This was set as the default because the service will normally take the output produced by the LDAP component as its output. But in the event that the component fails to execute for any reason, the service will respond with a message.
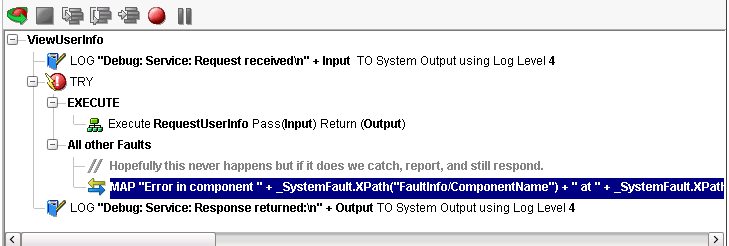
The Action Model for the service has been partially completed for you. The Try On Fault action is a wrapper for the execution of the component; if it fails, the Fault section will be executed and a Log action will send a log message to the System Output. You will add the action to execute the RequestUserInfo component and a Map action to create the XML output in the event of a fault.
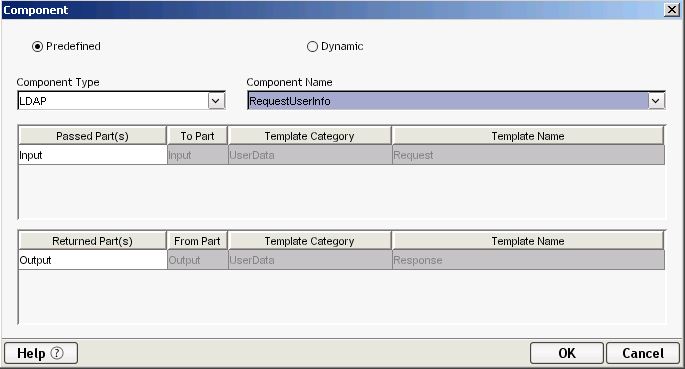
Right-click to display the context menu. Then select New Action>Component.
Right-click to display the context menu. Then select New Action>Map (or use the keyboard shortcut Ctrl+M).
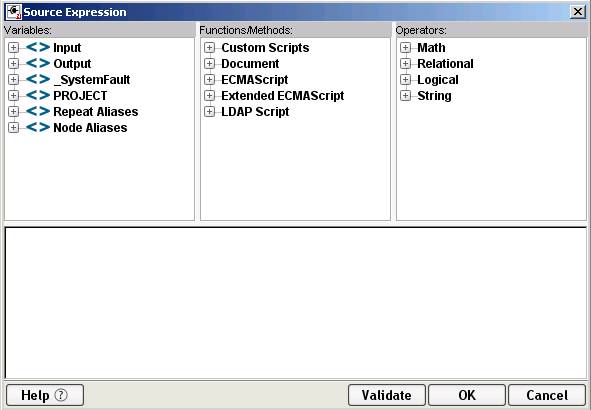
In the Source area click the Expression radio button, then click the ECMA Expression icon ![]() to open the expression editor.
to open the expression editor.
Type the following (include the quotes):
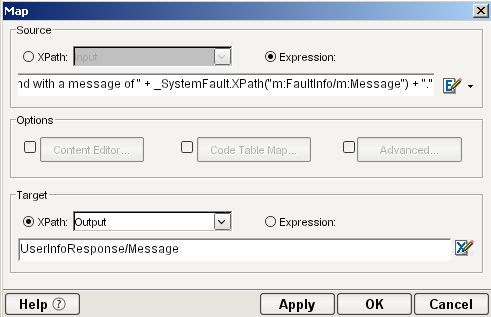
"Error in component " + _SystemFault.XPath("m:FaultInfo/m:ComponentName") + " at " + _SystemFault.XPath("m:FaultInfo/m:DateTime") + " with MainCode " + _SystemFault.XPath("m:FaultInfo/m:MainCode") + ", SubCode " + _SystemFault.XPath("m:FaultInfo/m:SubCode") + ", and with a message of " + _SystemFault.XPath("m:FaultInfo/m:Message") + "."
_SystemFault is a Composer DOM variable that holds an XML document in the event that a system fault occurs. If you had forced a fault during the execution of the service (by stopping your exteNd LDAP server, for example), you could view the structure of this document in the expression editor. You would do this by clicking the icon next to _SystemFault.
When you double-click an XML element in a DOM variable such as _SystemFault, the expression editor writes the appropriate ECMAScript expression—for example: _SystemFault.XPath("FaultInfo/DateTime").
In the Target text box, type UserInfoResponse/Message (or use the expression editor by clicking the icon.
To place the Map action after the Comment action, you can drag and drop. Left-click the Map Action, hold it and drag it down to the Comment Action. Then release the left mouse button.
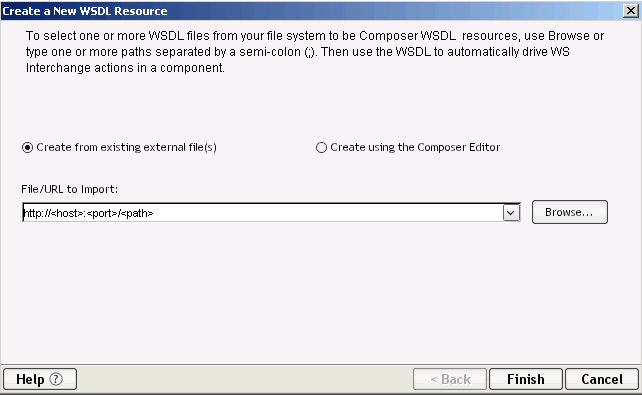
Now that the service is completed and tested, your next task is to create a WSDL for the service. You need to do this because you will be deploying this service as a Web Service, and the WSDL is required for the service trigger that will be generated. The WSDL will also be used to help build the user interface for the application in Lesson 4.
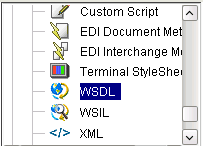
In the Category Pane of the Navigation Pane, select Resource and then WSDL.
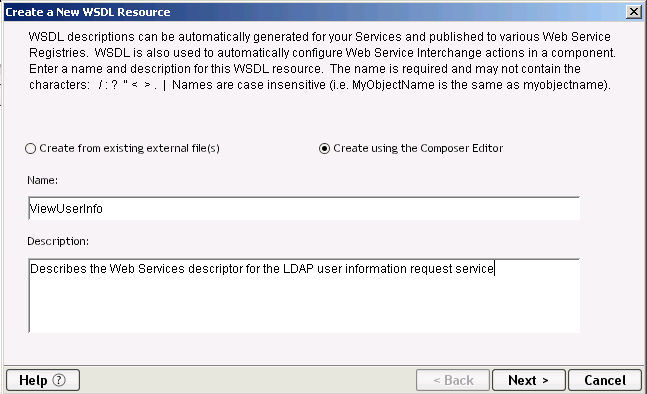
Type Describes the Web Services descriptor for the LDAP user information request service in the Description text box.
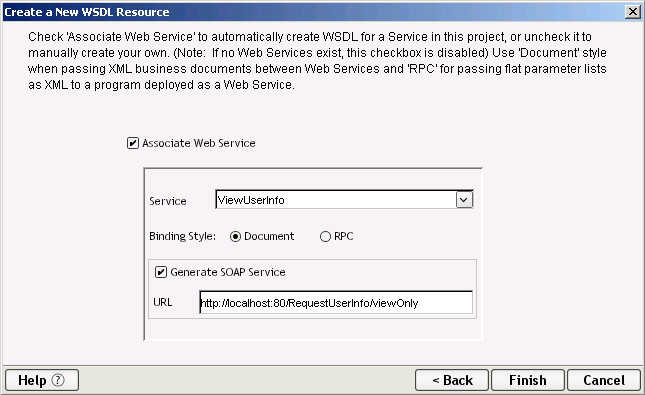
Type http://localhost:80/RequestUserInfo/viewOnly in the URL text box.
Click the Close document frame icon in the editor to close the WSDL.
You have now finished creating the exteNd Composer Web Service.
Next lesson In the next lesson you will create a service trigger for the service, then deploy and test the service.
Copyright © 2004 Novell, Inc. All rights reserved. Copyright © 1997, 1998, 1999, 2000, 2001, 2002, 2003 SilverStream Software, LLC. All rights reserved. more ...