Novell exteNd 5 Guided Tour
LESSON 1
Novell exteNd 5 is a comprehensive suite of development tools that gives you the ability to create end-to-end Web Services that are secure with little to no coding.
With exteNd Composer you can produce Web Services that use non-XML data sources such as directories and relational databases.
With exteNd Director you can write applications that allow end users to consume Web Services. You do this by building portlets that can then be deployed as part of portal Web applications.
By also using exteNd Director to create forms that are bound to the data in Web Services you can craft truly complete business solutions with minimal coding.
Finally, by deploying your application to the exteNd Application Server you are deploying to a standards-based server that provides a robust environment to support your applications.
Novell exteNd 5 provides a service-oriented architecture (SOA) that is standards based. exteNd 5 gives you all the tools you need to develop Web Services and Web applications to meet the ever-changing needs of your business—while using current and evolving standards that do not lock you into a specific platform.
|
For |
See |
|---|---|
|
More information about Novell exteNd |
The Web sites listed in the exteNd Help Library menu at the top of this page |
|
More information about the technologies discussed in this Guided Tour |
The Learning Resources page in Welcome to Novell exteNd in this help system |
|
Latest updates to this Guided Tour |
Check the exteNd documentation Web site frequently for updates to this Guided Tour |

The application (it is more like a part of a larger application) you will build in this Guided Tour will retrieve basic contact information from an LDAP directory (such as Novell eDirectoryTM). You will retrieve basic information such as full name, title, phone, and e-mail address. Then the information will be displayed in a portlet that is part of a Web application. While this is a simple read application, it is the start of a more complete solution—where users can maintain contact information about themselves or other directory users.
The Web Service you will create could also be used by other portlets to tailor their functionality to give a customer or other user of your application a personalized look. In developing the Web applications of tomorrow, developers need to provide users the information they need. The simple example you will build leads you in that direction by showing how to retrieve information specific to a user based on a centralized directory repository.
This Guided Tour is not intended to be a complete coding exercise—but rather an introduction to exteNd and how you can use it to create Web Services and use them in a Web application. Your starting point will be a partially completed project. You will write some code to complete the application, deploy the application to the exteNd Application Server, and test the code you have completed by running the application in your favorite Web browser.
The code provided for you is well commented, and it would be instructive to review it as you work through the Guided Tour. You will become familiar with some of the key artifacts. You will also learn how exteNd Composer and exteNd Director help you build applications that solve business problems while minimizing the code you need to write.
You will begin by performing the setup of the template project and database required by the application.
Then you will complete an exteNd Composer service that will extract the user information from the LDAP directory, ultimately deploying this as a Web Service.
After completing the exteNd Composer part you will go into exteNd Director to complete the user interface. The Web application will request a User ID and invoke the Web Service, returning either the information about the user or an error message. The returned information will then be displayed.
Now you are ready to start the first lesson.
In this lesson you will extract the template project to create your project work area and create a database required for the exteNd Director application. You will set up a connection pool in the exteNd Application Server for the exteNd Director database. You will also start the exteNd Application Server and the exteNd LDAP server that you will use for deployment and testing.
The template project is located in the \Docs\GuidedTour directory under your exteNd 5 installation root directory. (The default installation root directory is C:\Program Files\Novell\exteNd5. This is the path name that will be used in the examples in this Guided Tour.) The project is in a zip file called GuidedTour.zip.
Extract the file template.zip from GuidedTour.zip, and unzip template.zip into a working directory on your computer, such as D:\GuidedTour. When extracting the file, make sure you use an option such as Use Folder Names, which will keep the folder structure of the files in the template.zip during the extract. This will be your working copy of the Guided Tour project.
The folder template with the folder RequestUserInfoProject is created in your working directory. RequestUserInfoProject is the exteNd Director project folder.
TIP: All references to these projects throughout the Guided Tour use the base location of D:\GuidedTour\template.
An exteNd Director application requires a database to store the data specific to exteNd Director. For the application you are building you will need to create a database and set up a connection pool in the exteNd Application Server. Now you will create a MySQL database.
TIP: You can actually use any database supported by exteNd Director. For information on the supported databases, see the Release Notes for exteNd 5.
For this exercise you will be executing a SQL script that will create the database and assign a user as the owner for the database. You will use a command line utility provided with the install. Alternatively, if you have a tool such as the MySQL Control Center you may use it to execute the script.
The script is called databaseCreationScript.sql and is located in the template folder that you extracted in Exercise 1-1: Create a project area folder.
Open a Command Prompt, then use CD to change to the MySQL\bin directory in the exteNd installation directory (for example, C:\Program Files\Novell\exteNd5\MySQL\bin).
At the mysql.exe prompt type \. D:\GuidedTour\template\databaseCreationScript.sql, then press Enter.
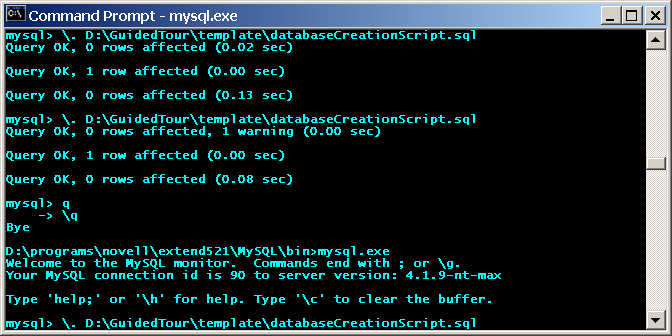
NOTE: The location of the script depends on where you unzipped the template files in Exercise 1-1: Create a project area folder.
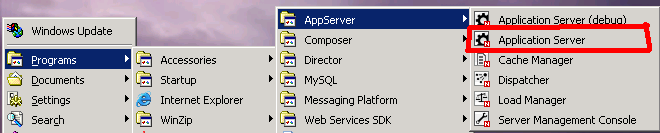
To start the Application Server, go to the Start>Programs>Novell exteNd 5.2>AppServer menu and select Application Server. (Do not select the debug option.)
The application server has completed its startup initialization when you see the following text on the server console (the build number and server/port might be different in your install):
  exteNd application server [Build Number:Release5.2.0 (040524_1)] serving at:
     http://jgdext5testvm:80 (runtime, admin)
The database you created will be accessed as a connection pool in the Application Server. This improves the performance of the application and provides flexibility in deployment by leaving the specification of which database to use until deployment time. Now you will define a pool in the exteNd Application Server.
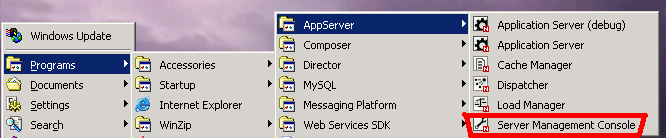
When the Application Server is ready, start the Server Management Console (SMC) by going to the Start>Programs>Novell exteNd 5.2>AppServer menu and selecting Server Management Console.
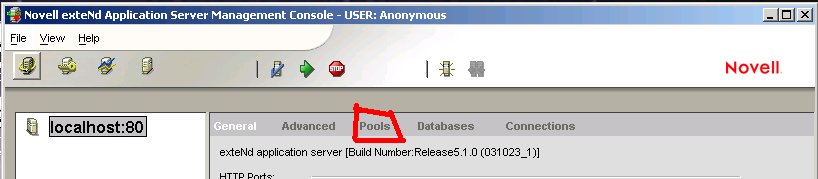
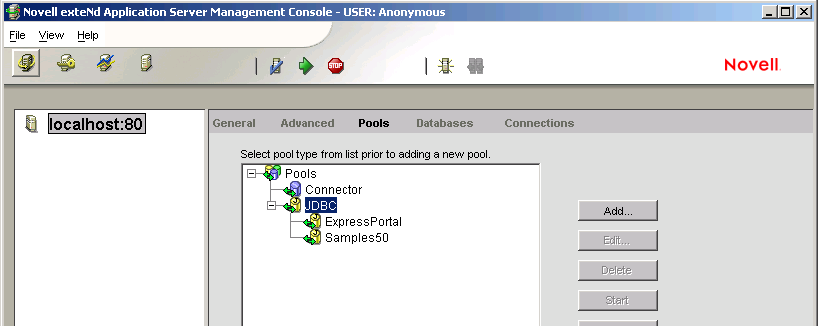
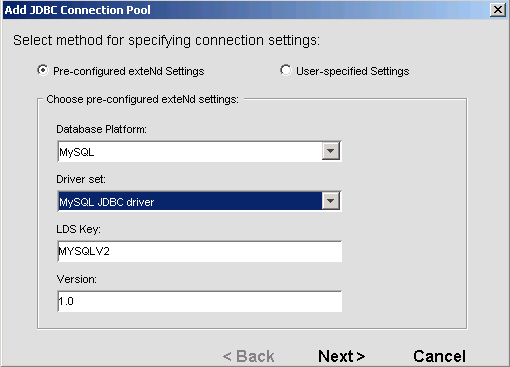
Select the Pools tab in the Configuration section of the SMC.
Select MySQL as the Database Platform from the dropdown list.
If not already selected, select the MySQL JDBC driver from the Driver Set dropdown list.
Type UserInfoRequest in the Pool Name text box.
The complete pool name for a JNDI lookup will be JDBC/UserInfoRequest.
Type uireqadmin in both the User Name and Password text boxes.
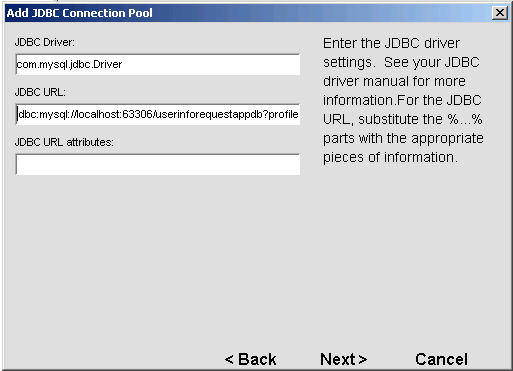
jdbc:mysql://%HOST%:%PORT%/%DBNAME%?profileSql=false&maxRows=0
Change the variables in the template as follows:
jdbc:mysql://localhost:63306/userinforequestappdb?profileSql=false&maxRows=0
Click Next on the Optional Connection Pool Properties dialog.
Accept the default connection pool manager properties by clicking Finish.
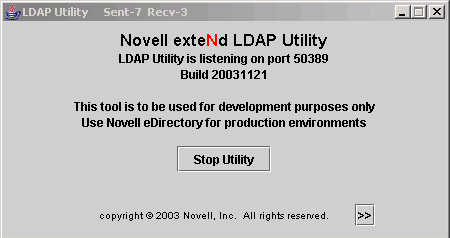
The Novell exteNd LDAP directory server is the data source that will be used by the exteNd Composer Web Service you will complete in the next lesson. exteNd LDAP is a simple LDAP directory implementation that provides an LDAP server to be used by developers for development and testing.
Start the LDAP server by going to the Start>Programs>Novell exteNd 5.2>Tools and clicking LDAP Utility.
Minimize the Novell exteNd LDAP Utility window by clicking the Minimize icon.
Next lesson In the next lesson you will complete an exteNd Composer service that you will later deploy as a Web Service.
Copyright © 2004 Novell, Inc. All rights reserved. Copyright © 1997, 1998, 1999, 2000, 2001, 2002, 2003 SilverStream Software, LLC. All rights reserved. more ...