The Table Designer is a powerful graphical interface that enables you to create and update tables in a relational database.
You can use the Table Designer to:
This page describes the following:

The following are concepts you should know before you use the Table Designer.
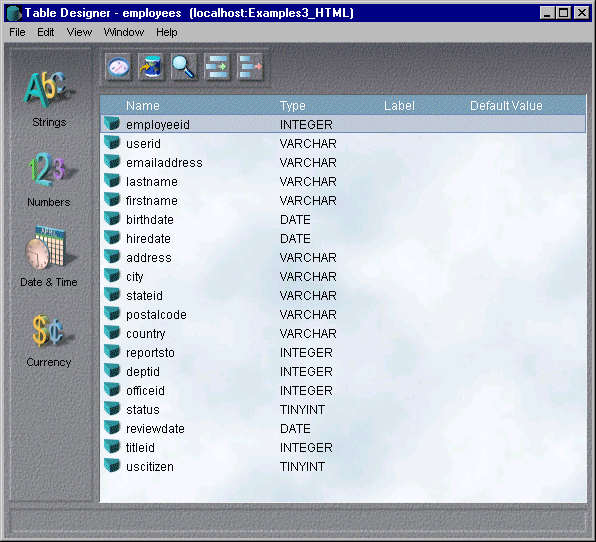
A table contains data relating to a specific subject, such as Employees. It is composed of columns and rows. Each entry in the table represents one data item. There are no duplicate data items.
A column is an area inside a database table where data is stored. A column contains one piece of the information that make up the table's subject. For example, in a table called Employees, standard columns could include Employee ID, Employee Name, and Hire Date. Each column must have a unique name. All of the data contained in one column must be of the same type.
A row is a structure within a table representing a unique instance of the table subject. It consists of all the columns contained in a table. Using the table named Employees as an example, a typical row would look like this:
All of the employee information for Bishop LanFranc constitutes one row in the table. Each row in the table can be identifiable by a primary (unique) key.
A primary key is a column or set of columns in a table that uniquely identifies each row in that table. For example, in the Employees table, each employee has a different Employee ID. This makes employee ID a candidate to be the primary key.
Once you create a table using SilverStream and save it to the server, you cannot change any of the primary key's properties.
 For more information, see
Specifying the primary key.
For more information, see
Specifying the primary key.
An index is a database structure designed to optimize the management of data. You cannot create indexes within the Table Designer; you create table indexes using your DBMS's tool.
In SilverStream, when you mark a table column as full-text searchable, the server indexes that table automatically every time records are inserted, updated, or deleted.
For more information, see
Making a table full-text searchable.
Versioning is a way of keeping track of modifications made to data in a table. You can set up versioning through the Table Designer using the Property Inspector. When you mark a table for version control, a mirror table is created. This is the version table. It contains the same columns as the primary table, plus three additional columns containing the following information:
Each primary table must have a primary key, otherwise the version table cannot be updated correctly when the primary table is modified. Any table that has a primary key can be versioned. SilverStream automatically creates a primary key for the version table when you create it. The version table primary key is a combination of the primary table's primary key and the version number.
Whenever a row in a primary table is changed, the new version is also copied to the version table. The Table Designer offers both automatic and manual version control. Manual version control is not allowed for a new or existing primary table containing auto-increment columns. When you switch versioning off (by selecting None in the Property Inspector), the version table is deleted from the server and you lose all of your history for the primary table. You cannot delete a version table using the Delete command.
You can apply versioning at any time. You can also turn it off at any time. The default version table name is derived from the primary table, but you can change this name. Once you have created the version table and saved it to the server, you cannot change its name. You can insert, delete, and update columns in the version table. Be very careful when updating a version table, because you are updating the versioning history.
To learn how to create a version table, see
Creating version tables.
It is important to keep the following in mind before you create or modify tables:
 To edit an existing table from the SilverStream Designer:
If tables already exist in the database you selected, a list of them appears in the right pane.
The Table Designer displays.
It is important to keep the following in mind before you create or modify tables:
A list of available tables displays in the right pane.
 ) from the action gallery that appears at the bottom of the right pane.
The Table Designer displays. No columns are defined.
For information about creating columns, see
Creating and modifying columns.
It is a good idea for a table to have a primary key. Primary keys are not required unless the table is versioned or full text searchable. A primary key is a column or group of columns in a table that uniquely identifies all the records in a table. For example, in the Employees table in the SilverBooks sample application shipped with SilverStream, the column iEmployeeId is the primary key. If you decide to create a table with a primary key, you must specify which column(s) is the primary key before you save the table to the database.
If you want to make a table full text searchable, the primary key for the table cannot contain integer or decimal values. If you change the primary key's data type to varchar, then you can make the table full text searchable.
Primary keys cannot contain null values.
For more information about primary keys, see
Primary key.
NOTE Once you save your table to the database, you cannot change the primary key in SilverStream.
To specify the primary key for your new table:
The Table Designer opens. The table you selected is displayed.
To insert a preformatted column, select one of the icons in the Table Designer gallery that appears in the left margin of the Table Designer window.
Use the Property Inspector to specify column properties and defaults.
To assign properties to a column:
The Property Inspector appears. It contains a property tab for the table as well as one for the column you just created.
The maximum number of characters that can appear in the column. | ||
Whether the column must always have a value. Specify that the column is required by selecting the Required check box. This is enforced by the DBMS, which returns an error message if a user tries to leave a required column blank. You cannot make a column required once you have saved the table in the database because doing so could invalidate certain records in the table. For the same reason, you cannot turn the Required flag on for a new column that you inserted into an existing table. You can, however, turn the Required flag off for a column after the table has been saved. | ||
Whether the column can be searched using full-text search. Specify that the column be full-text searchable by selecting the Full text searchable check box. The indexer reads all of the columns in the table that are marked as full-text searchable and creates its own table containing the indexed columns. It saves this table in its own database. For more information, see Making a table full-text searchable. | ||
Whether the column always receives a unique value supplied by the database. There are database-specific restrictions. You cannot have more than one auto-increment column in a table. | ||
Indicates the number of digits that appear after a decimal point. |
Use the Property Inspector and the Expression Builder to specify the defaults for the table columns. There are two types of defaults in SilverStream:
To learn more about the Expression Builder, see
Expression Builder.
Include default data in a table when you want a column to contain data regardless of whether a user has entered anything.
You can specify a default value expression for any column. The SilverStream Server evaluates the default expression whenever a new record is inserted or an existing record is updated and the user does not provide a value for the column.
It is important to keep the following in mind when assigning defaults:
Use the Expression Builder to create validation rules or aggregate data in a column. For example, if you wanted to add a column that contains the total price for an order, you would create an expression that combines the values of two other columns in your table. The expression would look something like this:
orderdetails.unitprice * orderdetails.quantity
Display defaults determine how a data column appears when you use it in a form or view.
To specify the default settings for a column:
For more information about the formats, see the page listing formats in the help system.
Use the Expression Builder to ensure data integrity by creating validation rules for your table. Keep the following in mind:
The Expression Builder displays.
orderitem.quantity > 0
What happens
The SilverStream Server evaluates these table-defined validation rules whenever an attempt is made to insert a new row or update a row in the database. This happens when an updateRows() method is called (typically, when the user clicks the Save button).
If one or more values fail validation, an AgoInvalidDataException is raised. You should handle this exception in your code.
NOTE You can also create validation rules directly on form fields; these rules are evaluated on the client (form). For more information, see Creating validation rules for form fields.
NOTE To learn more about version tables, see Versioning.
NOTE When you switch versioning off (None) in the Property Inspector, the version table is deleted from the server and you lose all of your history for the primary table. You cannot delete a version table using the Delete command.
NOTE Manual versioning is not allowed for a new or existing primary table that contains auto-increment columns.
You can apply versioning at any time. You can also turn versioning off at any time. The default version table name is derived from the primary table name and begins with a V, but you can change it. Once you have created the version table and saved it to the server you cannot change its name. You can insert, delete, and update columns in the version table, but you should be very careful when updating a version table because you are updating the versioning history.
Every database maintains a list of its tables. This list is referred to as the table directory. You can set security for the table directory. When you set security for the table directory, you have the option of applying those permissions to all the tables in the directory. You can specify who has:
You can also specify read/modify/set permissions authority on individual tables.
In addition, you can specify security permissions for individual rows in a table.
For more information, see the security chapter in the Administrator's Guide.
You can mark one or more columns in a table to be full-text searchable so users of your applications can use powerful full-text search to find information.
For more information on using full-text search in your applications, see
Full Text Search.
JDBC 2 supports Blobs and Clobs. If the JDBC driver you are using supports Blobs and Clobs (for example, the SilverStream Oracle 8 JDBC driver does), you can use Blobs and Clobs. You can: