5.12 Configuring the NFR Engine
Configuration of the NFR Engine takes place through a terminal console.
-
At the SUSE Linux Enterprise Server or the Open Enterprise Server 2 machine where you installed the NFR Engine, launch a terminal session.
-
At the terminal console, type nfrengine-config and press Enter.
The console is updated with a message similar to the one below:
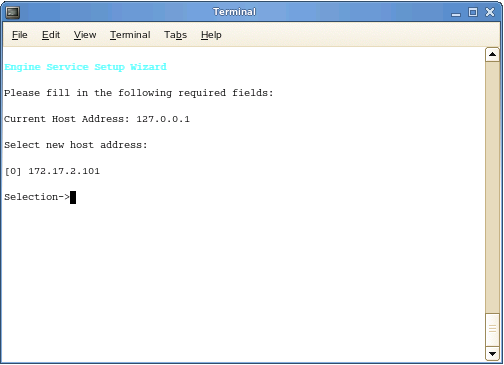
If you are installing the NFR Engine on a server that has multiple NICs, multiple IP addresses are listed.
-
Type the menu option for the IP address you are assigning to the NFR Engine and press Enter.
-
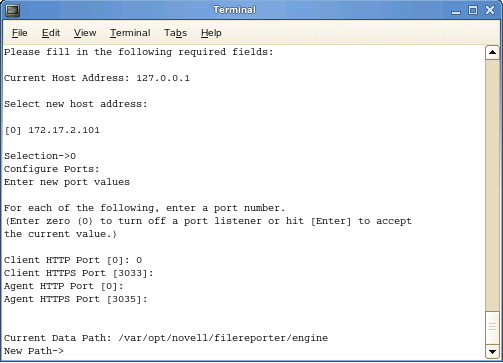
When you are prompted for the Client HTTP Port number, type 0 and press Enter.
-
When you are prompted for the Client HTTPS Port number, accept the Port 3033 setting by pressing Enter.
The console is updated with the default data path where scans and reports are stored on the server.
-
Accept the data path displayed or indicate a preferred path and press Enter.
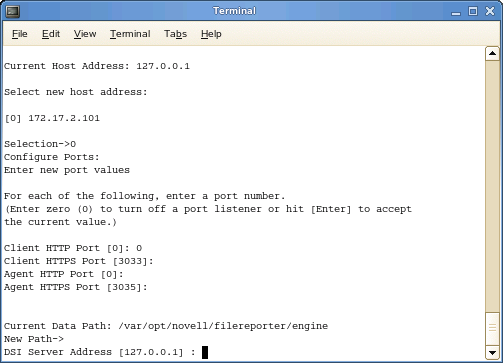
The console is updated with a prompt for the DSI server address:
-
Do one of the following:
-
If you are configuring Novell File Reporter for a network environment that does not include Novell Storage Manager, type the IP address of the server hosting the DSI and press Enter.
-
If you are configuring Novell File Reporter for a network environment that includes Novell Storage Manager, type the IP address of the server hosting the NSM Engine and press Enter.
The console is updated with a prompt to enter the DSI Server Port number, with a default setting of Port 3009.
-
-
Do one of the following:
-
If you installed the DSI and used the default setting in Step 5, accept the port number setting by pressing Enter.
-
If you installed the DSI and modified the port setting number in Step 5, type the modified port setting number and press Enter.
-
If you are installing Novell File Reporter into a network environment that includes Novell Storage Manager, type 8009 and press Enter.
-
-
When you are asked if you want to use SSL, type Y for Yes and press Enter.
-
When you are asked if you want to start the service, type Y for Yes and press Enter.
-
When prompted, press Enter to continue.
The console is updated with menu options for changing any of the configuration settings you just made.
-
Verify that the necessary ports are open as part of your network firewall configuration.