9.1 Configuring a Proxy Agent for Active Directory Managed Networks without Novell Storage Manager
-
Locate the nfrproxy.cfg file in the config folder where the DSI is installed.
On Windows Server 2003, the path is: C:\Documents and Settings\All Users\AppData\Novell\File Reporter\DSI-AD\config
On Windows Server 2008, the path is: C:\ProgramData\Novell\File Reporter\DSI-AD\config
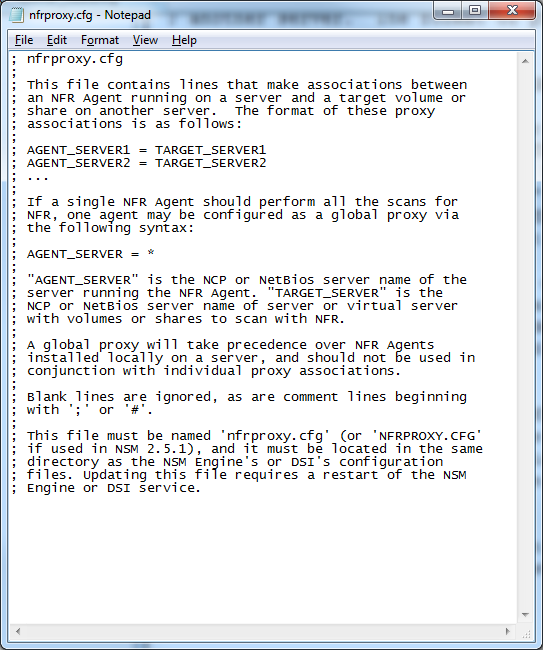
The file contains commented information on how to set up proxy associations.
-
Append the proxy associations to the nfrproxy.cfg file, using the following format:
servername-where-NFR-Agent-is-installed=virtual-servername -
Save the updated nfrproxy.cfg file.
-
Restart the DSI-AD service.
-
Launch NFRAdmin.
-
Click .
-
In the right pane, click > .
-
When you are notified that the rebuild is in progress, click .
-
In the right pane, click to view the new virtual servers listed as storage resources available for scanning.
If the new virtual servers do not appear, you might need to give Novell File Reporter enough time to rebuild the list. Repeat Step 7 and Step 8and allow for more time for the list to be rebuilt before proceeding to Step 10.
-
Proceed to Section 9.3, Establishing Permissions on the Active Directory Cluster Virtual File Server.