5.4 Creating Scan Policies
The specifications for a scan are established in a scan policy. The scan policy specifies the following parameters:
-
What type of scan to conduct (File System, Permissions, or Volume Free Space)
-
The scan targets
-
Scan retry settings
-
The scan schedule
IMPORTANT:The scan policy name must be unique. If you attempt to give the scan policy an existing name, File Reporter generates an error.
-
Select > .
-
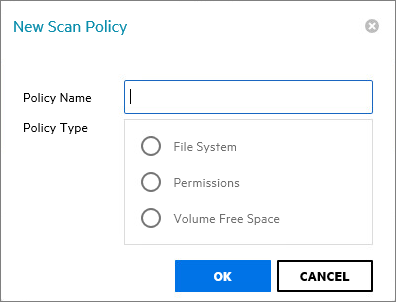
Click .
-
In the field, specify a name for the scan policy.
You can provide a description of the policy in the next dialog box.
-
Select the type of scan that File Reporter is to conduct.
File System: Scans the files currently stored on the network volume or share, the size of those files, when the files were last accessed, the locations of duplicate versions, and so forth.
Permissions: Scans the rights, trustee assignments, and permissions pertaining to the folders stored on the volumes or shares.
Volume Free Space: Scans the availability of free space on the volumes or shares.
-
Click .

Name: Displays the name of the scan policy.
Description: Specify a description of the scan policy in this field.
Retry Count: Specify the number of times File Reporter attempts to scan the storage resource targets listed in the scan policy if there is a failure.
Retry Interval: Specify the amount of time before File Reporter retries scanning the storage resource targets listed in the scan policy if there is a failure.
Directory Quotas: By default, a scan does not include home folder quota information, because gathering this information on Windows shares can extend the scan time significantly. Unless you plan to generate a Directory Quota report, we recommend that you leave this option deselected.
This option applies only to File System scans.
Previous Scans: This option lets you specify whether to keep the previous version of a scan generated through this policy. This scan is known as the “Previous scan” which you can then use to generate a Historic Comparison report through a comparison with either a Baseline scan or a “Current scan.” For more information, see Section 6.8, Historic Comparison Reports.
Previous scans are designated whenever a new scan is performed. The new scan is the Current scan and the earlier scan becomes the Previous scan. When the target paths are eventually scanned again, the new scan becomes the Current scan, the earlier Current scan becomes the Previous scan, and the former Previous scan is deleted.
NOTE:If you want to maintain a scan indefinitely, you can do so by specifying it as a Baseline scan. For more information, see Section 5.5, Establishing a Baseline Scan.
The management of Previous scan retention occurs when processing a new scan. This means that if you deselect , no existing Previous scan will be removed at that time, but it will be removed when a new scan is processed.
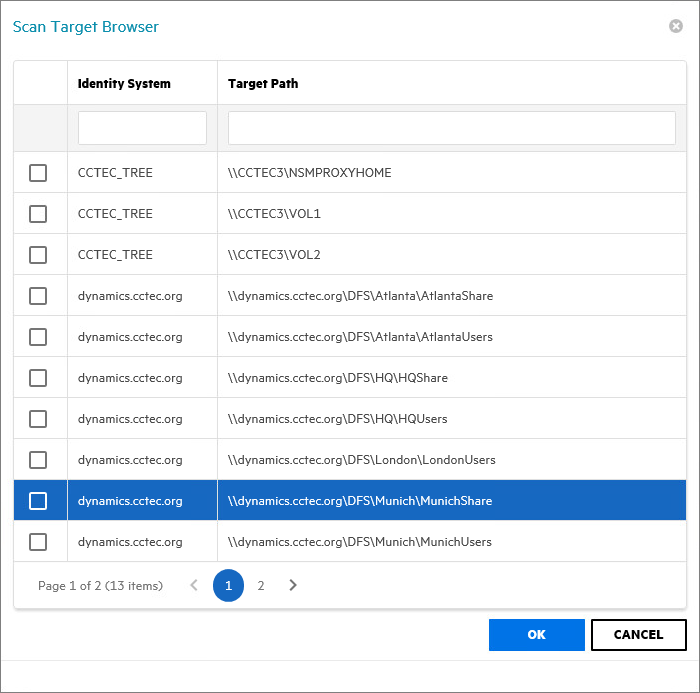
Add: Click this option to specify the scan targets for the scan policy.
IMPORTANT:After a target has been added to a scan policy, the same target cannot be added to another scan policy of the same scan policy type. For example, if you specify \\Pinyon\Vol1 in one File System scan, you cannot specify the same volume in another File System scan.
Clicking brings up a dialog box like the one below where you can select available storage resources.
-
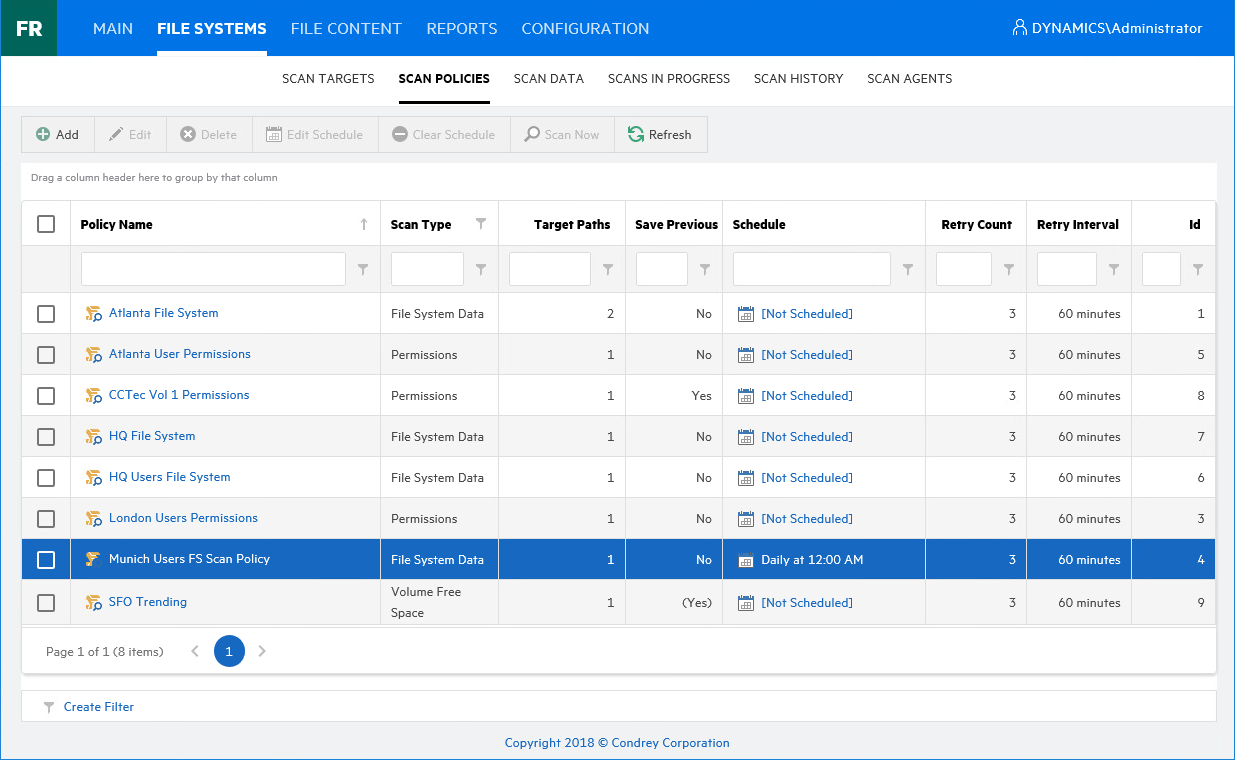
Click to save the scan policy.
The scan policy is now displayed on the Scan Policies page.
The scan policy still needs to be scheduled. For procedures on scheduling scans, go to Section 5.9, Scheduling Scans.