2.7 Performing the Initial Address Book Synchronization
-
Verify that address book synchronization has been enabled:
-
In the MTA Web console, display the current MTA log file.
-
Review the list of settings that was generated when you restarted the MTA in Step 5 in Section 2.6, Configuring the MTA for Address Book Synchronization to verify that address book synchronization is enabled and that the synchronization schedule is configured as expected.
-
Set the MTA log level to .
Status messages and error messages related to address book synchronization are logged when the MTA log level is set to Verbose, but not when the log level is set to Normal.
-
-
Run address book synchronization for the first time:
-
In the MTA Web console, click to display the Exchange synchronization settings.

-
Click to display the Exchange Synchronization page.
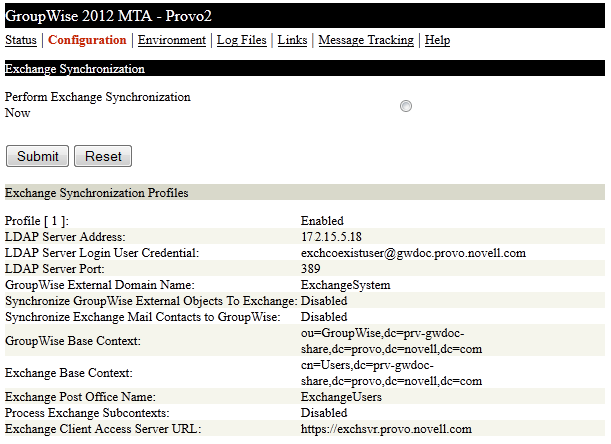
The details of the Exchange synchronization profile that you created in Section 2.6, Configuring the MTA for Address Book Synchronization are listed.
-
Verify the information that you provided in ConsoleOne.
-
Select , then click .
-
-
Check the MTA log file for status and error messages.
-
(Conditional) If any errors appear in the MTA log file:
-
Continue with Testing Address Book Synchronization.