4.2 Viewing Your Calendar
There are several different ways to view your GroupWise calendar, from a day view to a month view. Likewise, you can view your calendar and a proxy’s calendar at the same time.
All unaccepted items in your Calendar are italicized to help you easily identify which items you have not yet accepted.
4.2.1 Customizing Your Calendar Views When Viewing a Calendar
The Calendar has several view options. The view that is displayed when you exit your Calendar displays when you open the Calendar folder again.
-
In the Nav Bar, click , then click the buttons on the Calendar toolbar to choose different views.
Figure 4-1 Week View

Figure 4-2 Calendar View
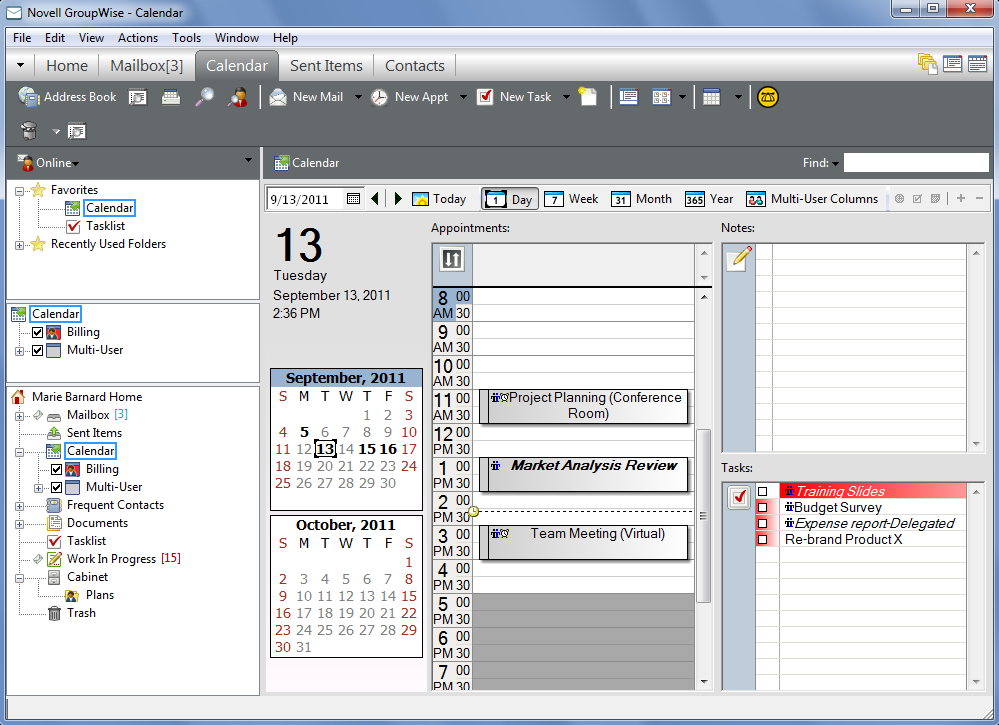
You can view the Calendar in various formats, including week, month, and year. To see another view, click a different button on the Calendar toolbar.
You can right-click any day in the Calendar to get more options. For example, you can see any day in an expanded view that displays in a separate window. You can also switch between Graphic Display and Text Display.
Fonts cannot be changed or modified in the calendar view. However, the text inside the appointment can be modified to other fonts, styles, and sizes.
If you want, you can close your folder list to leave more room for other views in the Main Window. Click > to open or close the Folder List display.
4.2.2 Switching the Calendar View Between Graphic Display and Text Display
-
Right-click the > click to show lines in the box.
or
Right-click the > click to remove existing lines.
This applies only to calendar views that have an Appointments List.
4.2.3 Selecting Calendars to Display
GroupWise has the ability to display multiple calendars in the main GroupWise calendar. You can select to view your main GroupWise calendar, personal calendars, and shared calendars.
-
In the Simple Folder List, in the Calendar view, select the calendar check box next to the calendars you want to display.
To display the Simple Folder List, click the folder list drop-down arrow
 (above the Folder List; it is to the right of Online or Caching), then click ,.
4.2.4 Viewing a Different Date in the Calendar
-
If the displayed view has a Calendar toolbar, click
 , then click a date.
or
If the displayed view has no toolbar, click > , specify a date, then click .
-
If the displayed view has a Calendar toolbar, click
 .
.
or
If the displayed view has no Calendar toolbar, click > .
Going to a different date is not applicable in some views.
4.2.5 Viewing All Day Events in the Calendar
All day events are located at the top of the calendar in the All-Day-Events pane when you are in the Day or Week calendar view.
For information on how to change your calendar view to a Day or Week view, see Navigating in the Calendar.
Figure 4-3 All-Day-Events Pane

4.2.6 Navigating in the Calendar
Use the Calendar toolbar to navigate in your calendar.
Figure 4-4 Calendar Toolbar

Table 4-1 Calendar Toolbar Button Descriptions
|
Button |
Description |
|---|---|
|
|
Select a date to view. |
|
|
Return to today’s date. |
|
|
Move forward or back one day, one week, one month, or one year, depending upon what the calendar display is set to. |

|
See a day view. |

|
See a week view. |

|
See a month view. |

|
See a year view. |

|
See a column view of your Multi-User Calendar. |
|
|
Show or hide appointments (on views where this applies). |
|
|
Show or hide tasks (on views where this applies). |
|
|
Show or hide reminder notes (on views where this applies). |
|
|
Adds another day in the week view. |
|
|
Remove a day from the week view. |


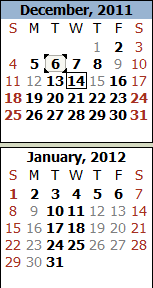
Use the month navigation to navigate to a different day when the or view is selected in the Calendar toolbar.
Figure 4-5 Month Navigation
4.2.7 Displaying Two Time Zones in the Calendar
You can display two different time zones in the calendar. In addition, you can quickly switch between the two time zones. This is helpful when you frequently travel between time zones, or when you need to schedule meetings across time zones.
-
Right-click in your Calendar and select .
-
Select .
-
Type a label for the additional time zone, such as London.
-
Select the time zone from the additional drop-down list.
-
Type a label for your workstation time zone.
-
Select the time zone where your workstation is located from the workstation time zone drop-down list.
-
Click
To swap the two time zones, click in the Additional Time Zone window. By clicking , you are also changing your machine’s time zone.
4.2.8 Working with Time and Date Differences
You can configure the Calendar to show the difference between two time zones and to calculate start and end dates based on a specified number of days.
Use Time Zone Difference to see the time zone in one locale based on the time zone in another. For example, if you are in New York, you can use Time Zone Difference to see the time in London.
You can calculate a starting or ending date based on a given date and a specified number of days. For example, you might have a deadline 90 days after a certain action. Date Difference lets you calculate the date the deadline will fall on.
Calculating a Start or End Date
-
Click > .
-
To calculate a start date when you know the end date, click the arrow buttons to move forward or backward one month or year at a time in the group box, then click a date.
or
To calculate an end date when you know the start date, use the arrow buttons to move forward or backward one month or one year at a time in the group box, then click a date.
-
Type a number in the text box.
-
Click , then view the calculated start date in the text box and calendar.
or
Click , then view the calculated end date in the text box and calendar.
4.2.9 Understanding the Calendar Item Icons
The icons that appear in your calendar give you additional information about items. For more information, see Section 1.10, Identifying Icons Appearing Next to Items.
4.2.10 Understanding Calendar Shading
Appointments on your calendar appear in different shades, depending on how the appointment is shown:
-
. The appointment displays as gray.
-
. The appointment displays as white.
-
. The appointment displays as dark gray.
-
. The appointment displays as gray with white and gray stripes on the side.
To change an appointment’s status:
-
Click > , then select , , , or .
4.2.11 Viewing Any Folder As a Calendar
This method of viewing your calendar is useful if you store all your appointments or other items for a specific project or client in one folder and want to see your schedule for that project only.
-
Click a project folder in the Folder List.
-
Click > > to display all scheduled, accepted items that are saved in that folder display.
4.2.12 Opening a New Calendar View
You can open a new Calendar view in a separate window outside your Calendar folder.
-
Click > then click a calendar view.
You can view the Calendar by day, week, week and month, month, and year.
Other views are also available, such as Desk Calendar, Notebook, Day Projects, Day Planner, and Project Planner. These views open in a separate window and provide alternatives to viewing your current calendar. Options such as the Desk Calendar provide a creative view of your appointments and tasks and still provide the flexibility to add appointments and tasks as needed.