2.3 Actions and Properties
The Intellisync Mobile Suite control menu offers specific actions and settings that are important for configuring and maintaining your system.
-
From the console tree, select .
-
Click .
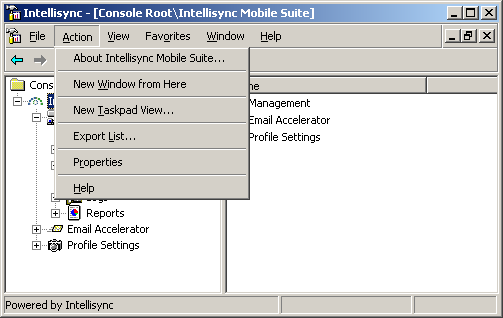
Because the Intellisync Mobile Suite control is an MMC snap-in, it uses many of the same operating conventions and terminology that you may be familiar with from using other MMC products. For example, the area on the left is called the console tree pane, and the area on the right is the details pane.
In addition to the menu items, which are available from most areas in MMC, there are two menu items specific to the Intellisync Mobile Suite control:
2.3.1 About Intellisync Mobile Suite
To view the About window:
-
From the console tree, select .
-
Click > .
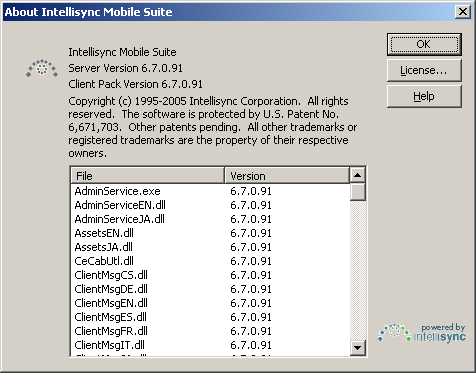
The About window shows copyright information and version numbers for the Intellisync software and your Intellisync Mobile Suite components.
Viewing Your License Information
-
From the console tree, select .
-
Click > , then click .
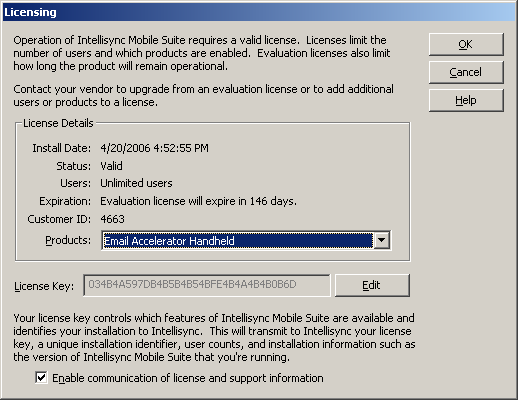
You license is based on the products and number of licenses you purchase. Evaluation licenses expire, but production licenses do not.
2.3.2 Intellisync Mobile Suite Properties
To view the Intellisync Mobile Suite properties:
-
From the console tree, select .
-
Click > .
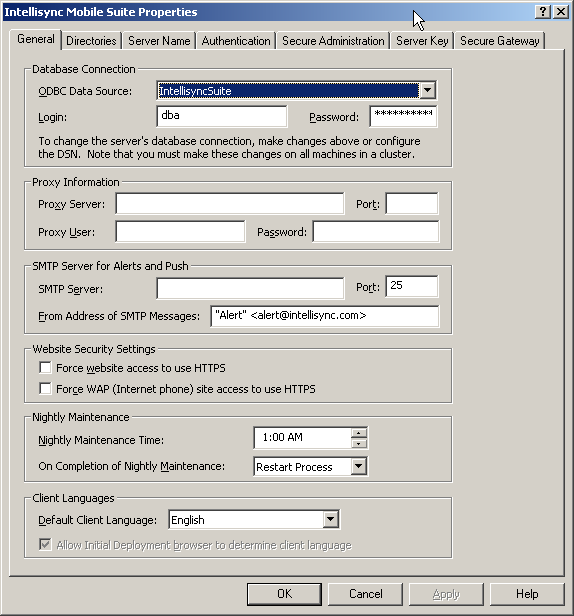
General Tab
The tab allows you to set your database connection, proxy and SMTP information, Web site security, nightly maintenance schedule, and your default client language.
-
From the console tree, select .
-
Click > .
Database Connection
The Intellisync Mobile Suite control stores information about users, groups, publications, and so forth, in a database. When you install the GroupWise Mobile Server software, the installation program creates an ODBC data source to connect to the database. The default data source name is Intellisync Mobile Suite.
-
ODBC Data Source: Displays the name of the current ODBC data source. Do not change this value unless you created a new database.
-
Login: Type the login name for the current ODBC data source.
-
Password: Type a password for the current ODBC data source, or you can leave the password field empty.
NOTE:If you use the Windows Control Panel to modify the ODBC data source, or if you change the login name and password in the database, you must also modify the Database Connection properties in the Intellisync Mobile Suite control.
Proxy Information
Use the Proxy Information fields for Intellisync Mobile Suite servers that must use a proxy server for access to the Internet.
-
Proxy server: Type the name of the computer acting as the proxy.
-
Port: Type the port number for the proxy server.
-
Proxy User: Type the user ID for the proxy server. (Complete this field only if you are using an authenticated proxy.)
-
Proxy Password: Type the password for the proxy server user ID. (Complete this field only if you are using an authenticated proxy.)
SMTP Server for Alerts and Push
If you plan to use Alerts or Push, you must specify the SMTP server information.
-
SMTP Server: Type the name of the SMTP server.
-
Port: Type the port number of the SMTP server.
-
From address of SMTP messages: Type the text you want to appear in the address field of your SMTP messages. This entry is only for messages that do not have a address, such as alerts generated by GroupWise Mobile Server.
Website Security Settings
For additional security, you can force Web access, WAP access, or both to use HTTPS, which is an extension to the HTTP protocol that supports sending data securely over the World Wide Web. This redirects users to a secure URL when necessary.
-
Force website access to use HTTPS: Forces all Web site access to use HTTPS as the communications protocol.
-
Force WAP Access to use HTTPS: Forces all WAP access to use HTTPS as the communications protocol.
Nightly Maintenance
Use this section to change settings for nightly maintenance.
-
Nightly Maintenance Time: You can configure the Intellisync Mobile Suite server to run nightly maintenance services at a preset time. The maintenance service completes by restarting the server. The default time for running the services is 3:00 a.m.
-
On Completion of Nightly Maintenance: Use this setting to control whether the server restarts at the end of the maintenance process. Novell strongly recommends that you select the default setting, .
Client Languages
Use this section to set the default client language.
-
Default Client Language: Select the default client language: English, German, French, Italian, Czech, Portuguese, or Spanish.
-
Allow Initial Deployment browser to determine client language: Use this setting to allow the browser to determine the client language.
Directories Tab
Use the tab to specify the disk location to store data used by GroupWise Mobile Server.
-
From the console tree, select .
-
Click > , then click the tab.
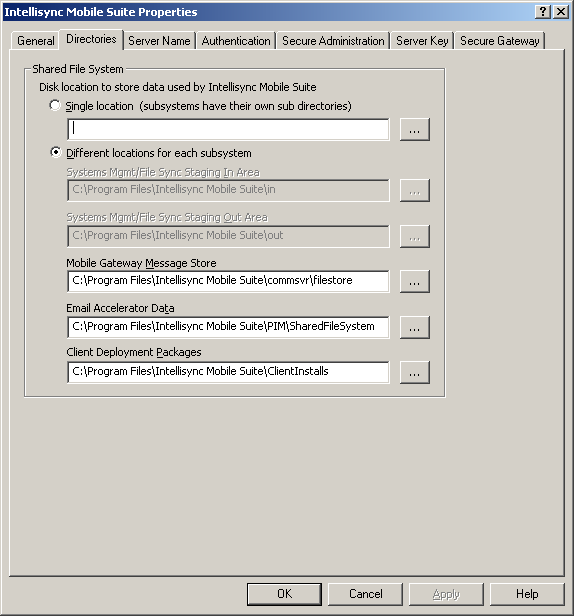
Single Location
Select this location to have all data stored in a single directory with each subsystem having its own subdirectory.
Type the parent directory location in the field or browse to and select the location.
Different Location
Select this location if you need to have a different location to store data for each subsystem.
-
Systems Mgmt/File Sync Staging In Area: This option is dimmed greyed out because system management and file sync are not part of GroupWise Mobile Server.
-
Systems Mgmt/File Sync Staging Out Area: This option is dimmed greyed out because system management and file sync are not part of GroupWise Mobile Server.
-
Mobile Gateway Message Store: Specify the location to store the Mobile Gateway message store data.
-
Email Accelerator Data: Specify the location to store the Email Accelerator data.
-
Client Deployment Packages: Specify the location to store the client deployment packages.
Server Name Tab
Use the tab to specify the server names that are part of your GroupWise Mobile Server system. Use fully qualified server names. Usually, all server names are the same, but in some advanced configurations, the server names might be different from each other. The Web site and sync server names might point to a reverse proxy, for example, at least for communications coming from outside the firewall. The internal server name is used only inside the firewall and should never go through a reverse proxy because it is used for non-HTTP traffic.
-
From the console tree, select .
-
Click > , then click the tab.
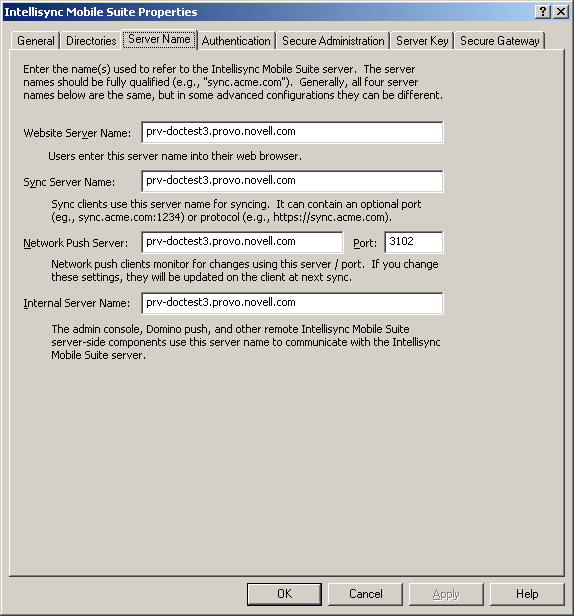
Use the following information to set options related to server names.
-
Website Server Name: The server name that users type into their browser to access the Web site.
-
Sync Server Name: The server name used for synchronization. This name is stored on client devices.
-
Network Push Server: The name of the server that handles network or IP push.
-
Port: The port number for the network push server.
-
Internal Server Name: The server name that the Intellisync Mobile Suite control (local or remote), Domino* push, and other internal components use to communicate with the Intellisync server.
Authentication Tab
By default, GroupWise Mobile Server authenticates users by their GroupWise user ID and password.
To view and edit the current authentication settings:
-
From the console tree, select .
-
Click > , then click the tab.
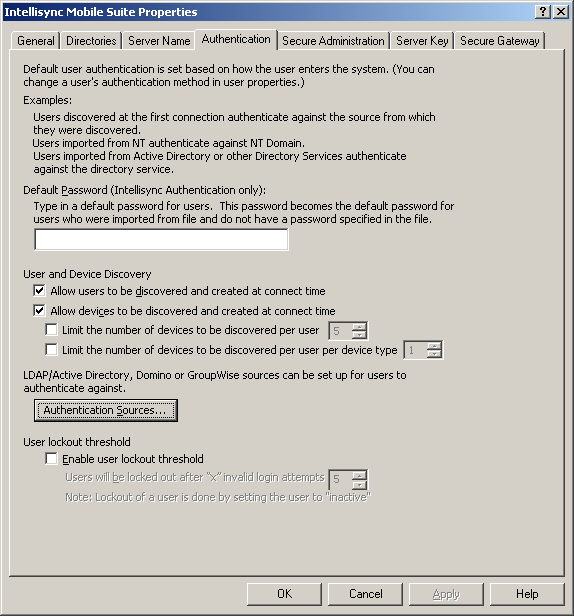
Use the following information to set options related to authentication.
-
Default Password (Intellisync Authentication only): Use this field to supply a password for imported users who do not have a password specified in the import file. (This field applies for Intellisync authentication only.)
-
Allow users to be discovered and created at connect time: User discovery is a feature whereby users are recognized and have user accounts created for them when they connect to the server for the first time. Select this option to enable this feature.
-
Allow devices to be discovered and created at connect time: Select this option to allow the system to discover, authenticate, and add devices that are not in the system. By not selecting this option, you can authenticate only devices that already exist in the system.
-
Authentication Sources: Click Authentication Sources if you want to set up additional authentication sources. GroupWise and Intellisync authentication are available as soon as GroupWise Mobile Server software installation finishes.
For additional information and guidelines for setting up authentication, see Section 6.0, Authenticating Users .
Secure Administration Tab
Use the tab to set permissions and restrict access to the Intellisync Mobile Suite control.
-
From the console tree, .
-
Click > , then click the tab.
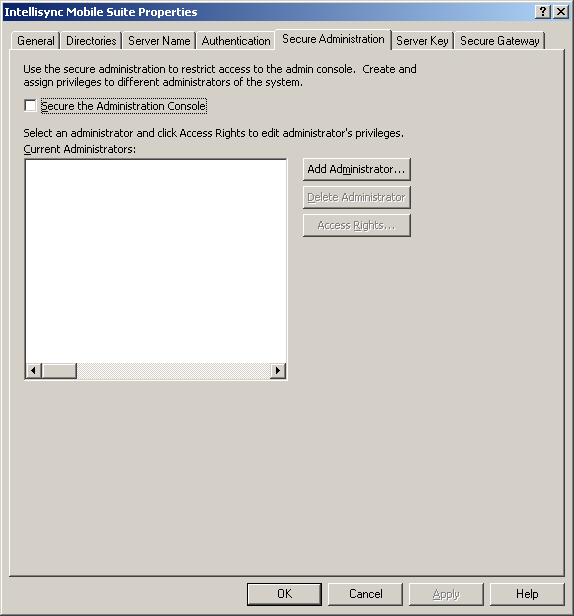
Use the following information to set access options for the Intellisync Mobile Suite control.
-
Secure the Administration Console: Select this option to restrict access to the Intellisync Mobile Suite control. Only users you specify as administrators can access the Intellisync Mobile Suite control when you enable this option.
-
Add Administrator: Click to create control administrators and grant permission to additional users.
Server Key Tab
Use the tab to enable Server Key Exchange, a security feature that exchanges a unique key between the server and the clients.
-
From the console tree, select .
-
Click > , then click the tab.
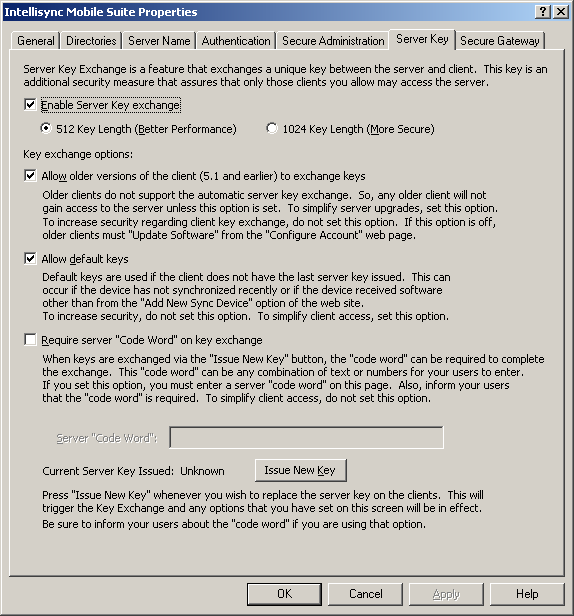
Use the following information to enable Server Key Exchange, a security feature that exchanges a unique key between the server and the clients.
-
Enable Server Key exchange: Select this feature to ensure that only clients you specify can access the server. Select the key length you want to use.
- 512-key length (Better Performance)
- 1024-key length (More Secure)
Client devices cannot connect if you disable key exchange and issue a new key.
Use the following information to set the key exchange options.
-
Allow older versions of the client to exchange keys: Select this option to allow older versions of the client to exchange keys with the server. If you diable this option, only clients running current software can participate in key exchange. That is, devices running older versions of client software cannot connect.
-
Allow default keys: Although this setting slightly decreases security, it simplifies access for clients. With this option set, Intellisync Mobile Suite uses default keys if the client does not have the most recent server key. This can happen if a device does not synchronize often or if the device received client software in a manner other than the Add New Sync Device page of the Web site. To increase security, do not set this option.
-
Require server “Code Word” on key exchange: You can add a special code that users must enter to complete the key exchange.
-
Server Code Word: The code word can be any combination of text or numbers. If you add a code word, inform your users of the code to ensure successful synchronizations.
-
-
Issue New Key: Click to replace the server key for the clients. This action triggers the Key Exchange process the next time the client connects, and implements any options you set on this panel.
Secure Gateway Tab
Use the tab to add, remove, and change the port of any Secure Gateway servers. The server intercepts the HTTP requests from mobile devices and then routes the requests through TCP/IP to a specific port that you define. The process encrypts all traffic end-to-end.
-
From the console tree, select .
-
Click > , then click the tab.
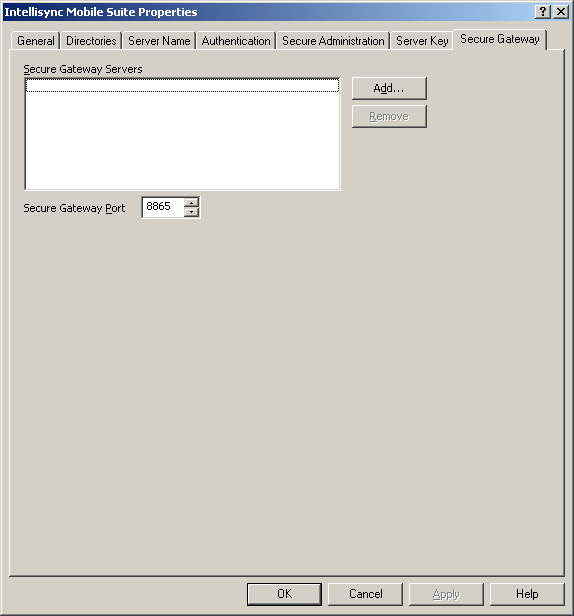
Use the following information to set Secure Gateway servers for the Intellisync Mobile Suite control.
-
Add Administrator: Click to create control administrators and grant permission to additional users.
-
Secure Gateway Port: Specify the port number to use for GroupWise Mobile Server to communicate with the Secure Gateway server.