3.2 Working With Users
All Intellisync Mobile Suite products share a common list of users and groups. Select the Users control to view a list of all users in the details pane.
Figure 3-1 Intellisync Mobile Suite control: Users
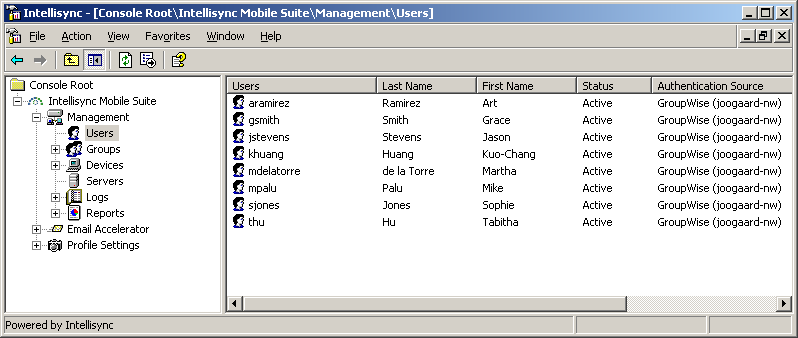
Each person who sends and receives information must have a unique user account. When a user connects, the server needs the user ID to identify the user and determine which information the user can access or update.
This section contains the following information:
This guide provides a general overview of each task. You can click for step-by-step instructions for completing the tasks.
3.2.1 Adding a New User
Depending on how your system is set up, you can add new users to your system through the Intellisync Mobile Suite control.
The method you are using to authenticate users determines the way in which you add new users. For example, if you are using GroupWise® authentication, new users are added automatically when connecting for the first time (after the server is set up and configured properly). If you are using Intellisync authentication, then add or import new users using the Intellisync Mobile Suite control.
Adding Users Through Auto Discovery
If you are using GroupWise authentication, there is no need to manually add users through the Intellisync Mobile Suite control. The feature that enables the server to recognize a new user and create a record upon the first connection is called auto discovery. Accounts created through auto discovery appear in the list of users along with all other user accounts.
Auto discovery is enabled by default. To change this setting:
-
From the console tree, select .
-
Click > , then click the tab.
-
Deselect .
For more information about GroupWise Authentication, see Section 6.0, Authenticating Users .
Adding Users Through the Intellisync Mobile Suite Control
To add users manually using the Intellisync Mobile Suite control, complete the following steps.
-
From the console tree, click > .
-
Click > .
-
Add a unique user ID, password, and optional information as needed.
For more information on completing this task, click .
The Intellisync Mobile Suite control creates an account for the new user and places an entry in the details pane. You must create the user account before the user connects for the first time unless you are using auto discovery.
Users you add manually through the Intellisync Mobile Suite control are set up for Intellisync Authentication by default. You can view and change the authentication method for a user on the tab of the user’s properties.
NOTE:If you are using the auto discovery option through GroupWise authentication, Intellisync Mobile Suite adds new users when they connect for the first time. If you are using GroupWise authentication, do not manually add users through the Intellisync Mobile Suite control.
3.2.2 Importing Users
To save time, you can import and synchronize users rather than creating an account for each user manually or through auto discovery. You can import users from a text file.
Importing Users From a Text File
To create user IDs for a large number of users, you can prepare a text file containing the user IDs and import the users from the file.
-
Prepare a text file containing user information.
The text file should have one user ID per line.
-
In the console tree, click > .
-
Click > .
-
Locate the text file and click .
-
Use the Properties dialog box to enter additional information and a password for each new user.
For more information on completing this task, click .
GroupWise Mobile Server imports user information and creates the user IDs. The imported users are not assigned to a device type. When a user connects with a specific device, that device type is registered for the user.
Adding users this way allows you to use Intellisync Authentication by default. You can view and change the authentication method for a user on the tab of the user’s properties.
NOTE:If you specify a default password in the tab of the Intellisync Mobile Suite control properties, this is the password for the new users unless you define a different one in the text file.
Using Tokens with Text Files
If you want to import additional user information, you can use tokens separated by tabs to include various properties for each user. The following tokens are available to use in your text files:
- $password=<password for this user>
- $description=<descriptive text about this user>
- $firstname=<user’s first name>
- $lastname=<user’s last name>
- $addtogroup=<group name to which the user should be a member>
- $active=<f0 or 1, where 0 indicates inactive and 1 indicates active>
- $alertdevice=<phone, pager, or e-mail>
- $alertphonenumber=<phone number of the alert device>
- $alertemailaddr=<e-mail address to receive alerts>
- $alertcarrier=<Verizon, Sprint, AT&T Wireless, Alltel, T-Mobile, or Cingular>
- $emailAddress=<user’s e-mail address>
- $language=<two-character country code. Valid entries are EN (English), FR (French), ES (Spanish), DE (German), JA (Japanese)>
- $timezone=<time zone specification>
For a list of possible time zones, see Time Zone Reference.
- $authtype=<GroupWise identification
source ID>
If you select to use $authtype, you must use the GroupWise identification source ID. You must get the GroupWise identification source ID from the GroupWise Mobile Server database. For instructions on how to do this, contact Intellisync support.
- $sync=<1. This triggers a sync after configuration>
- $serverdevice=<GroupWise,<ID>
where the ID is the XML translator identifier; for example, 100.>
If $serverdevice is specified, then any parameters following $serverdevice will be passed to the server connection until the end of line or another $serverdevice is specified.
- If $serverdevice= GroupWise:
- $GWServer=<GroupWise server>
- $GWPort=<GroupWise port number>
- $GWUuid=<GroupWise user unique ID>
- $GWDisplayName=<GroupWise user full name>
- $GWUser=<GroupWise user name>
- $GWPassword=<GroupWise user password. This parameter is not required for trusted application access>
- If $serverdevice = XML,<ID>:
- $XMLUser=<followed by the XML user ID>
- $XMLPassword=<XML password for the user>
- $XMLCompany=<company name on the server>
To ensure a successful import, review the tokens for accuracy and separate each with a tab.
Time Zone Reference
- “Abu Dhabi, Muscat”
- “Adelaide”
- “Alaska”
- “Almaty, Novosibirsk”
- “Amsterdam, Berlin, Rome, Vienna”
- “Arizona”
- “Astana, Dhaka”
- “Athens, Istanbul, Minsk”
- “Atlantic Time (Canada)”
- “Auckland, Wellington”
- “Azores”
- “Baghdad”
- “Baku, Tbilisi, Yerevan”
- “Bangkok, Hanoi, Jakarta”
- “Beijing, Chongqing, Hong Kong, Urumqi”
- “Belgrade, Bratislava, Budapest, Prague”
- “Bogota, Lima, Quito”
- “Brisbane”
- “Brussels, Copenhagen, Madrid, Paris”
- “Bucharest”
- “Buenos Aires, Georgetown”
- “Cairo”
- “Calcutta, Chennai, Mumbai, New Dehli”
- “Canberra, Melbourne, Sydney”
- “Cape Verde Is.”
- “Caracas, La Paz”
- “Casablanca, Monrovia”
- “Central America”
- “Central Time (US & Canada)”
- “Chihuahua, La Paz, Mazatlan”
- “Darwin”
- “Dublin, Edinburgh, Lisbon, London”
- “Eastern Time (US & Canada)”
- “Ekaterinburg”
- “Fiji, Marshall Is.”
- “Greenland”
- “Guam, Port Moresby”
- “Harare, Pretoria”
- “Hawaii”
- “Helsinki, Tallinn”
- “Hobart”
- “Indiana (East)”
- “International Date Line West”
- “Irkutsk, Ulaan Bataar”
- “Islamabad, Karachi, Tashkent”
- “Jerusalem”
- “Kabul”
- “Kathmandu”
- “Krasnoyarsk”
- “Kuala Lumpur, Singapore”
- “Kuwait, Riyadh”
- “Mexico City”
- “Mid-Atlantic”
- “Midway Island, Samoa”
- “Moscow, St. Petersburg, Volgograd”
- “Mountain Time (US & Canada)”
- “Nairobi”
- “Newfoundland”
- “Noronha”
- “Nuku'alofa”
- “Osaka, Sapporo, Tokyo”
- “Pacific Time (US & Canada); Tijuana”
- “Perth”
- “Rangoon”
- “Santiago”
- “Sao Paulo”
- “Sarajevo, Sofija, Warsaw, Zagreb”
- “Saskatchewan”
- “Seoul”
- “Solomon Is.”
- “Sri Jayawardenepura”
- “Taipei”
- “Tehran”
- “Vladivostok”
- “West Central Africa”
- “Yakutsk”
3.2.3 Changing a User’s Group Memberships
After you create user and group accounts, you can add or remove a user as needed. All new users are automatically assigned to the New Users and All Users groups.
To add or modify group memberships for a user:
-
From the console tree, click > .
-
In the details pane, select the user ID whose group memberships you want to change.
-
Click > .
-
Click or to change the groups to which the user belongs.
-
Click .
3.2.4 Assigning or Editing User Profiles
Generally, profiles are assigned to groups; however, you can assign profiles to individual users. These user profiles take precedence over the profile for the group to which the user belongs.
In the console tree, the option is available if the user already has a profile. If the user does not have an assigned profile, the option appears. Users with no assigned profile, either individually or through groups, automatically receive a default profile.
-
From the console tree, click > .
-
In the details pane, select the user ID to which you want to assign or edit profiles.
-
Click Action > or .
-
Use the tabs and lists to select profiles for each of the user’s devices.
-
Click .
3.2.5 Deleting a User
You can delete user accounts that you no longer need. When you delete a user, GroupWise Mobile Server deletes the Mobile Suite information for the user and forwards the delete request onto all of your installed Mobile Suite products. The products ensure that data files and database entries specific to that user are removed from the system.
-
From the console tree, click > .
-
In the details pane, select the user ID you want to delete.
-
Click > .
-
Click Yes.
3.2.6 Using the Properties Dialog Box to Manage User Information
After you create a user account, you can use the Properties dialog box to add or change user information. This gives you easy access to the same user information you can access using menu options. To make several changes for one user, you might find that using the Properties dialog box is faster than using the menus.
From the Properties dialog box, you can:
- Modify or add information about a user
- Assign or remove a user from a group
- Add or remove publications subscriptions
To use the Properties dialog box:
-
From the console tree, click > .
-
In the details pane, select the user ID.
-
Click > .