8.2 Setting Up Microsoft Outlook Clients
Complete the tasks in the following sections to set up Outlook clients to access GroupWise:
8.2.2 Adding a GroupWise Account to the Microsoft Outlook Client
The Outlook client must be configured to access a user’s GroupWise account. The following instructions assume that the Outlook client is already installed on the desired machine. There are two ways to add a GroupWise account to the Microsoft Outlook Client: manually or using the GroupWise profile setup tool.
Using the GroupWise Profile Setup Utility
Before using the GroupWise Profile Setup utility, you can configure it so less information needs to be entered by the end users. The GroupWise Profile Setup utility is found in /opt/novell/datasync/tools/GWProfileSetup.zip.
Configuring the GroupWise Profile Setup Utility
Configuring the GroupWise Profile Setup utility allows you as an administrator to customize the utility and fill out global information for your users. You can also use it to import certificates for Free/Busy, GMS, and an LDAP address book if you do not use commercial certificates or your CA certificate is not found in the Windows Certificate Authority Store. You can follow the steps found in Gathering CA Certificates in the GroupWise Mobility Service 2014 R2 Security Enhancements Quick Start if you need help gathering the certificates.
If you do not want to customize the utility, skip to Using the GroupWise Profile Setup Utility.
-
Download the GWProfileSetup.zip from the GMS server and extract the files to a temporary location on your workstation.
-
Edit GWProfileSetup.ini using the information in the file to modify the variables.
-
Zip up the 64bithelper.exe, GWProfileSetup.exe, GWProfilSetup.ini, and any CA certificates needed and deliver the zip file to your users so they can create the GroupWise Profile for Outlook on their Windows machines following the steps in Using the GroupWise Profile Setup Utility.
Using the GroupWise Profile Setup Utility
The steps below allow your users to create the GroupWise Profile for Outlook on their Windows workstation. The same steps must be followed whether or not you configured the utility.
-
Extract the GWProfileSetup.zip to a temporary location on your workstation.
-
Launch the GWProfileSetup.exe.
-
(Conditional) Accept any certificates that needed to be added to your machine.
-
Enter in the information required to create the GroupWise Profile for Outlook.
Creating the GroupWise Account Manually
-
On the machine, open > .
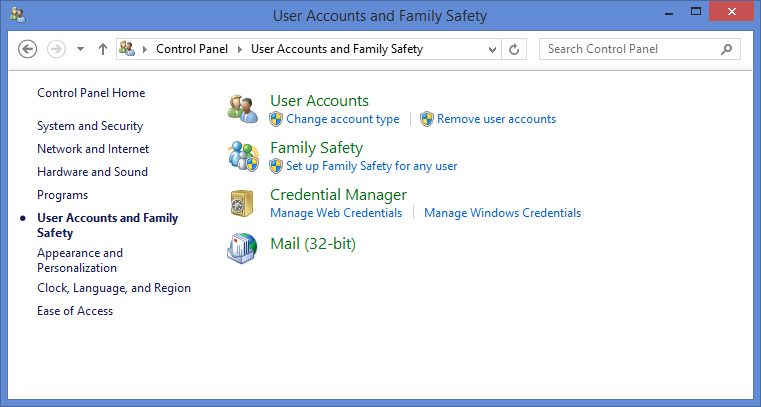
-
Click .
-
(Conditional) If a Mail Setup dialog box is displayed, click to display the Mail dialog box.
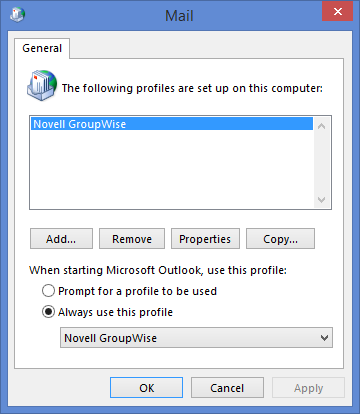
If GroupWise is installed on the machine, the Profiles list includes a profile, as shown in the screenshot above. You need to keep this profile and create a new profile.
-
Click to create a new profile.
-
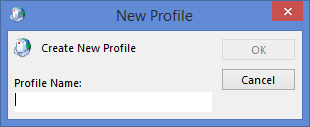
Specify a name for the profile (for example, Outlook GroupWise Account), then click to display the Add Account dialog box.
-
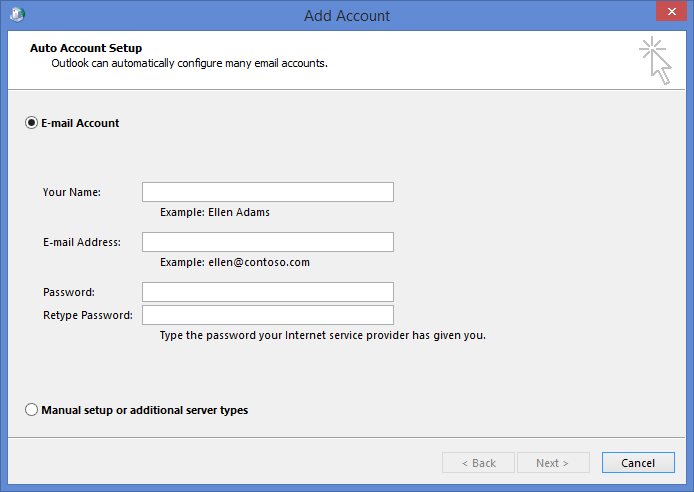
Select , then click .
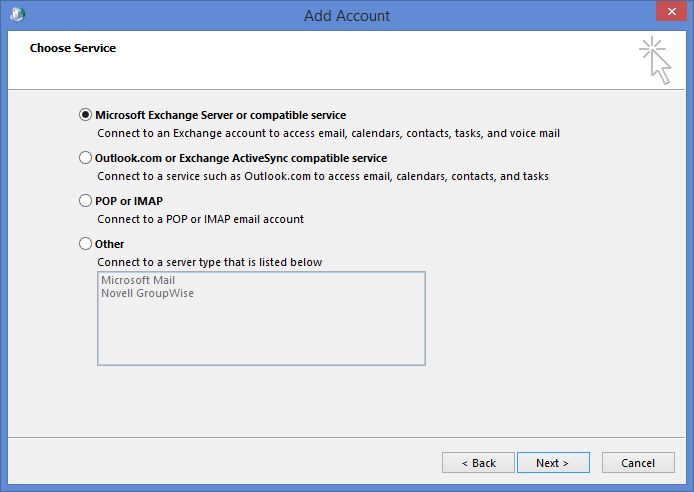
-
Select , then click .
-
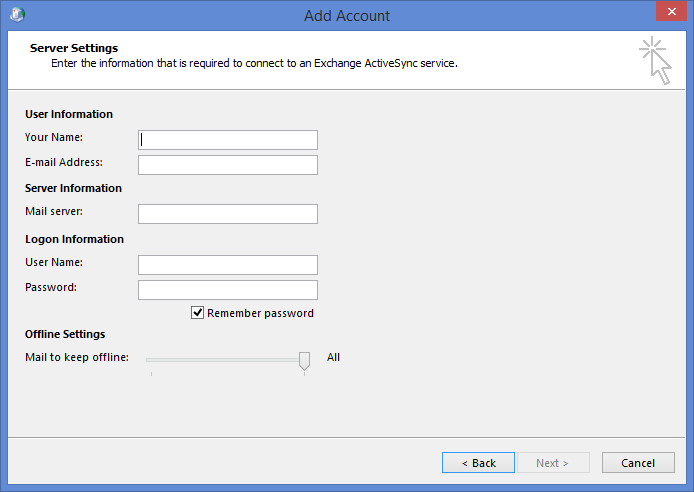
Provide the following information, then click .
Your Name: The GroupWise user’s full name (for example, Sarah McBride).
E-mail Address: The user’s GroupWise address (for example, smcbride@acme.com).
Mail Server: The GroupWise Mobility Server name or IP address (for example, gms.acme.com).
User Name: The user’s LDAP user name or GroupWise user name, depending on whether LDAP or GroupWise is being used for the authentication source.
Password: The password associated with the user name.
-
When the account settings have been verified, click to dismiss the verification dialog box.
-
Click to return to the profiles dialog box.

-
Select one of the following options, then click to save your changes.
-
Prompt for a profile to be used: Select this option if the Outlook client will be used to access multiple email accounts and the user wants to be prompted to select an account when starting the client.
-
Always use this profile: Select this option if the user wants to always open the GroupWise account when starting the client, then select the Outlook GroupWise account in the list.
-
-
Launch the Outlook client.
The client begins synchronizing data from the GroupWise account.