7.4 Setting Up the GroupWise Agents
After creating a new domain or post office, you need to configure the Agent object that was automatically created with it, then follow the setup instructions for the platform where you are installing the GroupWise agents:
7.4.1 Configuring New Agent Objects in eDirectory
When you create new post offices and domains, Agent objects are automatically created for them. Most agent configuration can be done after installation, but a few settings should be established before you install the agent software.
-
In ConsoleOne, browse to and expand the eDirectory container where the new post office or domain is located to display its contents.
-
Select the Post Office object or Domain object to display its contents.
-
Right-click the Agent object, then click to display the agent Identification page.
-
In the field, type a brief description of the agent for display at the agent server console.
-
In the field, select , , or .
-
Click to save the new Agent object properties.
-
Repeat these steps for each new post office and domain for which you are installing agents.
-
Continue with the installation instructions for the platform where you are installing the GroupWise agents.
7.4.2 NetWare: Setting Up the GroupWise Agents
Complete the following tasks to set up the NetWare agents. These tasks are designed to help you get the POA and MTA up and running as quickly as possible.
IMPORTANT:If you plan to install the GroupWise agents in a clustered server environment, see the GroupWise 7 Interoperability Guide before you install the agents.
Refer to the following additional tasks as you maintain all the GroupWise agents on NetWare:
Preparing the NetWare Server for the Agents
Make sure the NetWare server where you plan to install the GroupWise agents has been properly prepared to run the agents:
Obtaining a Static IP Address for the NetWare Server
The NetWare server where the GroupWise agents run should have a static IP address. DHCP should not be used to dynamically assign an IP address for it. Make sure the server where you plan to install the agents has a static IP address.
Setting Recommended NetWare Server Parameters for the NetWare POA
Some default settings on the NetWare server where you plan to run the NetWare POA might be inadequate for configurations of more than 100 concurrent client/server user connections. If your anticipated post office size indicates a need for more than 100 concurrent client/server connections, check the server parameters on the NetWare server to make sure they are adequate for the anticipated number of GroupWise client connections. For example, in a medium-size post office of 500 users, use the following settings:
Setting Recommended NSS Parameters for the NetWare POA
If you run the NetWare POA on NetWare 5.1 or 6.x Novell Storage Services™ (NSS) volumes, you can significantly improve GroupWise performance by using the following parameters and settings on the nss command in the autoexec.ncf file:
/NameCacheSize=20000
/OpenFileHashShift=15
/ClosedFileCacheSize=50000
/CacheBalance=60
The best /ClosedFileCacheSize setting for a server depends on many things, such as the amount of memory on the server, the load on the POA, and the number of other programs running on the server. For example, the 50000 setting can work well for a server that has 650 MB of memory. Experiment with various settings in order to optimize performance.
The following TID, although originally written for GroupWise 5.x and NetWare 5.x, applies to GroupWise 7 and NetWare 6.x as well:
Setting Recommended NetWare Server Parameters for the NetWare MTA
The default Maximum Packet Receive Buffers setting on a NetWare server is inadequate for the NetWare MTA in configurations that include numerous TCP/IP and remote file connections. Set Maximum Packet Receive Buffers to at least 2500 for the NetWare MTA in such configurations.
Creating a NetWare Account for Agent Access (Optional)
When the GroupWise agents run on a different NetWare server from where their directories and databases are located, and they are not set up to authenticate through eDirectory (using the /dn startup switch), the agents must use a specific eDirectory username and password to log in to that server.
To create a user for the agents to log in as:
-
In ConsoleOne, create a new user (such as GWAgents).
-
Provide a password for that user (such as GWise).
-
Grant that user the following rights to all domain, post office, and document storage directories:
-
Read or execute files
-
Write to files
-
Create files or directories
-
Erase files or directories
-
Modify files (rename or change attributes)
-
File scan
-
-
After you install the agent software, add the /user and /password startup switches to the agent startup files so that the agents can log in to the remote server as the user you have created.
Adding the NetWare Agent Installation Directory to the Server Search Path (Optional)
If you have selected a directory other than sys:\system to install the agents to (worksheet item 3), add the agent installation directory to the server search path by adding a search command to the autoexec.ncf file.
Installing the NetWare Agent Software
After you have prepared the NetWare server to run the GroupWise agents, you are ready to install them.
At a Windows machine that meets the administrator machine requirements listed in Section 2.1, GroupWise Administration Requirements:
-
Map a drive to the NetWare server where you want to install the agents.
-
Make sure you have sufficient rights to install software in the desired directory.
-
Insert the GroupWise 7 Administrator for NetWare/Windows CD into the CD drive to start the GroupWise Installation program, then click . If the Installation program does not start automatically, run setup.exe from the root of the CD.
or
If you have already copied the agent software to a software distribution directory, run agents\install.exe to start the Agent Installation program.

-
Follow the prompts to provide NetWare Agent information from your Basic GroupWise System Worksheet.
-
Click to install the NetWare agents.

The Agent Installation program has created a grpwise.ncf file that contains the commands to start the GroupWise agents on the NetWare server whenever the server starts. Here at the end of the Agent Installation program, you can select how you want to start the agents.
Update AUTOEXEC File: Select this option if you want the Agent Installation program to add the grpwise.ncf file to the NetWare autoexec.ncf file so that the agents start automatically whenever the server restarts.
Launch GroupWise Agents Now: Select this option if you want the Agent Installation program to start the agents for you immediately. This is appropriate when you have installed the agents on the same server with the domain and post office directories.
If you have installed the agents on a remote server from where the domain and post office directories are located, do not select this option. You must manually edit the agent startup files to configure the agents to access the remote servers. This configuration procedure is explained in Editing the NetWare Agent Startup Files.
Launch in Protected Mode: If you want the Agent Installation program to launch the agents for you, you can choose to launch them in Protected Mode on NetWare 5.1 and later. This option also adds the protect command to the grpwise.ncf line in the NetWare autoexec.ncf file:
protect grpwise.ncf
This line automatically starts the agents in Protected Mode when the server restarts.
-
Select the desired agent startup options, then click .
If you want to start the agents later or if the Agent Installation program fails to start them successfully, see Starting the NetWare GroupWise Agents.
-
If necessary, modify the agent startup files as described in Editing the NetWare Agent Startup Files, then manually start the NetWare agents by running grpwise.ncf.
-
To monitor an agent from your Web browser, view the agent Web console by supplying the IP address and port number of the agent. For example:
http://172.16.5.18:1677
http://172.16.5.18:7100
http://172.16.5.18:7180
http://172.16.5.18:7181
When viewing the agent Web console, you can specify the POA client/server port, the MTA message transfer port, or the default HTTP port that is established during installation. The POA client/server port and the MTA message transfer port are automatically redirected to their respective HTTP ports.
Editing the NetWare Agent Startup Files
The Agent Installation program creates a customized agent startup file for each domain and post office location. The first 8 characters of the post office and domain names became the names of the agent startup files, along with an agent-specific extension. For example, if the post office name is acctpo, then the POA startup file is named acctpo.poa. The Agent Installation program also customizes each startup file with the correct /home switch setting, pointing to the domain or post office directory.
Each startup file also provides a comprehensive list of startup switches, with all but the /home switch commented out. You can use any ASCII text editor to set the startup switches. The agent startup files are located in the agent installation directory.
When the MTA is not on the same server as the domain directory, you need to edit the MTA startup file to include the MTA’s eDirectory distinguished name. When the POA is not on the same server as the post office directory, you need to edit the POA startup file to include the POA’s eDirectory distinguished name.
The /dn-distinguished_object_name startup switch is located in Section 1 of the startup file. Delete the semicolon (;) at the beginning of the line and replace the distinguished_object_name variable with the distinguished name of the MTA or POA. For example, if the MTA is for a domain named Provo that is located in a container named Novell, you would enter:
/dn-mta.provo.novell
After modifying the startup files, use the grpwise.ncf file to start the NetWare agents from the NetWare server console.
If you want to learn more about running the NetWare agents, continue with Starting the NetWare GroupWise Agents. If you want to customize the configuration of the NetWare agents or expand your GroupWise system, skip to Section 7.5, What’s Next.
Starting the NetWare GroupWise Agents
You might have one or more GroupWise agents installed on each NetWare server in your GroupWise system. You can start the GroupWise agents on NetWare in several ways:
If you encounter any problems starting the GroupWise agents, see Strategies for Agent Problems
in GroupWise 7 Troubleshooting 2: Solutions to Common Problems for assistance.
Manually with a Load Command
You can use the NetWare load command to start the NetWare GroupWise agents at the NetWare server console or a remote console:
|
POA: |
load gwpoa.nlm @ startup_filename.poa
|
|
MTA: |
load gwmta.nlm @ startup_filename.mta
|
|
Internet Agent: |
load gwia.nlm @gwia.cfg |
|
WebAccess: |
load gwinter @startup_filename.waa
|
The startup file for the POA is named after the post office. The startup file for the MTA is named after the domain. The startup file for the Internet Agent is always gwia.cfg. The WebAccess Agent startup file is named after the WebAccess Agent object in eDirectory (typically webacc70a).
At the NetWare server console or remote console, you can use the agent server consoles described in the GroupWise 7 Administration Guide:
Manually with an NCF File
For your convenience, the GroupWise Agent Installation programs create NCF files for starting the NetWare GroupWise agents:
During installation, the grpwise.ncf file is configured with one or more POA and/or MTA load commands depending on the domains and/or post offices you listed during installation.
Automatically in the Server’s Autoexec.ncf File
When the GroupWise agents are running smoothly, you should modify the main NetWare configuration file (autoexec.ncf) to load the NetWare GroupWise agents automatically whenever you restart the server. You can add either the load commands or the NCF commands to the autoexec.ncf file.
When you are not at the NetWare server console, you can monitor the GroupWise agents from their Web consoles described in the GroupWise 7 Administration Guide:
Stopping the NetWare GroupWise Agents
At the NetWare server console, use Exit (F7). If a GroupWise agent does not respond to Exit (F7), you can use the unload command to unload the agent NLM. For WebAccess, you can use the stopweb command.
Uninstalling the NetWare GroupWise Agents
If you move the GroupWise agents to a different server, you can uninstall the agent software from the old location to reclaim disk space.
|
POA and MTA: |
Stop the POA and the MTA, then run the Agent Installation program (install.exe) in the \agents subdirectory of the GroupWise software distribution directory or GroupWise 7 Administrator for NetWare/Windows CD. On the Install/Uninstall page, select , then follow the prompts. |
|
Internet Agent: |
Stop the Internet Agent. If no other GroupWise agents are running on the server, delete the Internet Agent software files listed in |
|
WebAccess: |
Stop the WebAccess Agent. Delete the WebAccess Agent software files listed in |
IMPORTANT:If you added load commands to the autoexec.ncf file to automatically start the agents when the NetWare server starts, edit the autoexec.ncf file and remove the agent load commands.
7.4.3 Linux: Setting Up the GroupWise Agents
Complete the following tasks to set up the Linux agents. These tasks are designed to help you get the Linux agents up and running as quickly as possible.
IMPORTANT:If you plan to install the GroupWise agents in a clustered server environment, see the GroupWise 7 Interoperability Guide before you install the agents.
Refer to the following additional tasks as you maintain all the GroupWise agents on Linux:
Installing the GroupWise Agents on Linux
-
In a terminal window, become root by entering sux and the root password.
The sux command enables the X Window System, which is required for running the GUI GroupWise Installation program. If you are not using the X Window System, you can install GroupWise components individually, as described in Installing the GroupWise Agents Using the Text-Based Installation Program.
-
Change to the root of the GroupWise 7 Administrator for Linux CD.
-
Start the GroupWise Installation program.
./install
-
Select the language in which you want to run the GroupWise Installation program, then click .
NOTE:On Linux, all available languages are included in the same RPM, so all languages are always installed.

-
Click .
-
When the installation is complete, click .
The GroupWise agent software is installed to /opt/novell/groupwise/agents.
-
Click .
The agent installation and configuration steps are separate so that you can install updated agent software without repeating the agent configuration steps.

-
Follow the prompts to provide Linux Agent information from your GroupWise Agent Installation Worksheet.
On the Configuration Complete page, is selected by default.
IMPORTANT:If you want to configure the agents for high availability, as described in Enabling the High Availability Service for the Linux GroupWise Agents, they must be configured to start automatically on system startup.
-
If you do not want the agents to start automatically when the server restarts, deselect .
-
Click to complete the configuration.
-
Skip to Starting the Linux Agents with a User Interface or Starting the Linux GroupWise Agents as Daemons depending on whether or not you want a user interface on the Linux server where the agents run.
Installing the GroupWise Agents Using the Text-Based Installation Program
If you want to install any of the GroupWise agents on a server where the X Window System is not running, you can use the text-based GroupWise Installation program. You must use ConsoleOne to create the associated domain or post office before you can configure the agent software.
-
Make sure you are logged in as root.
-
Change to the root of the GroupWise 7 Administrator for Linux CD.
NOTE:If you need to perform the installation from a remote location, you can use ssh to access the remote Linux server. Copy the GroupWise 7 Administrator for Linux CD to the server where you want to install the agent software, then run the text-based GroupWise Installation program to install the agents on the Linux server.
-
Start the GroupWise Installation program.
./install
-
Enter the number of the language you want to use for the installation.
-
Enter the number of the language you want to use for reading the License Agreement.
-
Press any key to scroll through the License Agreement, then enter y to accept the License Agreement.
-
In the list of agents, enter the number for the GroupWise agent component that you want to install.
1. GroupWise Agents
2. GroupWise WebAccess
3. GroupWise Monitor
4. GroupWise Internet Agent
-
In the list of actions, enter 1 to install the agent software
A status bar indicates progress.
-
When the installation is complete, enter y to configure the agent component.
-
Follow the prompts to provide the configuration information, then press any key to exit.
In the text-based Installation program, you can press Ctrl+C to return to the previous menu.
-
When you have installed the agents that you want to run on the text-only server, skip to Starting the Linux GroupWise Agents as Daemons.
Starting the Linux Agents with a User Interface
-
In a terminal window, become root by entering sux and the root password.
The sux command enables the X Window System, which is required for running the GUI GroupWise agent server consoles.
-
Change to the GroupWise agent bin directory.
cd /opt/novell/groupwise/agents/bin
-
Enter one of the following commands to start the MTA:
- Syntax:
./gwmta --show --home domain_directory &
./gwmta --show @domain.mta &
- Example:
./gwmta --show --home /gwsystem/domlnx &
./gwmta --show @provo.mta &
The --show startup switch starts the MTA with a server console interface similar to that provided for the NetWare and Windows MTA. This user interface requires that the X Window System and Open Motif be running on the Linux server.
The --home startup switch specifies the domain directory and is required to start the MTA.
The @domain.mta startup switch specifies the MTA startup file, which contains the --home startup switch. The MTA startup file is named after the domain that the MTA services. The Installation program created the MTA startup file in the /opt/novell/groupwise/agents/share directory. Because the Installation program prompted you for the domain directory, it set the --home switch for you in the startup file.
The ampersand (&) causes the MTA to run in the background, so that the terminal window you started it in is again available for use.

The status messages displayed on the MTA server console are also written to the MTA log file (mmddmta.nnn) in the /var/log/novell/groupwise/domain.mta directory. The log file name includes the month and day when it was created, along with an incrementing extension to accommodate multiple log files on the same day.
In ConsoleOne, you can see that the MTA has updated the domain database because the Version field on the Identification page of the Domain object shows 7 when the database update is complete.
-
Wait until the domain database has been updated before you start the POA.
-
Use the following command to start the POA:
- Syntax:
./gwpoa --show --home post_office_directory &
./gwpoa --show @post_office.poa &
- Example:
./gwpoa --show --home /gwsystem/polnx &
./gwpoa --show @research.poa
The --home startup switch specifies the post office directory and is required to start the POA.
The @post_office.poa startup switch specifies the POA startup file, which contains the --home startup switch. The POA startup file is named after the post office that the POA services. The Installation program created the POA startup file in the /opt/novell/groupwise/agents/share directory. Because the Installation program prompted you for the post office directory, it set the --home switch for you in the startup file.

The status messages displayed on the POA server console are also written to the POA log file (mmddpoa.nnn) in the /var/log/novell/groupwise/post_office.poa directory. The log file name includes the month and day when it was created, along with an incrementing extension to accommodate multiple log files on the same day.
In ConsoleOne, you can see that the POA has updated the post office database because the Version field on the Identification page of the Post Office object shows 7 when the database update is complete.
If you encounter any problems starting the GroupWise agents, see
Strategies for Agent Problems
in GroupWise 7 Troubleshooting 2: Solutions to Common Problems for assistance.After the post office database has been updated, users can connect to the post office using either the Cross-Platform client or the Windows client.
When you start the Linux agents with a user interface, you can use the agent server consoles described in
Using the POA Server Console
inPost Office Agent
andUsing the MTA Server Console
inMessage Transfer Agent
in the GroupWise 7 Administration Guide.
Starting the Linux GroupWise Agents as Daemons
All of the Linux GroupWise agents except the Monitor Agent can be started using the grpwise script. The Monitor Agent uses its own customized grpwise-ma script that works essentially the same way.
-
Make sure you are logged in as root.
-
Change to the /etc/init.d directory.
-
To start all of the Linux GroupWise agents that are installed on the server, enter the following command:
./grpwise start
-
To confirm that the agents have started, enter the following command:
./grpwise status
Agent status is displayed in terms of the names of the domain and post office associated with each agent. It lists the agent locations in the following format:
POA
[post_office.domain]
MTA:
[domain]Internet Agent:
[domain.GWIA]
WebAccess:
[WEBAC70A]
[gwdva.hostname]
When using the grpwise script, you refer to the agents by the location names displayed when you list agent agent status (without the brackets), not by the names of the agent executables.
-
Use the following set of commands as needed to start the agents as daemons and verify their status:
NOTE:The GroupWise agents are Run Control compliant. During installation, a symbolic link is created from /etc/init.d/grpwise to /usr/sbin/rcgrpwise. Typically, /usr/sbin is already on your path, so you can run rcgrpwise from any directory, rather than changing to /etc/init.d in order to run the grpwise script. A /usr/sbin/grpwise-ma link is also created.
When you use the grpwise script to start the GroupWise agents as daemons, they run without a user interface.
If GroupWise Messenger agents are installed on the same server, the grpwise script also starts them.
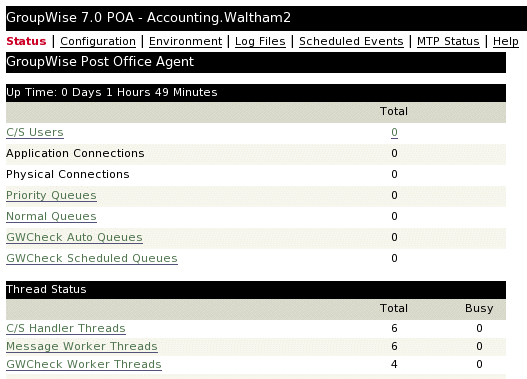
Monitoring the Linux GroupWise Agents from Your Web Browser
To monitor any GroupWise agent from your Web browser, view the agent Web console by supplying the IP address or DNS hostname and the port number of the agent. The following table lists the default port numbers:
Table 7-3 GroupWise Agent Web Console URLs
Figure 7-4 Linux POA Web Console
For more information about the agent Web consoles, including instructions on protecting the agent Web consoles with passwords see the following sections in the GroupWise 7 Administration Guide.
Starting the Linux GroupWise Agents on System Startup
If you selected in any Agent Installation program, the Agent Installation program configured your system so that the agents start automatically each time you restart your server. The Agent Installation programs always creates a grpwise startup script in /etc/init.d for starting the agents, as described in Starting the Linux GroupWise Agents as Daemons. To enable automatic startup, the Agent Installation programs also create symbolic links named S99grpwise in the rc3.d and rc5.d directories so that the agents load on restart into level 3 or 5, depending on the configuration of your Linux system.
When the grpwise script runs and starts the GroupWise agents, the agents read the agent startup files in /opt/novell/groupwise/agents/share to check for configuration information provided by startup switches. Because the --show switch cannot be used in the startup files, the agents never run with server console interfaces when started automatically when the server restarts.
Running the Linux GroupWise Agents as a Non-root User
For security reasons, it is preferable that the GroupWise agents not run with root user privileges. For example, if an intruder manages to assume the identity of a GroupWise agent, the intruder gains all the privileges of the commandeered process. If the process is running with root user privileges, then the intruder has root access to your system. If the process is running as a user with minimal privileges, then the intruder has only restricted access to your system. Therefore, your system is more secure if the GroupWise agents do not run as root.
The root user still needs to start the agents, because the agents do need to access some root-only resources on startup. However, you can configure the agents to switch to a different user after they start. After the agents are running as the non-root user, they need adequate access to the locations where each domain, post office, library, and software distribution directory is located.
NOTE:You can configure the POA, the MTA, and the Internet Agent to run as a non-root user. The WebAccess Agent, with its accompanying Viewer Agent, must still run as root. Unlike the other agents, the Monitor Agent can be started as a non-root user by default, so no setup is required for it to run as a non-root user.
Setting Up Typical Non-root Access
To configure the GroupWise agents to switch users after startup:
-
Make sure you are logged in as root.
-
Select a Linux user for the agents to run as and make sure that the user is listed in the /etc/passwd file.
You might want to create a new user specifically for this purpose, perhaps named gwagents.
-
Change to the groupwise directory under /etc:
cd /etc/opt/novell/groupwise
-
Create a new agents directory, then change to that directory:
mkdir agents
cd agents
-
Create a file named uid.conf.
-
Type the selected username in the file, for example:
gwagents
-
Stop and then start the agents.
While starting as root, the agents automatically change the ownership of the domain and post office directory structures from root to the user you specified in the uid.conf file. Then they switch users and run as the user you specified, rather than as root.
If you list the agent processes, you can observe that they are no longer running as root.
If the post office and domain are located on different servers, you must complete the above steps on each server.
IMPORTANT:All agents running on the same server must run as the same user.
If you later want to change the user that the agents are running as, follow the instructions in Changing the Non-root User.
Setting Up Non-root Access on an NSS Volume on Novell Open Enterprise Server Linux
When your domains, post offices, libraries, and software distribution directories are located on a Novell Open Enterprise Server (OES) Linux NSS volume, you must set up an eDirectory user for the agents to run as and you must LUM-enable that user. On OES Linux, you can use Novell iManager to accomplish these tasks.
To configure the agents to switch users after startup and provide access to an NSS volume:
-
Select or create an eDirectory user for the agents to run as.
You might want to create a new user specifically for this purpose, perhaps named gwagents.
-
From the Open Enterprise Server Welcome page in your Web browser, expand , then click .
-
In the iManager Links box, click .
-
To log in to iManager, specify a username, a password, and a tree.
-
In the left pane, expand , then click .
-
Provide the required information, then click .
The user does not need a password
-
-
LUM-enable the user you just created.
-
In the left pane, expand , then click .
-
Browse to and select the user you just created, then click .
-
Select the primary group for the user to belong to (for example, admingroup).
-
Change /bin/bash to /bin/false because the user does not need a shell.
-
Click to LUM-enable the user.
-
-
In a terminal window, change to the groupwise directory under /etc:
cd /etc/opt/novell/groupwise
-
Create a new agents directory, then change to that directory.
mkdir agents
cd agents
-
Create a file named uid.conf
-
Type the selected username in the file, for example:
gwagents
-
Use the following command to grant the user the required rights to the directories that the agents need to access on the local server:
rights -f /directory -r rwcemf trustee user.context.tree
The POA needs access to the post office directory. The MTA and the Internet Agent need access to the domain directory.
-
Stop and then start the agents.
While starting as root, the agents automatically change the ownership of the domain and post office directory structures from root to the user you specified in the uid.conf file. Then they switch users and run as the user you specified, rather than as root.
If you list the agent processes, you can observe that they are no longer running as root.
If the post office and domain are located on different servers, you must complete the above steps on each server.
IMPORTANT:All agents running on the same server must run as the same user.
If you later want to change the user that the agents are running as, follow the instructions in Changing the Non-root User.
Changing the Non-root User
To prevent an agent from running as a different user than the one for which it was originally configured, the GroupWise agents create a uid.run file in the domain or post office directory that they service.
If , for any reason, the user specified in the uid.run file does not match the user specified in the uid.conf file, the agent displays the following message:
Error: Running the agent with conflicting effective users
This could happen if the user specified in the uid.conf file is manually edited, or if the uid.conf file is deleted, thus changing or removing the information about the user that the agent should run as. If this message appears, verify that the uid.conf file specifies the desired user, then delete the uid.run file.
After displaying the message, the agent does not start, because it no longer has appropriate permissions in the domain or post office directory that it needs to service. By deleting the uid.run file, you enable the agent to reset the permissions in the domain or post office directory to appropriate user and then start successfully.
After configuring an agent to run as a specific non-root user:
-
If you want the agent to run as a different non-root user, modify the uid.conf file in the /etc/opt/novell/groupwise/agents directory to specify the desired non-root user, then delete the uid.run file from the domain or post office directory serviced by the agent.
-
If you want the agent to run as root, delete the uid.conf file from the /etc/opt/novell/groupwise/agents directory and delete the uid.run file from the domain or post office directory serviced by the agent.
Enabling the High Availability Service for the Linux GroupWise Agents
The GroupWise High Availability service makes sure that if the MTA, the POA, the Internet Agent, or the WebAccess Agent with its accompanying Document Viewer Agent goes down for any reason, it starts again automatically. On NetWare, this capability is provided by using a restartable protected address space. On Windows, Microsoft Clustering Services automatically restarts a service that is not responding. However, on Linux, some clustering environments do not include this capability, so it is built into the Linux GroupWise agents.
The GroupWise High Availability service (gwha) is installed automatically, starts when your server boots, and makes sure that any GroupWise agents installed on the server are running. It relies on the Monitor Agent to detect when a GroupWise agent is no longer running. The Monitor Agent notifies the High Availability service of any problem, then the High Availability service immediately issues the command to start the problem agent. A single Monitor Agent can service multiple instances of the High Availability service on multiple servers, as long as all instances use the same username and password to communicate with the Monitor Agent.
Configuring the High Availability Service
The High Availability Service is controlled by a configuration file (gwha.conf) located in the /etc/opt/novell/groupwise directory. The configuration file provides a section for configuring SSL for communication between the High Availability service and the Monitor Agent, followed by sections for each GroupWise agent installed on the server, as shown below. The headings for the sections match the agent locations listed in Starting the Linux GroupWise Agents as Daemons.
[gwha]
ssl       = no
key       =
cert      =
password  =

[domain_name]
server    = /opt/novell/groupwise/agents/bin/gwmta
command   = /etc/init.d/grpwise
startup   = domain_name.mta
delay     = 2
wait      = 10

[post_office_name.domain_name]
server    = /opt/novell/groupwise/agents/bin/gwpoa
command   = /etc/init.d/grpwise
startup   = post_office_name.poa
delay     = 2
wait      = 10

[domain_name.GWIA]
server    = /opt/novell/groupwise/agents/bin/gwia
command   = /etc/init.d/grpwise
startup   = gwia.cfg
delay     = 2
wait      = 10

[WEBAC70A]
server    = /opt/novell/groupwise/agents/bin/gwinter
command   = /etc/init.d/grpwise
startup   = webac70a.waa
delay     = 2
wait      = 10

[gwdva.server_name]
server    = /opt/novell/groupwise/agents/bin/gwdva
command   = /etc/init.d/grpwise
startup   = gwdva.dva
delay     = 2
wait      = 10
To set up the High Availability service:
-
In a terminal window, become root by entering sux and the root password.
The sux command enables the X Window System, which is required for running the GUI GroupWise agent server consoles.
-
Before starting to configure the High Availability service, test the agents by starting and stopping them manually with a user interface so that their agent server consoles display.
-
Change to the root directory of the Linux server.
-
Start the GroupWise agents manually, including providing the full path to the executable and including the --show switch, to make sure that they are set up and configured correctly.
/opt/novell/groupwise/agents/bin/gwpoa --show @post.poa
/opt/novell/groupwise/agents/bin/gwmta --show @dom.mta
/opt/novell/groupwise/agents/bin/gwia --show @gwia.cfg
/opt/novell/groupwise/agents/bin/gwinter --show @webac70a.waa
-
After verifying that the agents start correctly, stop the agents.
-
-
If you use SSL, you need to modify the High Availability service configuration file (gwha.conf).
-
Change to the /etc/opt/novell/groupwise directory.
-
Edit the gwha.conf file in a text editor
-
Under the [gwha] section, fill in the fields as follows:
[gwha]
ssl      = yes
key      = filename.key
cert     = filename.crt
password = password
-
Save the file, then exit the text editor.
-
-
If you want to control how the script manages starting and stopping the agents, modify the delay = and wait = settings in the High Availability service configuration file (gwha.conf).
The delay = setting controls the length of time between when the script issues the command to start an agent and when the script displays a message indicating that the agent has started. The default delay time is 2 seconds. Under certain circumstances, an agent could encounter a problem and fail to start after 2 seconds. In this case, you would receive the success message but the agent would not be running. You need to increase the delay = setting to accommodate the length of time it typically takes for the agent to start successfully on your system.
The wait = setting controls the length of time between when the script issues the command to stop an agent and when the script kills the agent if the agent has not yet stopped. The default wait time is 10 seconds. Under certain circumstances, an agent could take longer than 10 seconds to perform a normal shutdown, and killing the agent under those circumstances would not be appropriate. You need to increase the wait = setting to accommodate the length of time it usually takes for the agent to shut down. A message notifies you if the script kills an agent because its shutdown exceeds the wait = setting.
The default settings are usually appropriate, so you do not need to change them unless you frequently encounter problems with starting or stopping an agent using the script.
-
Change to the /etc/opt/novell/groupwise directory.
-
Edit the gwha.conf file in a text editor
Each agent has its own section in the file, for example:
[Waltham2]
server = /opt/novell/groupwise/agents/bin/gwmta
command = /etc/init.d/grpwise
startup = waltham2.mta
delay = 2
wait = 10
-
Change the delay = and wait = settings as needed.
-
Save the file, then exit the text editor.
-
-
If you want the script to start the agents with a user interface on the Linux server, add the show = setting in the High Availability service configuration file (gwha.conf). This is equivalent to using the --show startup switch on the command line when starting the agent.
-
Change to the /etc/opt/novell/groupwise directory.
-
Edit the gwha.conf file in a text editor
Each agent has its own section in the file, for example:
[Waltham2]
server = /opt/novell/groupwise/agents/bin/gwmta
command = /etc/init.d/grpwise
startup = waltham2.mta
delay = 2
wait = 10
-
Add show = yes to the section for each agent that you want to start with a user interface.
If you need to eliminate the user interface, use show = no or delete the show = line from the file.
-
Save the file, then exit the text editor.
-
-
Enable the High Availability service:
-
In YaST, click .
-
If necessary, select to activate the list of services.
-
Scroll down to the gwha line, select it, then click to change the status to On.
-
Click .
-
-
Start the agents as daemons.
-
Change to the /etc/init.d directory.
-
Enter the following command to start the GroupWise agents that are installed on the server:
./grpwise start
-
Use the following command to verify agent status:
./grpwise status
For more information about using the grpwise script, see Starting the Linux GroupWise Agents as Daemons
-
-
Create a new user and associated password on your Linux server to represent the High Availability service.
You might name it gwha.
-
Continue with Configuring the Monitor Agent to Communicate with the High Availability Service.
Configuring the Monitor Agent to Communicate with the High Availability Service
After you have the High Availability service set up and working correctly, you need to configure the Monitor Agent to communicate with it and test it to make sure that you can rely on it in the future.
-
Start the Monitor Agent with the --hauser and --hapassword startup switches.
If you use the grpwise-ma script to start the Monitor Agent, as described in Starting the Linux Monitor Agent as a Daemon, you can edit it to include the switches:
-
Change to the /etc/init.d directory, then edit the grpwise-ma script.
-
Locate the following line:
#MA_OPTIONS="--hauser username --hapassword password
             --hapoll 120"
-
Remove the pound sign (#) from the beginning of the line.
-
Replace username and password with the username and password you established in Step 8 in Configuring the High Availability Service.
MA_OPTIONS="--hauser gwha --hapassword gwagents --hapoll 120"
The --hapoll switch specifies that the Monitor Agent should check the status of GroupWise agents every 120 seconds. You can use the MA_OPTIONS variable to add any Monitor Agent startup switches to the grpwise-ma script as needed. For information about Monitor Agent startup switches, see
Using Monitor Agent Switches
inMonitor
in the GroupWise 7 Administration Guide. -
Save the file, then exit the text editor.
-
-
Change to the /etc/init.d directory.
-
Stop one of the agents.
-
Check the status of the agent you stopped to make sure it is stopped.
-
Wait for the next Monitor Agent polling cycle.
You can check and, if necessary, change the Monitor Agent polling cycle in the Monitor Agent Web console. Click , then scroll down to the HTTP Settings section.
-
After the polling cycle has passed, check the status of the agent again.
The agent that you stopped should now be running again.
NOTE:Although you would typically use the Linux Monitor Agent to monitor other Linux GroupWise agents, the Windows Monitor Agent can be used to monitor the Linux agents and communicate with the High Availability service.
Stopping the Linux GroupWise Agents
How you stop the Linux GroupWise Agents depends on how you started them.
From the Agent Console User Interface
When you use the --show startup switch to start the GroupWise agents, you can stop them from the agent server console interface.
-
Click .
Since the WebAccess Agent does not have the same type of agent server console as the other Linux agents, you can stop it by closing the terminal window in which it is running.
Using the grpwise Script
When you start the GroupWise agents with the grpwise script, you can also use the script to stop them. The same applies for the Monitor Agent and its grpwise-ma script.
-
Make sure you are logged in as root.
-
Change to the /etc/init.d directory.
-
To stop all of the GroupWise agents installed on the server, enter the following command:
./grpwise stop
-
To confirm that the agents have stopped, enter the following command:
./grpwise status
Agent status is displayed in terms of the names of the domain and post office associated with each agent. It lists the agent locations in the following format:
-
Use the following set of commands as needed to stop the agents as daemons and verify their status:
IMPORTANT:For convenience in typing the command, the agent_location_name is not case sensitive.
NOTE:The GroupWise agents are Run Control compliant. During installation, a symbolic link is created from /etc/init.d/grpwise to /usr/sbin/rcgrpwise. Typically, /usr/sbin is already on your path, so you can run rcgrpwise from any directory, rather than changing to /etc/init.d in order to run the grpwise script. A /usr/sbin/grpwise-ma link is also created.
Manually as Daemons
When you start the GroupWise agents manually on the command line (without using the grpwise script), use the standard Linux kill command to stop them.
-
Make sure you are logged in as root.
-
Determine the process IDs (PIDs) of the agent to kill:
POA
ps -eaf | grep gwpoa
MTA:
ps -eaf | grep gwmta
Internet Agent:
ps -eaf | grep gwia
WebAccess:
ps -eaf | grep gwinter
Monitor:
ps -eaf | grep gwmon
All of the PIDs for the specified agent are listed.
-
Kill the first process listed for each agent:
- Syntax:
kill PID
- Example:
kill 1483
kill 1892
It might take a few seconds for all agent processes to terminate.
-
Repeat the ps commands to verify that the agents have stopped.
You can also restart the MTA and the Internet Agent without stopping them first using the following command:
- Syntax:
kill -HUP PID
- Example:
kill -HUP 1483
The -HUP (hang up) option is equivalent to using in the MTA and Internet Agent server console or Web console. Because the other agents do not have a Restart feature in their consoles, the -HUP option cannot be used to restart them.
Uninstalling the Linux GroupWise Agents
If you move the GroupWise agents to a different server, the GroupWise agent software can be uninstalled just like any other software on Linux. To determine what GroupWise software is currently installed on the Linux server, use the following command:
rpm -qa | grep groupwise
This lists all of the GroupWise RPM packages on the server. The POA and the MTA are together in the same RPM. WebAccess and Monitor have two RPMs each, one for the agent software and one for the application software. The following list provides the list of all GroupWise agent and administration RPMs that you might need to uninstall from a server:
Use the following command to uninstall a GroupWise RPM package:
rpm -e novell-groupwise-package
Uninstalling the RPMs does not uninstall files created after installation by the GroupWise programs. To see what GroupWise files are created in locations other than under /opt/novell/groupwise and its subdirectories, see the Linux sections of Agent Installation Directories
in the GroupWise 7 Troubleshooting 3: Message Flow and Directory Structure:
-
POA and MTA:
Linux Installation Directory
-
Internet Agent:
Linux Installation Directory
-
WebAccess:
Linux Installation Directory
-
Monitor:
Linux Installation Directory
7.4.4 Windows: Setting Up the GroupWise Agents
Complete the following tasks to set up the Windows agents. These tasks are designed to help you get the Windows POA and MTA up and running as quickly as possible:
IMPORTANT:If you plan to install the GroupWise agents in a clustered server environment, see the GroupWise 7 Interoperability Guide before you install the agents.
Refer to the following additional tasks as you maintain all the GroupWise agents on Windows:
Preparing the Windows Server for the Windows Agents
Make sure the Windows server where you plan to install the GroupWise Windows POA and MTA has been properly prepared to run the agents:
Obtaining a Static IP Address
The Windows server where the GroupWise Windows agents run should have a static IP address. DHCP should not be used to dynamically assign an IP address for it. Make sure the server where you plan to install the Windows agents has a static IP address.
Mapping Drives to Post Offices and Domains
The Windows POA requires direct access to the post office directory so that it can write to the post office database. The Windows MTA requires direct access to the domain directory so that it can write to the domain database. If the agents are not installed on the same server where their directories are located, make sure the server has drives mapped to all locations where the agents need access. If you are running the Windows POA for a post office located on a NetWare server, you might need to increase Maximum File Locks Per Connection from its default setting on the Windows server.
After installation, the agents can access their directories using either mapped drives or UNC paths. However, mapped drives are required during installation so that the agent startup files can be set up properly.
Creating a Windows User Account for Remote Access (Optional)
If you specified a new Windows username and password under worksheet item 9, create the new Windows user account so it is ready when you start the agents for the first time.
-
In the Windows Control Panel, double-click to add a new user.
-
Grant the user Full Control rights in the domain and post office directories.
Enabling SNMP (Optional)
If you want to monitor the GroupWise Windows agents from an SNMP manager program, such as the Management and Monitoring Services component of Novell® ZENworks Server Management, SNMP must be enabled on the Windows server where the agents are installed. If it is not already enabled, you should enable it before you run the Agent Installation program.
-
In the Windows Control Panel, double-click .
-
Click .
-
Select , click , select , then click
-
Follow the prompts to finish the installation.
Installing the Windows Agent Software
After you have prepared the Windows server to run the GroupWise Windows POA and MTA, you are ready to install them.
At a Windows server that meets the requirements listed in Section 2.1, GroupWise Administration Requirements:
-
Make sure you have mapped drives to all domain and post office directories for which you are installing agents.
-
Insert the GroupWise 7 Administrator for NetWare/Windows CD into the CD drive to start the GroupWise Installation program, then click . If the Installation program does not start automatically, run setup.exe from the root of the CD.
or
If you have already copied the agent software to a software distribution directory, run agents\install.exe to start the Agent Installation program.
-
Follow the prompts to provide the Windows Agent information from your GroupWise Agent Installation Worksheet.
-
On the Installation Complete page, choose whether or not you want the Agent Installation program to start the agents for you immediately, then click .
If you want to start the agents later or if the Agent Installation program fails to start them successfully, see Starting the Windows GroupWise Agents.
-
To monitor an agent from your Web browser, view the agent Web console by supplying the IP address and port number of the agent. For example:
http://172.16.5.18:1677
http://172.16.5.18:7100
http://172.16.5.18:7180
http://172.16.5.18:7181
When viewing the agent Web console, you can specify the POA client/server port, the MTA message transfer port, or the HTTP established during installation.
-
If you want to learn more about running the Windows agents, continue with Starting the Windows GroupWise Agents and Stopping the Windows GroupWise Agents.
or
If you want to customize the configuration of the Windows agents or expand your GroupWise system, skip to Section 7.5, What’s Next.
Starting the Windows GroupWise Agents
You might have one or more GroupWise agents installed on each Windows server in your GroupWise system. You can start the GroupWise agents on Windows in several ways:
If you encounter any problems starting the GroupWise agents, see Strategies for Agent Problems
in GroupWise 7 Troubleshooting 2: Solutions to Common Problems for assistance.
Manually As Applications
On the Windows desktop, click , select the GroupWise agent, then start the GroupWise agent.
You can also use desktop shortcuts to start the GroupWise agents. The GroupWise Installation program automatically creates desktop shortcuts for the POA, the MTA, and the Internet Agent. You can easily create desktop shortcuts for WebAccess and Monitor by linking to the following target files:
When you start the GroupWise agents as applications, you can use the agent server consoles described in the GroupWise 7 Administration Guide:
Automatically in the Windows Startup Group
After the GroupWise agents are running smoothly, you should add them to the Windows Startup group to start them automatically whenever you restart the Windows server.
For example, on a Windows 2000 server:
-
From the Windows desktop, click .
-
Browse to the directory where you installed the GroupWise agent.
The default installation directories are:
-
Double-click agent executable, then if necessary, add the startup file to the command line.
POA:
gwpoa.exe @startup_filename.poaMTA:
gwmta.exe @startup_filename.mtaInternet Agent:
gwia.exe @gwia.cfg
WebAccess:
strtweb.bat
Monitor:
gwmon.exe
The startup file for the POA is named after the post office. The startup file for the MTA is named after the domain. The startup file for the Internet Agent is always gwia.cfg. The WebAccess Agent startup file is provided in strtweb.bat. The Monitor Agent does not use a startup file.
-
Click .
-
Select the folder, provide a name for the shortcut, then click .
All programs in the folder are automatically started when the server reboots.
-
If possible, restart the server to verify that the GroupWise agents start automatically.
Manually or Automatically as Services
If you installed the GroupWise agents as services, you can manage them just like you would any other Windows services.
NOTE:The Monitor Agent cannot currently be installed as a Window service.
For example, on a Windows 2000 server:
-
From the Windows desktop, click .
-
Double-click , select the agent service, then click .
The POA service is named after the post office. The MTA service is named after the domain. The Internet Agent service is named GWIA. The WebAccess Agent service is named WebAccess (webaccess_agent_object_name).
You can check the status of the agent service by using the Windows Event Viewer. From Administrative Tools, double-click, click , sort the log entries on the column, scroll to the agent service, then double-click a log entry to view information about it.
-
To configure the agent service to start automatically when the server reboots, right-click the agent service, then click .
-
In the field, click , then click .
When running as services, the GroupWise agents do not display an agent console on the Windows server where they are running. Instead, you can monitor the GroupWise agents using their Web consoles described in the GroupWise 7 Administration Guide:
Stopping the Windows GroupWise Agents
As Applications
When the GroupWise agents run as applications, you can stop them from their server consoles.
If the GroupWise agent does not respond to Exit, you can close the agent server console window to stop the agent or use the Windows Task Manager to terminate the agent task.
As Services
When the GroupWise agents run as Windows services, you can stop them as you would any other Windows services.
For example, on a Windows 2000 server:
-
From the Windows desktop, click .
-
Double-click Services, select the agent service, then click Stop.
The POA service is named after the post office. The MTA service is named after the domain. The Internet Agent service is named GWIA. The WebAccess Agent service is named WebAccess (webaccess_agent_object_name).
Uninstalling the Windows GroupWise Agents
If you move the GroupWise agents to a different server, you can uninstall the agent software from the old location to reclaim disk space.
|
POA and MTA: |
Stop the POA and the MTA, then run the Agent Installation program (install.exe) in the \agents subdirectory of the GroupWise software distribution directory or GroupWise 7 Administrator for NetWare/Windows CD. On the Install/Uninstall page, select , then follow the prompts. This deletes most of the contents of the c:\grpwise directory and uninstalls the POA and the MTA as Windows services. |
|
Internet Agent: |
Stop the Internet Agent, then run the Internet Agent Installation program (install.exe) in the \internet\gwia subdirectory of the GroupWise software distribution directory or GroupWise 7 Administrator for NetWare/Windows CD. On the Install/Uninstall page, select , then follow the prompts. This deletes most of the contents of the c:\grpwise\gwia directory and uninstalls the Internet Agent as a Windows service. |
|
WebAccess: |
Stop the WebAccess Agent. Delete the contents of the c:\webacc directory to delete the WebAccess Agent software. If the WebAccess Agent was running as a Windows service, run “Delete Service.exe” in the \internet\webacces subdirectory of the GroupWise software distribution directory or GroupWise 7 Administrator for NetWare/Windows CD. If you want to delete the WebAccess Application from your Apache Web server, locate the WebAccessUninstall.ini file under the Tomcat root directory (for example, under \tomcat\4). It lists all files that the GroupWise Installation program installed to your Web server. Delete the listed files to uninstall the WebAccess Application from your Web server. |
|
Monitor: |
Stop the Monitor Agent. Delete the contents of the c:\gwmon directory. |