4.1 Scheduling Appointments
Use appointments to schedule blocks of time on a specific date or range of dates.
You can use Busy Search to check for a time when all the users and resources you want for an appointment are available.
This section contains the following topics:
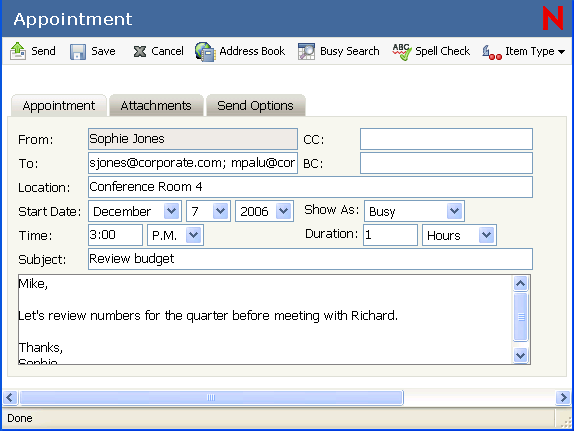
4.1.1 Scheduling an Appointment for Other Users
-
Click on the toolbar.
-
In the field, type a username, then press Enter. Repeat for additional users. If necessary, type usernames in the and fields.
or
To select usernames or resources from a list, click on the toolbar, search for each user’s name, double-click each user, then click .
-
Type the location description in the field.
-
Specify the start date.
-
Specify a start time and duration. Duration can be in minutes, hours, or days.
-
Specify how you want the appointment to appear as from the drop-down menu.
Appointments can appear as , , , or Tentative.
-
Type a subject and message.
-
If you want to make sure the people and resources for the appointment are available, you can do a busy search by clicking on the toolbar. See Section 4.1.5, Checking When Everyone Is Available.
You can specify many options, such as making this appointment a high priority, requesting a reply from recipients, and more, by clicking the tab.
-
Click on the toolbar.
4.1.2 Rescheduling an Appointment
If you want to make sure the people and resources for the appointment are available, you can do a busy search by clicking Busy Search on the toolbar.
-
Click the folder in the Folder List.
-
Select the appointment to reschedule and open it.
-
In the appointment window, click on the toolbar.
-
Make your changes, then click on the toolbar.
4.1.3 Canceling an Appointment
You can cancel an appointment if you scheduled it or if you have the necessary Proxy rights to the scheduler's Mailbox.
-
Click the folder in the Folder List.
-
Select the appointment you want to cancel.
-
Click .
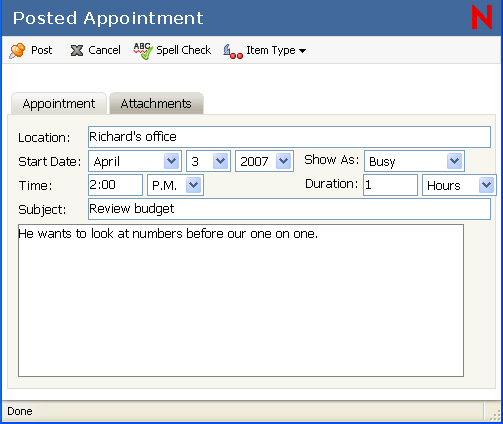
4.1.4 Scheduling an Appointment for Yourself
If you are not available for meetings, schedule a posted appointment for those times. When another user includes you in an appointment and does a busy search, the user can see you are not available at those times, but can still schedule over your appointment.
Posted appointments are placed in your Calendar on the date you specify. They are not placed in your Mailbox or in any other user's Mailbox.
-
On the toolbar, click .
-
(Optional) Type a subject and a place if necessary.
-
Specify the start date.
-
Specify a start time and duration. Duration can be in minutes, hours, or days.
-
Specify how you want the appointment to appear as with the drop-down menu. Appointments can appear as Free, Tentative, Busy, or Out of the Office.
-
(Optional) Type a message.
You can specify many options, such as making this appointment a high priority and more, by clicking the Options tab.
-
Click on the toolbar.
Posted appointments are placed in your Calendar on the date you specified. They are not placed in your Mailbox or in any other user's Mailbox.
4.1.5 Checking When Everyone Is Available
Use Busy Search to find a time when all the people and resources you want to schedule for a meeting are available.
Performing a Busy Search
-
In an appointment you are creating, specify usernames in the field.
-
Specify the first possible day for the meeting in the field.
-
Specify the meeting's duration.
-
Click on the toolbar.
The legend at the bottom of the Appointment dialog box shows the available times.
-
Click one of the suggested times to select an available meeting time.
-
Complete and send the appointment.
If you want to do a busy search before creating an appointment, click in the toolbar.