6.1 Searching for Users and Resources
To open the GroupWise® Address Book, click the
button
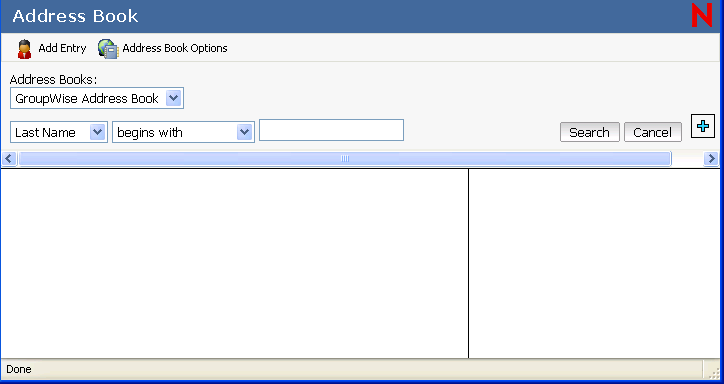
 on the Main Window toolbar. The Address Book opens, displaying a drop-down menu that lists the system address book, Frequent Contacts address book, and any personal address books you have created.
You can use the drop-down menu to select the address books in this view. The bottom pane lists the matching search entries in the selected address book.
You can also specify search criteria by using the predefined filters. For example, you can use the begins with filter to display only entries with last names that begin with “D.”
When you begin typing a name in the , , or fields of an item you are creating, Name Completion tries to complete the name for you.
If Name Completion finds the name you are looking for, you can stop typing. If Name Completion doesn't find it, continue typing. Name Completion searches again after each new character you type.
This section contains the following topics:
6.1.1 Viewing People, Resources, or Groups in the Address Book
Use the predefined filters in the View menu to display only groups, users, organizations, or resources in an address book.
The Address Book uses the following icons to identify people, resources, and groups in address books:
 People
 Resources
 Groups
Address books display all entries by default. Although all groups, companies, and resources are marked by icons, finding specific entries in large address books can prove difficult. A predefined filter displays only the type of entry you are looking for.
To view groups, organizations, or resources in an address book,
-
In the Main Window, click
on the toolbar.
-
Select an address book.
-
Click
 to filter for contacts, groups, and resources.
-
Select the and .
-
To return to the non-filtered address book view, click
again.
In the Address Selector, click a predefined filter from the
drop-down list to filter for people, groups, and resources.
6.1.2 Searching for an Entry in the Address Book
-
In the Main Window, click
on the toolbar.
or
Click
on the toolbar in an item you are composing.
-
In the Address Books list, select the address book you want to search.
For GroupWise, you can choose from the GroupWise address book, the Frequent Contacts address book, or a personal address book.
-
Select the number of entries you want displayed at one time. The default displays 15 entries at one time.
-
To list the first entries in the selected address book, leave the search conditions boxes empty.
or
To search for a specific entry, click the
 icon to show another set of search condition boxes and the
icon to hide all search conditions boxes. These boxes let you define the Address Book fields and information you want to search.
icon to show another set of search condition boxes and the
icon to hide all search conditions boxes. These boxes let you define the Address Book fields and information you want to search.
GroupWise WebAccess supports the * (asterisk) and ? (question mark) wildcards. When searching a field, you can use * to represent multiple characters and ? to represent one character. If you define a “Last Name contains s?n” condition, the search returns all entries whose last names contain S and N separated by one character (Sanders, Johannson, Larsen, and so forth).
-
Click (or ) to display a list of entries that match your search conditions.
If you decide to send an item to a user you found, you can select a user, click or to add the name to the recipient list, then click to open a new item.
NOTE:Double-clicking a user adds it to the list.
6.1.3 Using Filters to Narrow an Address Search
-
In the Main Window, click
on the toolbar.
or
Click
on the toolbar in an item you are composing.
-
Select the address book you want to search.
-
Select whether you want to search for the name, last name, first name, or department.
-
Select which predefined filter you want to use: begins with, equals, does not begin with, or not equal.
For example, to list only users whose last name is Davis, select , select , then type “Davis.”
-
Type the information you want to search for.
Name Completion completes the name.
To filter the list of entries by contacts, groups, or resources, click an option on the
drop-down list.
You can click
to add additional search parameters.
-
Click .
6.1.4 Addressing an Item
-
Open a new item.
-
Click to open the Address Book.
By default, the Address Book opens to the GroupWise address books.
-
In the Address Books list, select the address book you want to search.
For GroupWise, you can choose from the GroupWise address book, the Frequent Contacts address book, or a personal address book.
-
Select the number of entries you want displayed at one time. The default displays 15 entries at one time.
-
To list the first entries in the selected address book, leave the search conditions boxes empty.
or
To search for a specific entry, use the search conditions boxes to define the Address Book fields and information you want to search.
GroupWise WebAccess supports the * (asterisk) and ? (question mark) wildcards. When searching a field, you can use * to represent multiple characters and ? to represent one character. For example, if you define a “First Name begins with jo*” condition, the search returns all entries whose first names start with JO (John, Joel, Jose, and so forth). If you define a “Last Name contains s?n” condition, the search returns all entries whose last names contain S and N separated by one character (Sanders, Johannson, Larsen, and so forth).
-
Click to display a list of entries that match your search conditions.
-
Select the entry you want to add to the item’s recipient list, then click or to indicate the recipient type.
NOTE:You can double-click the name to add it to the To: list.
-
After you finish selecting the item’s recipients, click to add them to the item.