7.4 Specifying Send Options
You can specify send options for different types of items (mail, appointment, task, note, phone message) you send, and you can specify global send options that affect every item you send. Send options include the following:
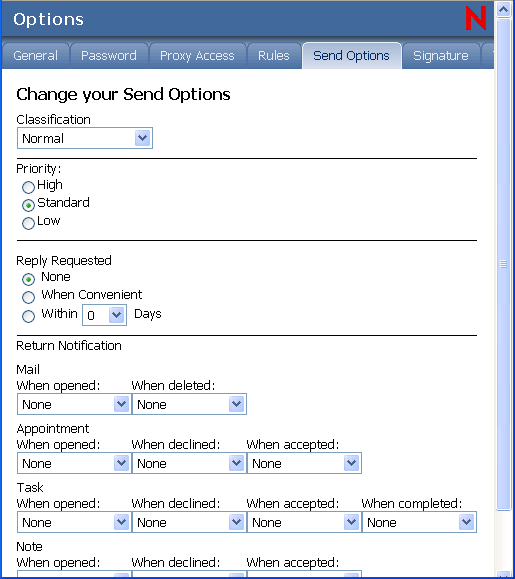
7.4.1 Changing the Security Setting (Classification) of All Items You Send
A classification is a security setting that lets the recipient know if the item is confidential, top secret, and so forth. This information appears at the top of the item. A classification does not provide any encryption or additional security. It is meant to alert the recipient to the relative sensitivity of the item.
-
In the GroupWise WebAccess main window, click the icon.
-
Click
-
Select a security setting from the drop-down list.
-
Click , then click .
7.4.2 Changing the Priority of All Items You Send
Recipients can see the priority of an item by looking at the color of the icon next to the item in the Item List. High priority items are red, normal priority items are white, and low priority items are gray.
-
In the GroupWise WebAccess main window, click the icon.
-
Click
-
Select a priority.
The small icon next to an item in the Mailbox is red when the priority is high, white when the priority is standard, and gray when the priority is low.
-
Click , then click .
7.4.3 Requesting a Reply for All Items You Send
When you request a reply to an item, the recipient of the item sees an icon next to the item in the Item List. If you select , “Reply Requested: When convenient” appears at the top of the item. If you select , “Reply Requested: By xx/xx/xx” appears at the top of the item. If the recipient attempts to delete an item without replying, he or she is reminded that the item requested a reply. (The recipient can still delete the item without replying.)
-
In the GroupWise WebAccess main window, click the icon.
-
Click
-
Under , specify when you want to receive a reply.
The recipient sees
 next to the message. If you select
, “Reply Requested: When convenient” appears at the top of the message. If you select
, “Reply Requested: By xx/xx/xx” appears at the top of the message.
next to the message. If you select
, “Reply Requested: When convenient” appears at the top of the message. If you select
, “Reply Requested: By xx/xx/xx” appears at the top of the message.
-
Click , then click .
7.4.4 Getting a Return Receipt for All Items You Send
Return notification lets you know information such as when the recipient opens or deletes an item, declines an appointment, or completes a task.
-
In the GroupWise WebAccess main window, click the icon.
-
Click
-
In the group box, specify the type of return receipt you want.
If you select to receive Notify, this applies only when you are using the GroupWise client for Windows. Receiving notifications through Notify is not supported in GroupWise WebAccess.
-
Click , then click .