6.2 Using Groups to Address Items
A group is a list of users or resources you can send messages to. Use groups to send a message to several users or resources by typing the group name in the , , or fields. There are two types of groups: public and personal.
A public group is a list of users created by the system administrator, and it is available for use by each GroupWise user. For example, there might be a public group for the Accounting Department. Each employee in Accounting is included in the group. Public groups are listed in the system address book.
A personal group is a group created by you. For example, if you often send an appointment to your work group, you can include each co-worker's address or name and a meeting place (a resource) in a personal group.
This section contains the following topics:
6.2.1 Creating a Personal Group
-
In the Main Window, click
 on the toolbar.
By default, the Address Book opens to the GroupWise address books.
-
In the Address Books list, select the address book that contains the entries you want to add to the group.
For GroupWise, you can choose from the GroupWise address book, the Frequent Contacts address book, or a personal address book.
-
Select the number of entries you want displayed at one time. The default displays 15 entries at one time.
-
To list the first entries (15 by default) in the selected address book, leave the search conditions boxes empty.
or
To search for a specific entry, click the
 icon to show another set of search condition boxes and the
 icon to hide all search conditions boxes. These boxes let you define the Address Book fields and information you want to search.
GroupWise WebAccess supports the * (asterisk) and ? (question mark) wildcards. When searching a field, you can use * to represent multiple characters and ? to represent one character. For example, if you define a “First Name begins with jo*” condition, the search returns all entries whose first names start with JO (John, Joel, Jose, and so forth). If you define a “Last Name contains s?n” condition, the search returns all entries whose last names contain S and N separated by one character (Sanders, Johannson, Larsen, and so forth).
-
Click to display a list of entries that match your search conditions.
-
Select the entry you want to add to the group, then click or to indicate the recipient type. You can also double-click the user icon to add it to the list.
If you are using the HTML Address Book, you can add multiple recipients at one time by selecting the check boxes in front of the recipients’ entries.
-
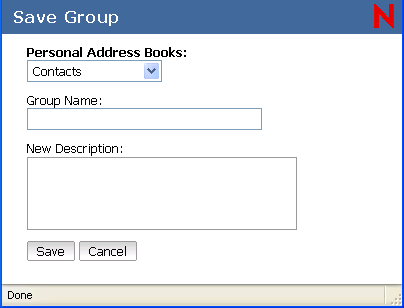
After you select the entries you want to add to the group, click to display the Save Group dialog box.
-
In the list, select the personal address book where you want to save the group.
-
Type a name and description (optional) for the group, then click .
The group is added to the personal address book. When addressing items, you can type the group name in the , , or field, or you can use the Address Book to include it. The item is sent to each member of the group.
You can also create and save a personal group from the Address Selector when you are addressing a message or other item:
-
In an item view, click on the toolbar.
-
Search for each member of your group and add them to the right pane.
To filter the list of entries by contacts, groups, or resources, click an option on the
drop-down list.
-
To add an entry that is not in an existing address book, click , fill in the information, click , then select the entry.
-
Click Save Group.
or
If you want to save the group to a different address book than the one that is displayed, select the address book.
-
Type a name for the group.
-
Type comments, such as a description of the group.
-
Click .
6.2.2 Addressing Items to a Group
-
In an item view, click
on the toolbar.
-
Select the personal address book you saved your group in.
-
Search for the name of your group.
For example, select “Project” to find your Project Team group.
-
Select a group, then click , , or .
-
Repeat as necessary.
-
To see more information about the group, click the group’s name .
-
Click to return to the item view.
6.2.3 Adding and Removing Contacts from a Personal Group
-
In the Main Window, click
on the toolbar.
or
Click
on the toolbar in an item you are composing.
-
Select the address book the group is saved in.
-
Search for the name of the group.
For example, select “Project” to find the Project Team group.
-
Click the group’s name .
-
Click , then click .
The right pane of your Address Book window is now populated with the members of your group.
-
To add a contact, search for the contact, select the contact from the search list, and click : or .
Your contact is now added to the list of the group’s members.
-
To remove a contact, find the contact’s name in the right pane and click the red X next to the contact’s name.
That contact is removed from the list of the group’s members.
-
Repeat Steps 6 and Step 7 as necessary.
-
Click .
6.2.4 Viewing Group Information
-
In the Main Window, click
on the toolbar.
or
Click
on the toolbar in an item you are composing.
-
Select the address book your group is saved in.
-
Search for the name of your group.
For example, select “Project” to find your Project Team group.
-
Click the group’s name.
A list of all group members is displayed.
6.2.5 Deleting a Group from a Personal Address Book
-
In the Main Window, click
on the toolbar.
-
Select the address book the group is saved in.
-
Search for the name of the group.
For example, select “Project” to find your Project Team group.
-
Select the check box next to the group’s name.
-
Click .
The group is deleted.