6.5 Using Personal Address Books
You can have multiple personal address books. By default, GroupWise WebAccess provides one predefined personal address book with your name as the title. You can use your personal address book to add e-mail addresses and information for users, resources, or organizations not defined in the system address book. These addresses can be for people inside or outside of your organization.
When you create multiple address books, you can include the same name and address in several books. If the entry is copied from an address book and you edit the entry's information in one book, it is updated in all books.
You can add and delete names and address information for any contact (person, company, or resource) you want in your personal address books. You can also create your own information properties (fields).
Personal address books list addresses according to your preferences. For example, you can include Internet addresses or no address at all for the people you add to your personal address books. You can also create personal groups. If you save a list of people as a group, you only need to type the group name in the To box to send the entire group a message.
This section contains the following topics:
6.5.1 Creating a Personal Address Book
-
In the Main Window, click
 on the toolbar.
-
Click
-
Click to display the Create Address Book form.
-
In the field, type the name you want to use for the personal address book.
-
If desired, type a description in the field.
The description is for your use only. It appears only when viewing the address books in the Address Books Options form.
-
Click to add the new address book to the list.
-
Click to return to the Address Book.
You can add and modify records in your personal address books. However, only the system administrator can add and modify records in the system address book.
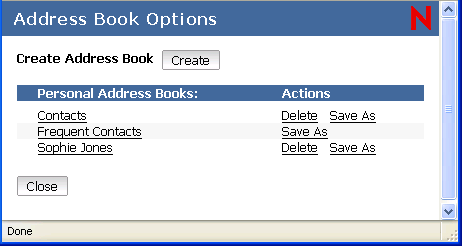
6.5.2 Deleting a Personal Address Book
-
In the Main Window, click
on the toolbar.
-
Click .
-
Click next to the name of the personal address book you want to delete.
After it is deleted, a personal address book cannot be recovered.
6.5.3 Editing a Personal Address Book
In a personal address book, you can add or delete entries, edit existing information, copy names from one book to another, or rename a book. You can also create your own custom address book fields.
This section contains the following topics:
Adding Entries to a Personal Address Book
-
From the GroupWise WebAccess main window, click to open the Address Book.
-
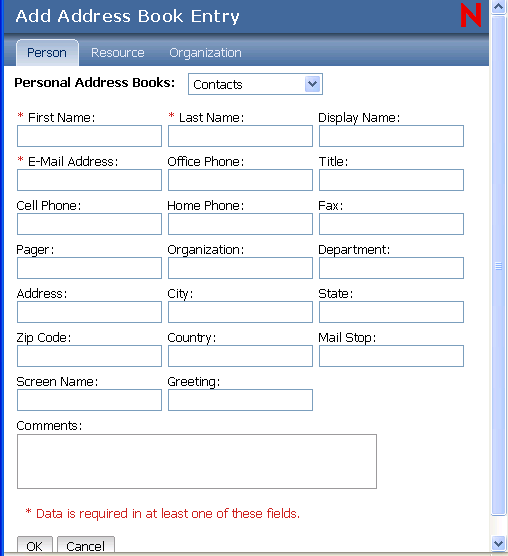
In the Address Book, click to display the Add Address Book Entry form.
-
If you want to add a resource or organization rather than a person, click or .
-
Select the personal address book where you want to add the entry.
-
Fill in at least one of the fields that have an asterisk. This is required so that the entry can be listed in the Address Book.
If you want to send messages to the entry, make sure you complete the field.
-
Fill in any other fields you want. Any information you add displays when you select the entry in the Address Book.
-
Click to save the entry to the selected address book.
Deleting Entries from a Personal Address Book
-
In the Main Window, click
on the toolbar.
-
Select the address book, then search for the names you want to remove.
-
Check the box next to each name you want to remove.
-
Click .
Editing Entries in a Personal Address Book
-
In the Main Window, click
on the toolbar.
-
Select the address book, then search for the name you want to edit.
-
Click the name you want to edit.
-
Edit the information in the different fields, then click .
Copying Entries Between Personal Address Books
You cannot copy names to the system address book.
-
In the Main Window, click
on the toolbar.
-
Click an address book, then search for the names you want to copy.
-
Check the box next to each name you want to copy.
-
Click .
-
Select the address book you want to copy the names to, then click .
Renaming a Personal Address Book
-
In the Main Window, click
on the toolbar.
-
Click .
-
Click the name of the address book you want to rename.
NOTE:You cannot rename the Frequent Contacts address book.
-
Type the new name, then click .
Copying a Personal Address Book
-
In the Main Window, click
on the toolbar.
-
Click .
-
Click next to the personal address book you want to copy.
-
Type a name for your address book, then click .