7.3 Using Rules
You can use rules to define actions that you want to be performed on items you receive. For example, you can forward or reply to messages or move messages to folders. Rules can help you organize your Mailbox, automate your Mailbox while you are away, or delete unwanted items.
Rules are stored in your GroupWise Mailbox at your post office. Because of this, rules you define in other versions of the GroupWise client also appear in the Rules list and apply when you use GroupWise WebAccess.
You can edit any rules you create in GroupWise WebAccess. If you create rules using another version of the GroupWise client, you can edit those rules provided they do not contain more capabilities than GroupWise WebAccess allows you to set. For example, the Windows version of the GroupWise client lets you create rules to apply to items you are sending. Because the Rules feature in GroupWise WebAccess does not include this capability, you cannot edit that rule.
This section contains the following topics:
7.3.1 Creating a Rule
When you create a rule, you must do the following:
-
Select the type of action you want performed.
-
Name the rule. By naming the rules, you can have more than one rule that uses the same action.
-
Define any optional conditions. For example, you might want to move all items from your supervisor to a specific folder. You can define a condition so that only messages with your supervisor’s name on the From line are moved to the folder. All other items remain in your main Mailbox folder.
-
Fill in the information required to carry out the action. For example, you might need to specify the folder where you want to move the messages.
-
Save the rule.
-
From the GroupWise WebAccess main window, click the icon.
-
Click .
-
Select the type of rule you want to create:
-
Delete: Moves an item to the Trash. You can apply the rule to all new items or only new items that meet the criteria you establish.
-
Forward: Forwards an item to the recipients you specify. You can apply the rule to all new items or only new items that meet the criteria you establish.
-
Move to Folder: Moves an item to the folder you specify. You can apply the rule to all new items or to only new items that meet the criteria you establish.
-
Reply: Generates a reply to an item. The reply can go to the sender of the item only (Reply to Sender) or to all recipients of the item (Reply to All). You can apply the rule to all new items or only new items that meet the criteria you establish.
-
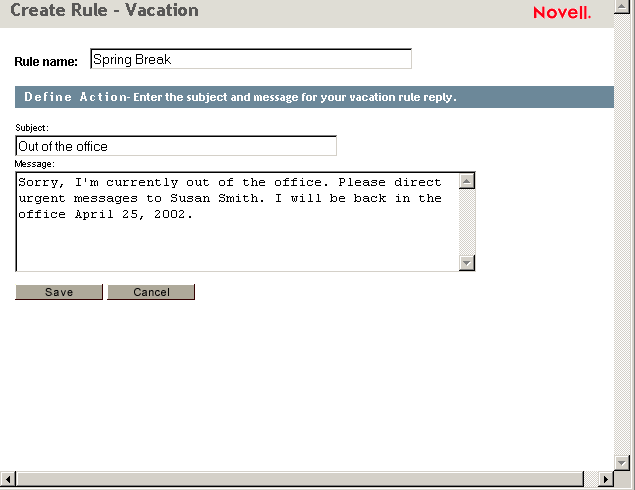
Vacation: Generates a reply to all new items you receive. The reply goes to the sender of the item only (Reply to Sender), not to all recipients of the item (Reply to All).
-
-
Click to display the Create Rule form.
-
Type the name you want to use for the rule. Names can include any characters, including spaces.
-
If desired, define an optional condition to limit the items that are affected by the rule. If you do not define an optional condition, the rule is applied to all new items you receive.
You cannot define an optional condition for the Vacation rule. The Vacation rule is applied to all items.
-
Define the actions that you want performed when the rule is applied.
The actions vary depending on the type of rule you are creating. For example, when creating a rule to reply to items, you select whether you want to reply to the sender only or the sender and all recipients. When moving an item to a folder, you select the destination folder.
If you want to create a rule to forward items to another account, specify the e-mail address.
-
Click to save the rule to the Rules list.
-
By default, the rule is automatically activated. If you don’t want the rule to be active at this time, deselect the rule’s box, then click .
or
To keep the rule active, click .
When you create a rule, GroupWise WebAccess stores it in your GroupWise Mailbox at your post office. Whether you log in to your Mailbox through GroupWise WebAccess or another version of the GroupWise client, you always have the same rules.
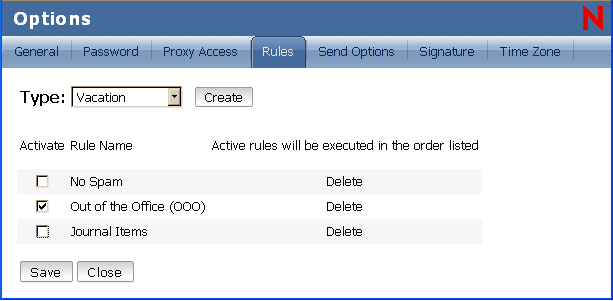
7.3.2 Activating or Deactivating Rules
By default, when you save a rule that you have just created, it is automatically activated. GroupWise WebAccess executes the rule for any new items you receive. It does not execute the rule for any items you have already received.
-
From the GroupWise WebAccess main window, click the icon.
-
Click .
-
In the list of active rules, click the rule’s check box to activate it or deactivate it.
A check mark indicates that the rule is active.
-
Click to save the changes.
7.3.3 Forwarding Your E-mail to Another Account
Use the following procedure to create a rule that automatically forwards new items entering your mailbox to a different e-mail account.
-
From the Create Rule form, select the rule, then click the button.
-
Type a name for the rule in the field.
-
In the first condition field, select This tells the rule to check the To: line in each incoming item.
-
In the second condition field, select . This tells the rule that the text in the incoming item’s To: line must match the text you type in the next condition field.
-
In the last condition field, type the complete e-mail address of the account from which you want to move the e-item. For example: msmith@corporate.com.
-
Define the actions to be taken by the rule. In the first action field, type the complete e-mail address of the account to which you want to send the item. Include other addresses to which you might want to courtesy copy or blind copy.
-
Type a subject to the e-mail indicating that it is moving from the old account to the new. For example: From msmith@corporate.com to marys@corporate.com.
-
Use the message field to include any other notes or instructions for the reader at the new account.
-
Click the button.