7.3 Managing Contacts Through Your Mailbox
GroupWise Contact Management gives you access to your contacts, groups, resources, and organizations from the  Contacts folder in the Folder List.
Figure 7-5 Mailbox Showing the Contacts Folder
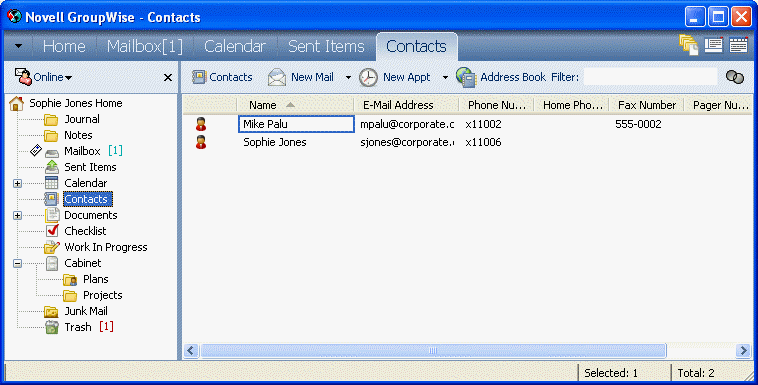
The Contacts folder shows, by default, all the entries in your Frequent Contacts address book.
Any modification you make in the Contacts folder is also made in the corresponding address book (Frequent Contacts or other address book). Any modification you make in the address book is reflected in the Contacts folder. For more information about address books, see Section 8.0, Using the Address Book.
Your proxies never see your Contacts folder.
Use the Contacts folder to view, update, delete, and add information for contacts, groups, resources, and organizations in the selected address book.
To see contacts, groups, resources, and organizations from another address book, change the address book that the Contacts folder displays.
This section contains the following topics:
7.3.1 Managing Contacts
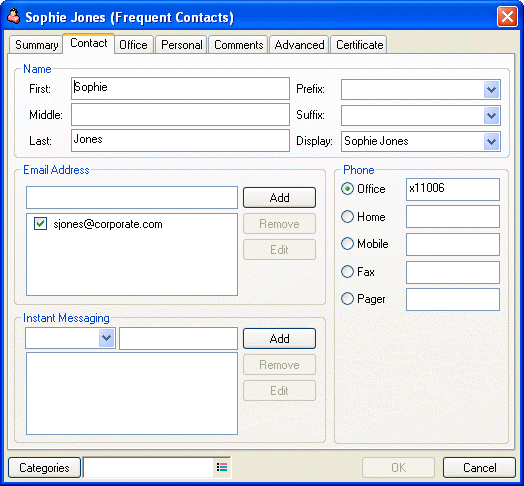
Each contact in the Contacts folder is marked with the  Contact icon. When you double-click a contact, the contact item view displays.
Figure 7-6 Contact Item View
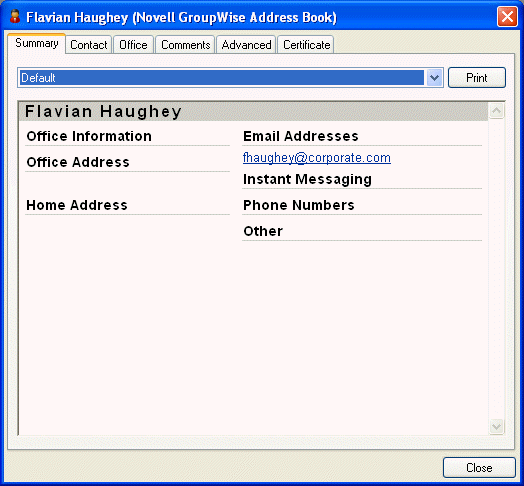
The following table explains the purpose of each page on the contact item view. For specific help about each field on a tabbed page, click a field in the contact item view, then press Shift+F1.
Table 7-1 Contact Item View Descriptions
|
Tab |
Purpose |
|---|---|
|
Summary |
This page displays a summary of the information contained in the other pages. Click the drop-down list to display the summary information in two different formats. If your system administrator has customized this page, you might have additional formats to choose from. |
|
Contact |
Use this page to enter the contact’s name, multiple e-mail addresses, multiple phone numbers, and multiple instant messaging IDs. Click the drop-down list to select how you want the name to display in Name Completion. You can select , , , or you can enter any display name you choose. When you want to address an item to this contact, type the display name in an address field (, , ) of the item. If you double-click an e-mail address on the page, a new mail view is opened, addressed to this contact. If you double-click an instant messaging ID from a supported product, the instant messaging product is opened (if installed) and a conversation is initiated with this contact. You can specify multiple phone numbers. Select the default phone number. |
|
Office |
Use this page to enter the contact’s title, department, organization, company address, mail stop, and company Web site. Type an organization name. If it is already in your address book, Name Completion fills in the name. If the organization name is not already in your address book, the name you enter is added to your address book. Use the arrow button to add more information to the organization. Click the button to launch a browser and go to the Web site. |
|
Personal |
Use this page to enter the contact’s home address, personal Web site, and birthday. Click the button to launch a browser and go to the Web site. Click the button to select the birthday of this contact. When the check box next to the date is selected, the birthday information is displayed on the Summary page and in the column if you have added one to an address book. Selecting the check box does not add the birthday to your Calendar. If you deselect the check box, the birthday information is available only on the Personal page. |
|
Comments |
Use this page to type information about your interaction with this contact. You can insert a time stamp for each entry. |
|
Advanced |
Use this page to view, add, and edit user-defined fields. All system and user-defined fields display. For more information, see Defining Custom Fields in a Personal Address Book. |
|
Certificate |
Use this page to view or remove security certificates you have received from this contact, change the trust of the certificates, edit certificate properties, and import and export certificates. For more information, see Section 12.10, Viewing Security Certificates You Have Received and Changing the Trust. |
|
History |
This page displays all the items you have sent to or received from this contact. You can specify the types of items you want to see. You can also specify the date range of items you want to see. This page includes a QuickViewer pane so you can quickly scan messages. |
7.3.2 Managing Groups
Each group in the Contacts folder is marked with the  Group icon. When you double-click a group, the group item view displays.
Figure 7-7 Group Item View
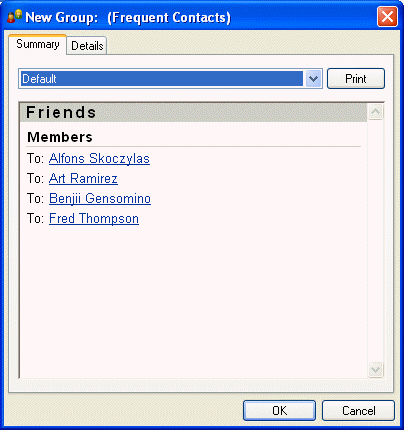
The following table explains the purpose of each page on the group item view. For specific help about each field on a page, click a field in the group item view, then press Shift+F1.
Table 7-2 Group Item View Descriptions
|
Tab |
Purpose |
|---|---|
|
Summary |
This page displays a summary of the information contained in the other pages. Click the drop-down list to display the summary information in two different formats. If your system administrator has customized this page, you might have additional formats to choose from. |
|
Details |
Use this page to enter a name for the group, a description of the group, and see who is included in the group. You can also select a member of the group and press Delete to remove the name. If you right-click a name, you can see details, remove the name, or change the designation of , and . Use the button to add entries to the group. For more information, see Adding and Removing Contacts from a Personal Group or Corporate Distribution List. |
7.3.3 Managing Resources
Each resource in the Contacts folder is marked with the  Resource icon. When you double-click a resource, the resource item view displays.
Figure 7-8 Resource Item View
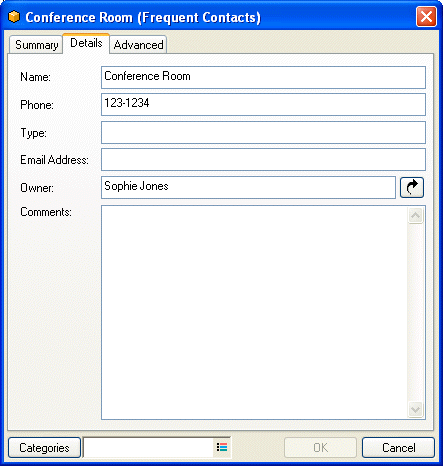
The following table explains the purpose of each page on the resource item view. For specific help about each field on a page, click a field in the resource item view, then press Shift+F1.
Table 7-3 Resource Item View Descriptions
|
Tab |
Purpose |
|---|---|
|
Summary |
This page displays a summary of the information contained in the other pages. Click the drop-down list to display the summary information in two different formats. If your system administrator has customized this page, you might have additional formats to choose from. |
|
Details |
Use this tab to enter a name for the resource, a phone number, resource type, e-mail address, owner, and comments about this resource. In the Owner field, you can enter a contact that is already in your address book, or you can use the arrow button to create a new contact entry. |
|
Advanced |
Use this tab to view, add, and edit user-defined fields. All system and user-defined fields display. For more information, see Defining Custom Fields in a Personal Address Book. |
7.3.4 Managing Organizations
Each organization in the Contacts folder is marked with the  Organization icon. When you double-click an organization, the organization item view displays.
Figure 7-9 Organization Item View
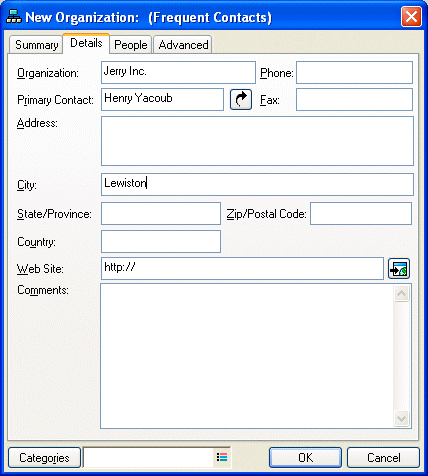
The following table explains the purpose of each page on the organization item view. For specific help about each field on a page, click a field in the organization item view, then press Shift+F1.
Table 7-4 Organizational Item View Descriptions
|
Tab |
Purpose |
|---|---|
|
Summary |
This page displays a summary of the information contained in the other pages. Click the drop-down list to display the summary information in two different formats. If your system administrator has customized this page, you might have additional formats to choose from. |
|
Details |
Use this page to enter a name for the organization, a phone and fax number, the primary contact in this organization, the address, Web site, and comments about this organization. In the field, you can enter a contact that is already in your address book, or you can use the arrow button to create a new contact entry. |
|
People |
This shows the members of this organization. These are the contacts who have this organization specified on the Office page. |
|
Advanced |
Use this page to view, add, and edit user-defined fields. All system and user-defined fields display. For more information, see Defining Custom Fields in a Personal Address Book. |
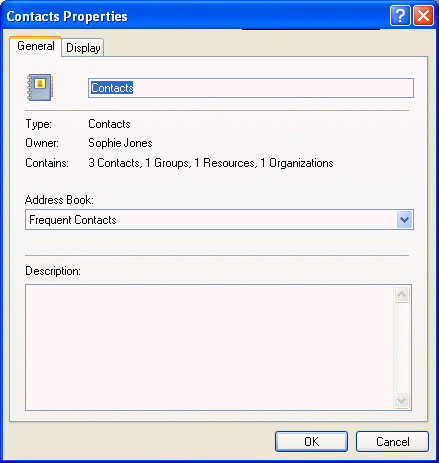
7.3.5 Changing the Address Book for the Contacts Folder
-
Right-click the Contacts folder.
-
Click .
-
Click the address book name from the drop-down list.
-
Click .
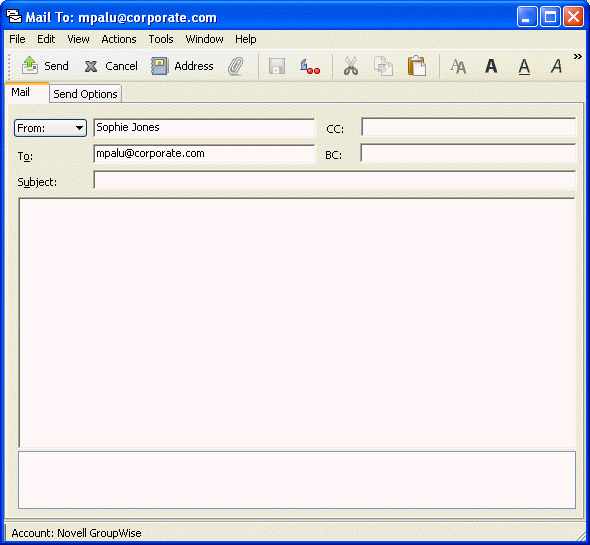
7.3.6 Sending a Mail Message from a Contact
-
From the Full Folder List, click the folder.
To access the Full Folder List, click the folder list header drop-down list (above the Folder List; it probably displays Online or Caching to indicate what mode of GroupWise you are running in), then click .
-
Double-click a contact.
-
On the Summary page, click the e-mail address you want to send a message to.
You can also double-click an e-mail address on the Contact page.
-
Type a subject and message in the mail message that opens.
-
Click on the toolbar.
7.3.7 Changing the Display Name of a Contact
The display name is the name that displays when you begin typing in the (or or ) field of a message. When you begin typing a name, for example, "Ta," Name Completion fills in the rest of the name with a name from the address book, for example "Tabitha Hu." However, if there are two Tabitha Hus in the address book, one in Accounting and one in Facilities, it might be difficult for you to know which name Name Completion has filled in, unless you take the time to look at more properties.
You can change the display name so that it’s easy to know which name Name Completion has filled in. For example, if you only correspond with Tabitha Hu in Accounting, you could change the display name to Tabitha--Accounting.
-
From the Full Folder List, click the folder.
To access the Full Folder List, click the folder list header drop-down list (above the Folder List; it probably displays Online or Caching to indicate what mode of GroupWise you are running in), then click .
-
Double-click a contact.
-
Click the tab.
-
Click the field.
-
Type a new display name.
You can also click the drop-down list to select Last, First or First Last (for example: Hu, Tabitha or Tabitha Hu).
-
Click .
The next time you address a message, Name Completion fills in this Display Name.
7.3.8 Viewing All Correspondence with a Contact
Use the History page to view all correspondence you have had with a contact.
-
From the Full Folder List, click the folder.
To access the Full Folder List, click the folder list header drop-down list (above the Folder List; it probably displays Online or Caching to indicate what mode of GroupWise you are running in), then click .
-
Double-click a contact.
-
Click the tab.
All items you have received from or sent to this contact display.
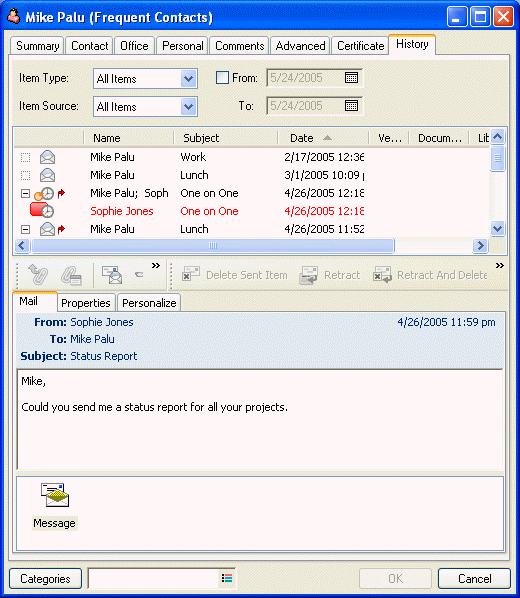
The column shows which folder each item is located in.
To add or remove columns, right-click the column heading, then click an option. To sort by the information of a column (for example, by date or subject), click the column heading.
The message text of the selected item displays below the item list. You can resize the window to see more or less text. You can act on an item (for example, reply, forward, or delete) by clicking buttons on the toolbar above the message text.
-
To show items received and sent between specific dates, specify start and end dates in the and fields.
-
To show only a specific item type (for example, mail or appointment), click an item type from the drop-down list.
-
To show only received items or sent items, click or from the drop-down list.