16.3 Archiving E-Mail
Use Archive to save mail or phone messages, appointments, reminder notes, or tasks to a designated database on a local drive. Archiving items saves network space and keeps your Mailbox uncluttered. It also protects items from being automatically deleted.
16.3.1 Understanding Your Archive
You can view archived items whenever you need to. You can also unarchive any archived item. When you archive an item you have sent, you cannot track the status of that item.
The system administrator might specify that your items are archived automatically on a regular basis. Automatic archiving occurs every time the GroupWise client is opened. Items are archived from the mailbox the user is currently using. This means if you are in Caching Mode, items are archived from your Caching Mailbox, and if you are in Online Mode, items are archived from your Online Mailbox.
Some items like appointments might be scheduled to be archived before the actual appointment date. When these items are archived, they are removed from the Sent Items folder but remain on your calendar. This allows you to schedule items far in advance, without worrying about losing them from your calendar.
When you move an item to a folder, it is not archived. Items in all folders are affected by the Cleanup options you specify in Environment Options, and by any archiving or cleanup options your administrator specifies.
Archived items are never deleted unless you manually go into your archive and delete them.
16.3.2 Specifying Where Archives Are Stored
-
Click > .
-
Double-click , then click the tab.

-
Specify the location of your archive directory in the field.
-
Click .
For information on how to archive items in your Mailbox, see Section 16.3, Archiving E-Mail.
IMPORTANT:If you run GroupWise on multiple workstations, make sure that the archive location you specify exists on only one of the workstations. After the initial creation of your archive, the archiving process occurs only if GroupWise can access the specified location. If the archive exists on multiple computers, the result is multiple archives, which is a situation that you want to avoid. For information on how to remedy this problem, see Section 16.3.8, Combining Archived Items from Multiple Archives.
16.3.3 Moving an Item to the Archive
-
If you have not previously done so, specify the archive path in File Location in the Environment dialog box. See Section 16.3.2, Specifying Where Archives Are Stored.
-
In your Mailbox, select the items you want to archive.
-
Click > .
When you archive an item you have sent, you cannot track the status of that item.
16.3.4 Archiving Items Automatically
-
Click > .
-
Double-click , then click the tab.

-
Select for the item type you want.
-
Specify the number of days after the item is delivered or completed that you want it to be archived.
-
Click .
If your system administrator has specified that items are automatically archived on a regular basis, you might not be able to change this option.
If you or your system administrator has set up auto-archiving of items in your Mailbox, items in the Tasklist folder are also archived based on the original date you received the item, not based on the due date you assign it.
If you have automatic archiving set up, it only archives items to one computer. If you are working on a computer where the automatic archive is not available, the items are not archived to the computer where the archive is not available.
16.3.5 Viewing Archived Items
-
In the Main Window, click > .
or
Click the folder list header drop-down list (above the Folder List; it probably displays Online or Caching to indicate what mode of GroupWise you are running in), then click .
16.3.6 Unarchiving Items
-
Click > .
or
Click the folder list header drop-down list (above the Folder List; it probably displays Online or Caching to indicate what mode of GroupWise you are running in), then click .
-
Click the item you want to unarchive, click > .
-
Click > to close the archive and return to the Main Window.
or
Click the folder list header drop-down list (above the Folder List; it displays Archive), then click your user folder (your name) to return to the mode of GroupWise you were running previously.
Unarchived messages are returned to the folder from which they were archived. If the folder has been deleted, GroupWise creates a new folder. If auto-archive has been configured, unarchived messages remain in your active mailbox for 7 days before they are moved back to your archive.
16.3.7 Moving Your Archive from One Location to Another
You might want to move your archive from one location to another location in your computer’s file system.
-
Click > .
-
Double-click , then click the tab.
-
In the field, specify the location where you want to move your archive.
NOTE:If you are moving your archive to a location where a GroupWise archive currently exists or previously existed, do not specify a directory that contains archive files. Archive files are stored in the ofxxxarc directory, which is a directory that GroupWise automatically generates as a subdirectory to the archive directory.
If you specify the ofxxxarc directory as your GroupWise archive directory, the result is multiple archives, which is a situation that you want to avoid. For information on how to remedy this problem, see Section 16.3.8, Combining Archived Items from Multiple Archives.
-
Click .
-
(Conditional) If you have not previously enabled archiving, you are prompted as to whether you want to enable archiving. Click .
-
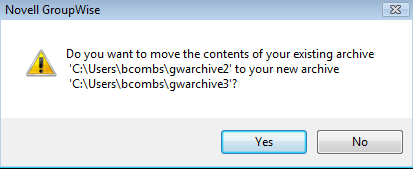
(Conditional) If you are moving your archive to a directory that does not already have archive files, you see a message asking if you want to move the contents of your archive to the new location.
-
Ensure this is the location where you want to move your archive, then click .
-
Click .
16.3.8 Combining Archived Items from Multiple Archives
You might have items in multiple archives that you want to combine into one archive.
-
In the GroupWise client, specify the archive directory that contains the fewest archived items.
For information on how to specify an archive directory in GroupWise, see Section 16.3.2, Specifying Where Archives Are Stored.
You must be on the physical computer that contains the directory where the archive exists.
-
Unarchive all the items in the archive, as described in Section 16.3.6, Unarchiving Items.
-
Specify your main archive directory.
For information on how to specify an archive directory in GroupWise, see Section 16.3.2, Specifying Where Archives Are Stored.
You must be on the physical computer that contains the directory where the archive exists.
-
Archive all of the items that you want to move into your main archive, as described in Section 16.3.3, Moving an Item to the Archive.
-
Repeat Step 1 through Step 4 for any additional archives that you might have, until you have archived items in only your main archive.