4.1 Running Reports
Identity Audit is installed with a set of reports organized into several product categories. Reports run asynchronously, so users can continue to do other things in the application while the report is running. The PDF report results can be viewed by any user after the report finishes running.
Many report definitions include parameters. The user is prompted to set these before running the reports. Depending on how the report developer designed the report, the report parameters can be text, numbers, bits values, or dates. A parameter might have a default value or a list based on values in the Identity Audit database.
4.1.1 Manually Running a Report
-
In Identity Audit, click to display the available reports.
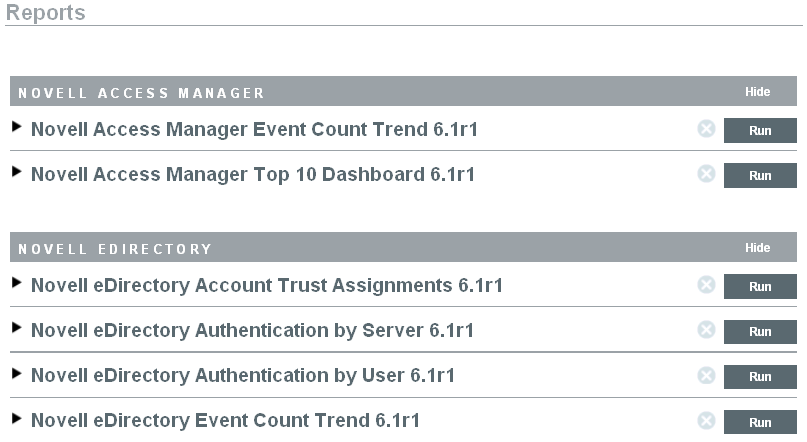
If desired, click a report definition to expand it. If you see a link, you can click to find out how the completed report looks with a set of sample data.
-
Select the report you want to run and click .
-
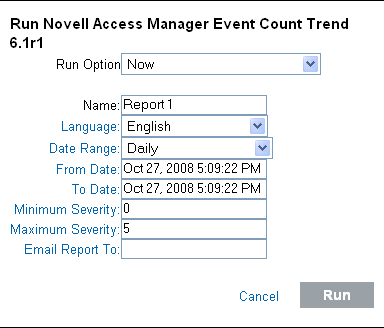
Set the schedule for running the report. If you want the report to run later, you must also enter a start time.
-
Now: This is the default. It runs the report immediately.
-
Once: Runs the report once at the specified date and time.
-
Daily: Runs the report once a day at the specified time.
-
Weekly: Runs the report once a week on the same day at the specified time.
-
Monthly: Runs the report on the same day of the month every month, starting at the specified date and time. For example, if the start date and time is October 28 at 2 P.M, the report will run on the 28th day of the month at 2 P.M every month.
All time settings are based on the browser’s local time.
-
-
Specify a name to identify the report results.
Because the username and time are also used to identify the report results, the report name need not to be unique.
-
Choose the language in which the report labels and descriptions should be displayed (English, French, German, Italian, Japanese, Traditional Chinese, Simplified Chinese, Spanish, or Portuguese).
The data in the report will be displayed in whatever language it was originally produced by the event source.
-
If the report includes time period parameters, choose the date range. All time periods are based on the local time for the browser.
-
Current Day: Shows events from midnight of the current day until 11:59 of the current day. If the current time is 8AM, the report will show 8 hours of data.
-
Previous Day: Shows events from midnight yesterday until 11:59PM yesterday.
-
Week To Date: Shows events from midnight Sunday of the current week until the end of the current day.
-
Previous Week: Shows last seven days of events.
-
Month to Date: Shows events from midnight the first day of the current month until the end of the current day.
-
Previous Month: Shows a month of events, from midnight of the first day of the previous month until 11:59 PM of the last day of the previous month
-
Custom Date Range: For this setting only, you also need to set a start date and end date below.
-
-
If you selected , set the start date (From Date) and the end date (To Date) for the report.
If any of the other settings is selected for the report type, these time settings are ignored.
-
Set the events to be included in the report.
-
Set the events to be included in the report.
-
If the report should be mailed to a user or users, enter their e-mail addresses, separated by commas.
To enable mailing reports, the administrator must configure the mail relay under .
-
Click .
A report results entry is created and mailed to the designated recipients.
4.1.2 Scheduling a Report
When you run a report, you can run the report immediately or schedule it to be run later, either once or on a recurring basis. For scheduled reports, you must choose a frequency and enter a time at which the report should run.
-
Now: This is the default. It runs the report immediately.
-
Once: Runs the report once at the specified date and time.
-
Daily: Runs the report once a day at the specified time.
-
Weekly: Runs the report once a week on the same day at the specified time.
-
Monthly: Runs the report on the same day of the month every month, starting at the specified date and time. For example, if the start date and time is October 28 at 2PM, the report will run on the 28th day of the month at 2PM every month.
NOTE:All time settings are based on the browser’s local time.
Figure 4-1 Scheduled Reports
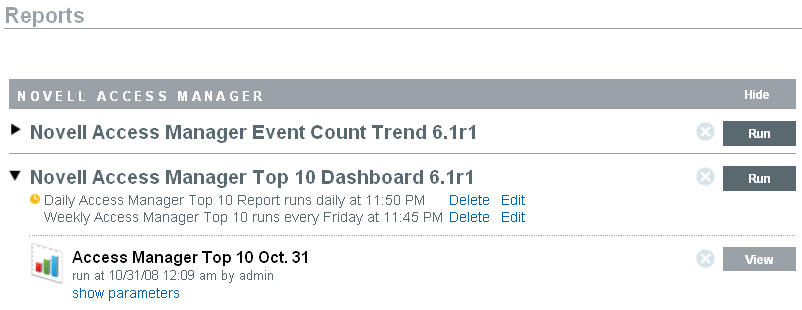
Report schedules can be removed or modified by using the and links.