7.1 Scheduling Jobs in Designer
Designer’s job scheduler contains most of the same functionality as the job scheduler found in iManager.
7.1.1 Creating a Job
To create a new job in Designer:
-
In the Outline view, right-click a driver and select .

-
In the New Job window, give the job a descriptive name, or use the name provided.

-
In the field, select the server to perform the job execution. You can click the drop-down item to select a different server than the one listed.
-
If the administrator has created and installed any custom job definitions on the selected server, click the icon to the right of the server entry to read in a live list of available jobs from the server. Because Designer is an offline modeling tool, only the Identity Manager 3.5 job definitions show in the server’s list by default.
-
Choose a definition for the job. The New Job Wizard comes with three job definitions; there might also be additional custom jobs listed.
-
Random Password Generator: Generates a random password for each object in the job’s scope. The password is generated by NMAS™ to match the Password Policy object that the job references. These Password Policy objects are not usually the same as those used for eDirectory™ user password policies.
The job submits the generated passwords one at a time to the driver’s Subscriber channel. The Subscriber channel policies must take action on the passwords.
-
Schedule Driver: Starts or stops the associated driver. You can also toggle a driver to start the driver if it is stopped or to stop the driver if it is running.
-
Subscriber Channel Trigger: Submits zero or more trigger documents to the Subscriber channel. The submission can either be a document per object if a scope is defined, or it can be a single trigger event if no scope is defined.
Trigger event documents identify the job and the scope object. A trigger event can bypass the cache and “go to the head of the queue” if desired. Trigger jobs allow you to use driver policies that you can customize for your personal requirements.
-
-
Decide if you want to edit the job. The option opens the newly created job in the IDM Job Editor window after it first saves the job object. If you do not want to open the editor at this time, deselect the editor.
-
Click .
-
The File Conflict window gives you the option to save the job object and continue. If you want to create the job object and continue with the IDM Job Editor, click . Otherwise, click .
-
Continue with Job Editor Selections Under the General Tab.
7.1.2 Editing a Job
After you create a job, you need to add the necessary information to make the job useful. To edit a job, double-click a newly created job in the Outline view to bring up the job in the IDM Job Editor view.
Figure 7-1 The IDM Job Editor View
The IDM Job Editor has four tabs at the bottom of its view:
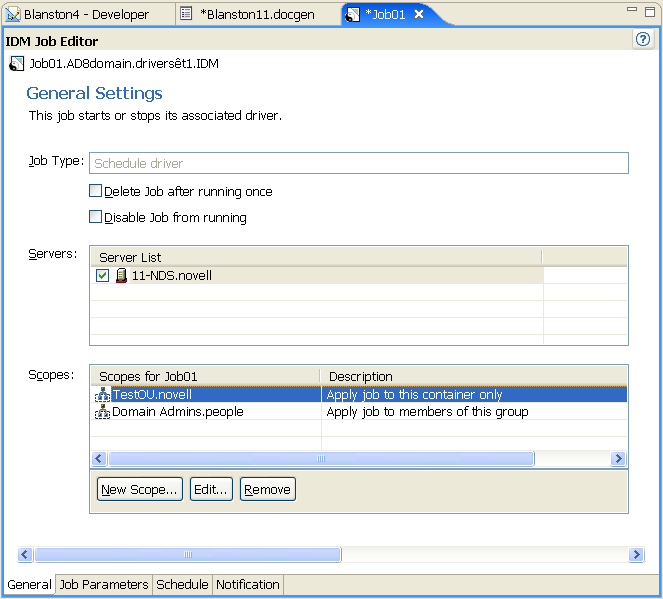
Job Editor Selections Under the General Tab
A line at the top of the General tab shows the Java class name of the job. This is followed by the job type, which shows the type of job you selected. Under the Job Type heading, you can enable or disable the job, or delete the job after it runs.
Figure 7-2 Items Under the General Tab
-
To delete the job after it runs, select .
-
To disable the job from running, select .
-
In the column, select the server or servers where this job should run.
A filtered list of servers is available to help you assign this job. A custom job may be installed on one server but not on another. In this case, the server without this custom job is filtered out of the Server List.
A job can be assigned to multiple servers as long as it has been installed on each server. Designer only allows this association if the jobs are properly installed and packaged so that the Metadirectory engine can see them.
-
To add a scope to the column, click .

-
To select a scope object, type the Distinguished name of the object or use the icon to browse to and select the object. Click to add the scope object.
Scopes allow you to define the objects that this job applies to. An object in eDirectory can be a container, a dynamic group, a group, or a leaf object. If you select a group object, you can apply the job to the group's members, or only to the group. If you select a container object, you can apply the job to all descendants in that container, to all of the children in the container, or to the container only.
-
If the object is a container, select . Then select how you want to apply the job:
-
Apply job to this container only
-
Apply job to children of this container
-
Apply job to all descendants of this container
-
-
(Optional) If you select or , you can specify the classes you want to scope. Click the icon to bring up the Schema Browser window to select the classes you want to scope. Select the class schema, then click .

The classes are added to the box. To remove a class, select it and click the Minus icon.
-
If the object is a group or a dynamic group, select . You can then select the option if the scope is for the group.
-
If the object is a non-container, select .
-
After the scope criteria are selected, click to return to the General Settings page.
-
If you need to edit a scope, select the scope name, then click .
-
To remove a scope, select the scope name, then click .
Job Editor Selections Under the Job Parameter Tab
The Job Parameter page allows you to add additional parameters to the job and to view the parameters as they are presently set up. What you can do depends on the type of job you selected.
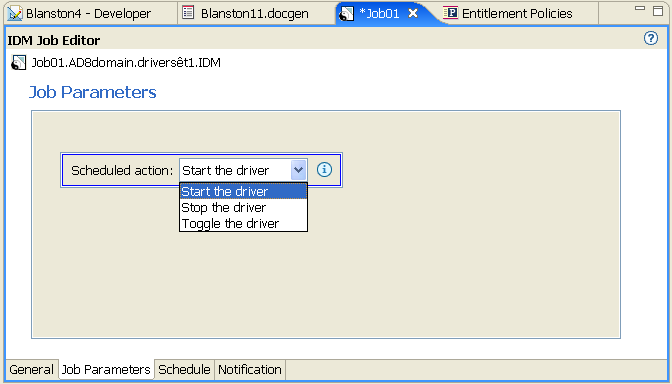
Parameters for the Schedule Driver Job
Figure 7-3 The Job Parameter Page for a Schedule Driver Job
-
If you want the job to start the driver, select .
-
If you want the job to stop the driver, select .
-
If you want the job to stop the driver if it’s started or to start the driver if it’s stopped, select .
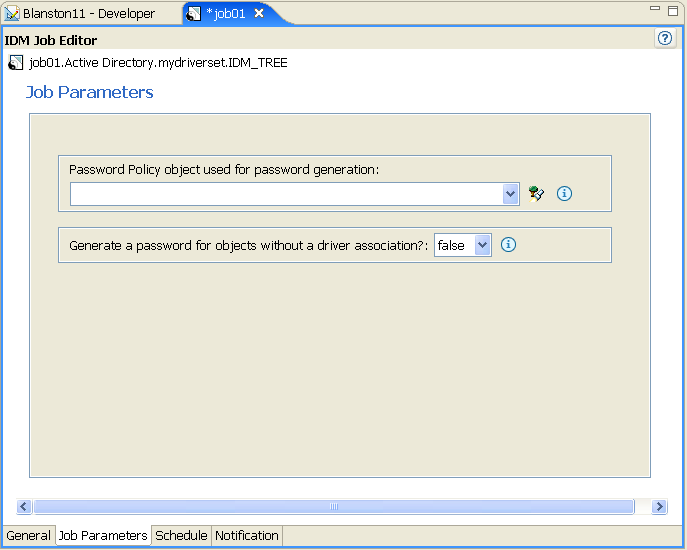
Parameters for the Generate Random Passwords Job
Figure 7-4 The Job Parameter Page for the Generate Random Password Job
-
Type the Password policy object’s Distinguished name, or use the icon to select the Password policy you want to use for password generation.
-
If you want to generate passwords for scoped objects without a driver association, select . Otherwise, select .
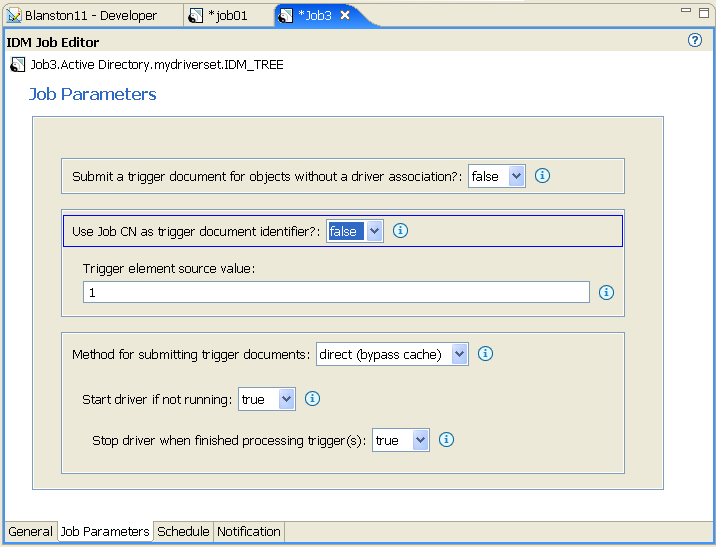
Parameters for the Subscriber Channel Trigger Job
Figure 7-5 The Job Parameter Page for the Subscriber Channel Trigger Job
-
If you want to submit a trigger document for scoped objects that do not have a driver association, select . Otherwise, keep the default of .
-
If you want to use the job’s Common Name (CN) as a document identifier trigger, keep the default of . Otherwise, select .
-
(Optional) If you select , specify the string that the job can use as the value for the trigger element’s Source attribute.
-
Select a method for submitting the trigger documents. If you want to queue the job the trigger is from, keep the default of . Otherwise, select .
-
(Optional) If you select , you are presented with the option. If you want to start the driver if it is not running, keep the default of . Otherwise, select .
-
(Optional) If you select on the option, you are presented with the option with the default of . Use the default to stop the driver once it finishes processing the trigger job, or select to keep the driver running.
Customized job definitions have their own parameter sets.
Job Editor Selections Under the Scheduler Tab
The Scheduler tab allows you to set up when you want to run the job.
Figure 7-6 The Job Options for the Scheduler Tab
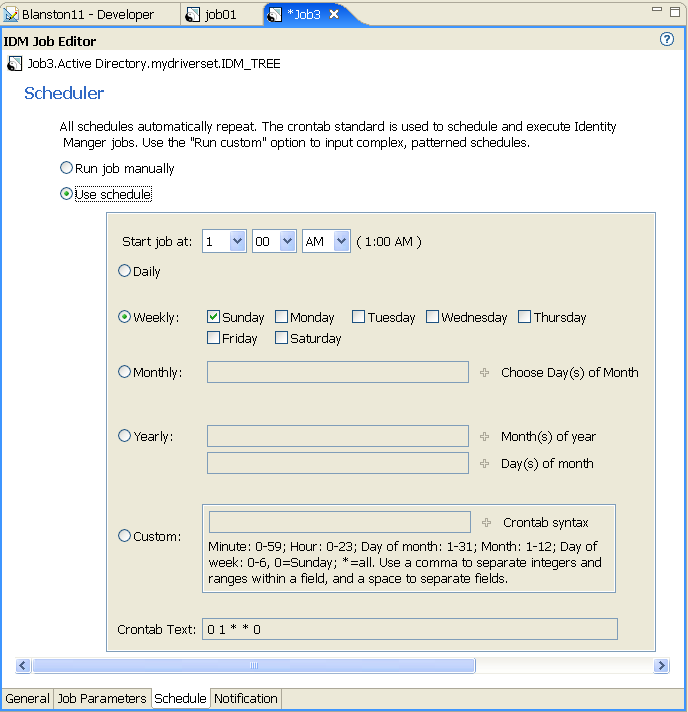
-
Select the option to set the date and time, and whether to run the job daily, weekly, monthly, yearly.
Select the option to run the job when you choose to.
-
With selected, set the time when you want the job to start running. Use the drop-down menus to select the hours, minutes, and or . The default is 1:00 AM.
-
If you want to run the job repeatedly, use the , , , , or fields to select when you want it to run.
For example, if you want the job to run weekly, select , then select the day you want it to run. If you want the job to run once a month, select , then click the icon to select the day of the month.

-
(Optional) Select to choose minutes, hours, days, months, and days of the week from the Choose Advanced Crontab Criteria page.

-
The Choose Advanced Crontab Criteria page default has everything selected. Click , choose the time and days you want to run the job, then click to return to the Scheduler page.
The information displayed in the field displays any settings you make on the Scheduler page. For example, if you click and select two days, those two days are displayed in the field.
Job Editor Selections Under the Notification Tab
The Notification Settings page allows you to define what you want to do with the job results. It is divided into two parts, and , with the , , , and results for each part.
The Notification Settings page allows you to set how you want to be notified for each result. Actions include sending an audit result or sending an e-mail when the result completes.
Figure 7-7 The Job Options Under the Notification Tab
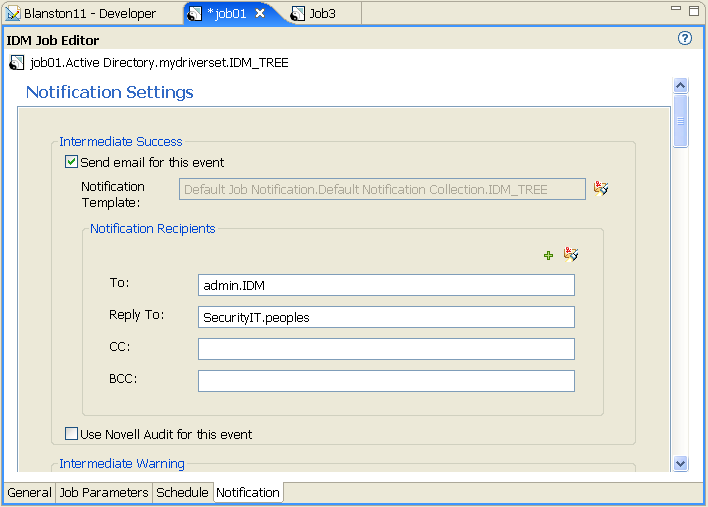
-
If you select , Designer supplies the template in the field. To change templates, click the icon to select another template.
-
Under Notification Recipients, select who you want to send the results to by typing the user’s or group’s fully Distinguished name. You can use the icon to create a mail profile.

The and fields are required for a profile.
-
When you have filled in the information, click .
-
If you want the results to go to Novell® Audit, select .
-
Use Steps 1 through Step 4 for each of the options:
-
>
-
-
-
-
-
-
-
If you do not select an option, no action is taken for the result.
-
Deploying a Job with Scope Objects
Jobs might need access to eDirectory data and certain Identity Manager actions, such as starting and stopping drivers. Such access is subject to eDirectory rights assignments and is controlled by the rights that are granted to the DirXMLJob object. Identity Manager actions are controlled by special attributes, but normal eDirectory rights are needed for data reads and writes.
When you deploy a job object that has scope objects, there might be eDirectory rights assignments that Designer cannot properly set up. The rights needed to complete the task depend on the scope objects that are assigned to the job object.
Figure 7-8 Warning Messages When Deploying a Job with Scope Objects
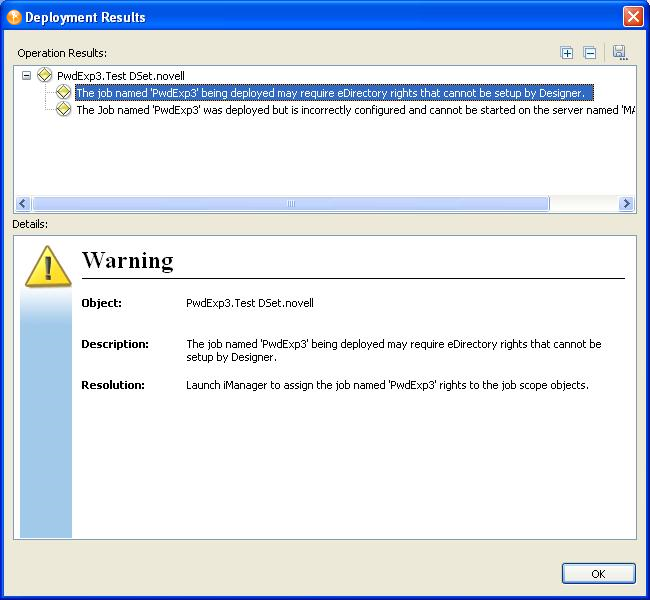
If you see this warning when deploying job objects, use the iManager utility to assign eDirectory rights to the job object so it can properly access the job scope objects and complete its task.
You can assign the eDirectory rights either from the option or from the option. To assign eDirectory rights to the job object, do the following:
-
In Novell iManager, click the icon.
-
Select the job object from the in the tab.
-
In the View pane, select .
-
From the list, select
-
In the Modify Inherited Rights Filter window, click .
-
From the list, select the related property, and click .
-
Change the rights as required in the Modify Inherited Rights Filter window, and click .
-
From the View Effective Rights window, select the property from the list.
Another procedure to assign the eDirectory rights is as below:
-
In Novell iManager, click the icon.
-
In the Administration list, click .
-
Click the Active Directory Parent or Active Directory Child for which the job is created.
-
Click the tab, select the job to be assigned with rights, then click .
-
In the Job Status window, click the link, then click .