9.5 Actions
This section describes the actions that are available for use within an action model. An action is similar to a programming statement in that it takes input in the form of parameters and performs specific tasks. An action model is a set of instructions for processing XML documents and communicating with XML data sources. An action model performs all data mapping, data transformation, and data transfer within an Integration activity. All actions within an action model work together.
At runtime, every action is converted to an executable form of ECMAScript and processed. At design time, many actions accept ECMAScript expressions as parameters, adding great flexibility and control to the action model. The Function action provides you with the most flexibility and control by giving you access to the full functionality of the ECMAScript language.
This section contains the following topics:
9.5.1 Advanced
This section includes descriptions of the following actions:
Apply Namespaces
This section includes the following topics:
About the Apply Namespaces Action
Ideally, an Integration activity always receives valid XML documents (that is, the documents validate against their schema, map and transform data appropriately, and send valid XML documents). However, this might not always the case. In other cases you might want to ignore namespaces altogether. It is important to have some means of validating XML documents. These and many other XML processing cases require a method of modifying or overriding the prefix and namespace handling provided by the Integration activity.
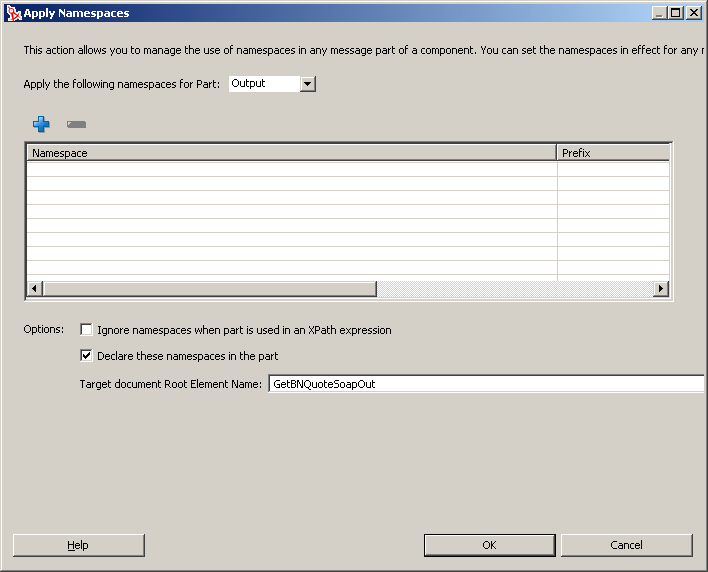
The Apply Namespaces action provides a mechanism for managing namespaces and namespace prefixes in effect for input and output messages within an action model. The action allows you to consolidate namespace and prefix declarations for a Web service in one place, to override those declared in the input and output messages, or to ignore namespaces altogether.
The Apply Namespaces action can be applied to input and output messages. You can also have multiple Apply Namespaces actions for an individual message part, effectively changing namespaces based on conditions specified in the action model. The namespaces declared are in effect until the end of the action model is reached or another Apply Namespaces action is executed. In other words, only the most recent Apply Namespaces action is in effect.
When creating a new Integration activity, an Apply Namespaces action is created automatically for the Output message if the WSDL declares any namespaces. After component creation, you can manually create additional Apply Namespaces actions.
Creating an Apply Namespaces Action
-
Right-click the line in the action model that is one line above the position in which you want to place the Apply Namespaces action (the new action is inserted below the line that you selected).
-
Select .
-
Select the message (Input, Output, _SystemFault, or Project) to which you want to apply the namespace from the list.
-
Click the plus (+) icon to add a new row, then click the column and type a namespace URI.
The table displays all the Namespace declarations for the selected message part. After creating a new Apply Namespaces action, the table might or might not contain a list of declarations for a selected part. The list of declarations is initially constructed from the declarations defined in the WSDL.
Within the declaration list for a message part, prefixes must be unique. However, you can have duplicate namespace URIs if the URIs have unique prefixes. This allows you to declare multiple prefixes that are associated with the same namespace URI.
-
If desired, click
Use this option when you want Map action source XPaths to find elements by their XML local name only.
This provides for a less restrictive method of specifying Map actions (see Section 9.5.8, Map) and is useful when Map actions contain the wrong prefix or no prefix in their Source specifications. This allows you to place the Apply Namespaces action inside a Decision action (see Section 9.5.5, Decision) that tests whether the Input message contains prefixes or not, yet still have one set of Map actions to map the input to another part. In other words, the Integration activity normally expects the input to contain prefixes, so you design all your Map actions with prefix names. For the occasional input that has no prefixes, the Decision action activates the Apply Namespaces action defined to ignore namespaces for input, allowing the Map actions to work in either case.
-
When you want to declare a set of namespaces in the root element of an output message built by your action model, click .
This option is almost always checked for output to ensure that prefixed elements created in the output, as a result of Map actions, resolves to the proper namespaces.
This allows a recipient of the output to validate the document properly. The Apply Namespaces action with this option checked could also be used to add new declarations to an existing document that already contains declarations.
The is used to specify the name of the root element to contain the Namespace declaration attributes. The Integration Activity automatically fills in this value based on the information in the WSDL document and the message part specified in the for Part list.
-
Click . The new action is added to the action model.
Throw Fault
This section includes the following topics:
About the Throw Fault Action
You use the Throw Fault action to do the following:
-
Write information to an XML message on failure of an action
-
Perform any number of actions before throwing the fault
-
Halt execution of a component
Throw Fault is only executed when a condition that you specify is true. The message part that is written when a Throw Fault action is executed is called a Fault document, and the XML within this message is contained in a global object called ERROR.
Throw Fault actions can be used in a number of ways:
-
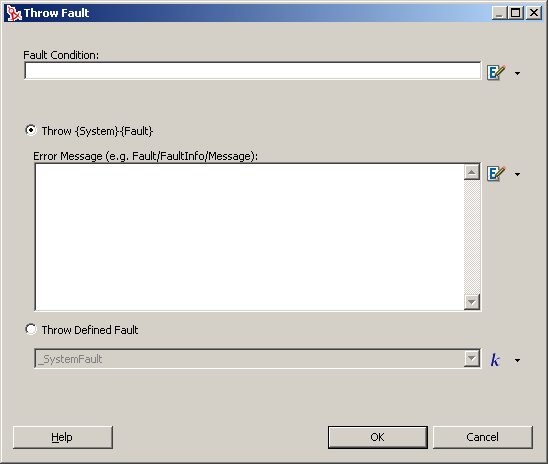
Using a Throw Fault Action by itself. You can specify a Fault Condition and an error message within the Throw Fault Action dialog. When the action is executed, the Fault Condition is evaluated. If the condition evaluates as True, the following occurs:
-
Any Before Throw actions that you specify are executed. This can be very useful as a way to leave your application in a particular state before halting execution. For example, you can send a mail message stating that the execution did not complete.
-
The contents of the error message are written to the Fault document in a node that you specify, as well as to the global object ERROR.
-
The action model execution is halted.
-
-
Using a Throw Fault Action within a decision expression in the Decision action. You can specify a fault condition by entering it in the decision expression of a Decision action. Then put a Throw Fault statement in the True branch of the Decision action. Here you can either specify additional conditions in the Throw Fault fault condition or leave it blank and simply specify the fault document to which the fault information should be written. When the action is executed and all your conditions are True, the Throw Fault action is executed. If the fault condition in the Decision action or Throw Fault action is False, the next action in the action model is executed.
-
Using a Throw Fault inside a Try /On Fault action (see Try/On Fault. By putting either of the above methods inside the execute branch of a Try /On Fault action, you prevent the Integration activity from halting execution and have an opportunity to respond or recover from the fault. You create your fault condition by using one of the previous two methods inside the execute branch of a Try/On Fault action after other actions the output of which you want to test have worked correctly. You can specify any number of unique faults so that the Integration activity can branch into several different directions, depending on which fault occurs. When the Throw Fault action for the given fault is triggered, instead of halting execution of the component, control passes into the appropriate branch of the Try/On Fault action. Here you can specify other actions to remedy or respond to the error.
Adding a Throw Fault Action
-
Right-click the line in the action model that is one line above the position in which you want to place the Throw Fault action (the new action is inserted below the line that you selected).
-
Select .
-
In the field, type a valid ECMAScript expression that, when True, causes the action to throw a fault.
You can also click the ECMA expression builder button and build an expression (see Section 10.0, Working with ECMA Expressions).
-
Select to write your error message to the _SystemFault document.
By default, the message that you type in the field is placed in the Fault/FaultInfo/Message node of that document. Specify a different node if desired. You can also click the ECMA expression builder button and build an expression.
-
Select to select a fault document that is one of the message parts associated with the Integration activity.
-
Click .
The new action is added to the action model. Place any actions that you wish to execute before the application stops in the branch.

Try/On Fault
The section includes the following topics:
About the Try/On Fault Action
The Try/On Fault action executes a set of actions when a fault occurs within the Execute branch of the Try/On Fault action. Any number of defined faults can be specified within the Execute branch. You can use the Try/On Fault action to trap anticipated errors and run other actions to remedy or report on the fault. For instance, you can use Try/On Fault to respond to an XML Interchange action that fails to find a file.
When you add a Try/On Fault action, several lines are added to the action model:
-
The beginning of the Try action
-
The branch
-
A branch for each Fault that you specified
-
An branch
When you are aware of potential faults an action can produce, you put those actions in the Execute branch. You then put error handling actions under each On Fault branch to handle unique situations. If a fault does occur, the actions in the On Fault branch execute.
Using the example given previously, if you anticipate a fault with the XML Interchange action, you put the action under the Execute branch. In one On Fault branch, you might add another XML Interchange action that attempts to read the file from an alternate location. In another On Fault branch, you might add another XML Interchange action that looks for a file with a different extension.
Adding a Try/On Fault Action
-
Right-click the line in the action model that is one line above the position in which you want to place the Try/On Fault action (the new action is inserted below the line that you selected).
-
Select .
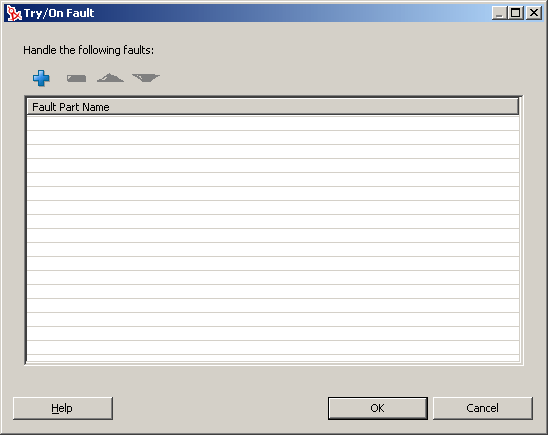
Use the + icon to add a new fault part to the list. Use the red - icon to remove fault parts from the list. Use the up-arrow and down-arrow icons to change the order of the faults.
If you don’t specify a fault part, corrective actions can be placed in the default All Other Faults branch of the Try/On Fault action.
-
Click .
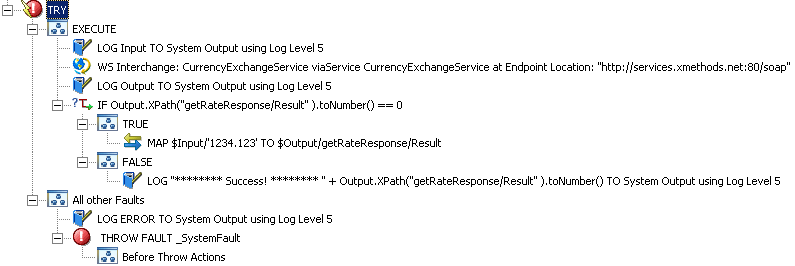
The following appears in the Action Model Viewer: the action icon, with an Execute, one or more On Fault branches, and an All Other Faults branch.
-
Add any actions that might cause errors to the Execute branch.
-
In the On Fault branch, add actions that resolve the errors specified in the Execute branch.
The following illustration shows a complete Try/On Fault action in the action model.
9.5.2 Data Exchange
This section includes descriptions of the following actions:
WS Interchange
This section includes the following topics:
About the WS Interchange Action
The WS (Web Service) Interchange action is the most important action in the Integration activity and allows the Integration activity to invoke a Web service according to calling conventions specified in a WSDL file. The Integration activity automatically creates a WS Interchange action when it creates the action model.
In most cases there is no need to add another WS Interchange action to the action model. However, there might be situations in which you need to do so. The following procedure describes how to add a WS Interchange action.
Adding a WS Interchange Action
-
Right-click the line in the action model that is one line above the position in which you want to place the WS Interchange action (the new action is inserted below the line that you selected).
-
Select .
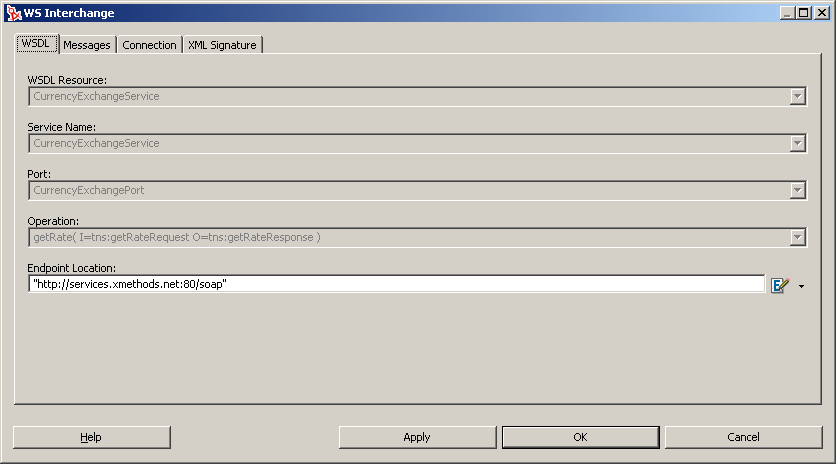
The , , , and fields are filled in automatically based on the information in the WSDL specified for the Integration activity.
-
If desired, modify the information in the field (usually a URL pointing at a servlet) for the Web service that you wish to use, wrapped in quotation marks. Alternatively, enter an ECMAScript expression that will evaluate to an Endpoint Location at runtime.
-
Click the tab.
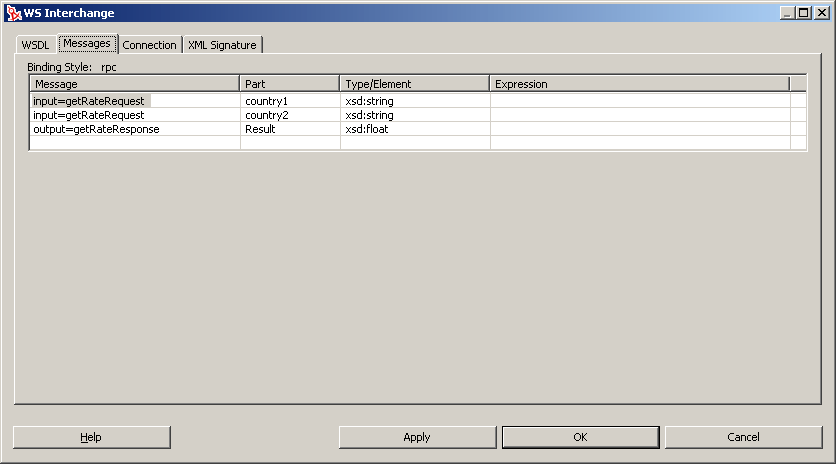
The , , and fields are filled in automatically based on the information in the WSDL specified for the Integration activity.
-
If desired, click the column for a message, then use the ECMA expression builder to create an ECMAScript expression that describes the source and target for the message. Usually, this is an expression that specifies an XPath location in an Input part or Output part.
-
Click the tab.
You use this tab to specify connection parameters for HTTP servers that require authentication.
-
Type a user ID to use for the connection in the field, and a password for the user in the field.
The user ID and password are not actually submitted during the establishment of a connection. They are simply defined here. The password is encrypted. You will have access to UserID and Password variables in ECMAScript, allowing you to map the user ID and password as values into the screen. This way, no one ever sees the passwords.
-
If the connection requires a client certificate, choose a client certificate by clicking the browse button in the field and selecting the certificate file you want to use for this connection.
-
If the connection requires a client private key, choose a client private key by clicking the browse button in the field and selecting the client private key file.
-
Type the password for the client private key in the field.
-
Specify a connection timeout value, in seconds, in the field.
-
Click to test the WS Interchange action in real time, or click to close.
XML Interchange
This section includes the following topics:
About the XML Interchange Action
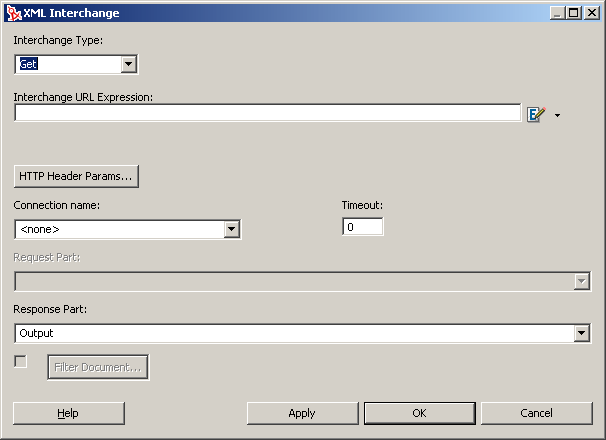
The XML Interchange action reads external XML documents into a DOM and writes data from the DOM as XML files. There are four types of XML Interchange actions:
-
GET
-
PUT
-
POST
-
POST with Response
When using the GET interchange, fill in the field with a URL that points to the XML document that you want to bring into the Integration activity. In the field, you select the DOM (Input, Output, _SystemFault, or Project) that is to receive the XML.
When using the PUT interchange, enter a URL that points to the location to which you want to write the XML document in the . In the field, you select the name of the DOM from which you want to send data as XML.
When using the POST interchange, enter a URL that points to the location to which you want to write the XML document in the field. In the field, you select the name of the DOM from which you want to send data as XML.
When using the POST with Response interchange, you supply the same parameters as for Post, with one additional parameter. You must also specify a Response Part DOM to receive the Response XML document from the Post with Response interchange. The difference between the two interchanges is that Post with Response expects a response XML object back from the origin server.
Adding an XML Interchange Action
-
Right-click the line in the action model that is one line above the position in which you want to place the XML Interchange action (the new action is inserted below the line that you selected).
-
Select .
-
Select an (Get, Put, Post, or Post with Response).
-
In the field, type an expression that defines a fully qualified URL for an XML document, using any of the following supported protocols:
-
file
-
FTP
-
HTTP
-
HTTPS
Depending on the selected, this URL is the source or the destination of the XML file for the XML Interchange action. For example:
file:///g:/xmldata/invoicebatch1.xml
ftp://accounting:password@123.456.789.987:21/invoices/inv1.xml
Because this is an ECMAScript expression, the URL string must be enclosed in quotation marks.
-
-
If you need to specify HTTP header parameters, click .
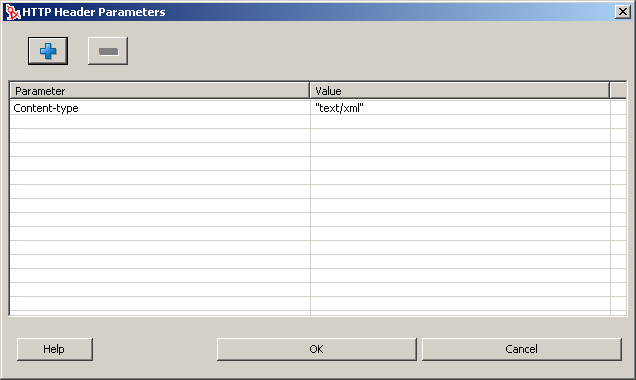
-
Click the plus (+) icon to add new header parameters, then type a name and a corresponding . Common HTTP header parameters include “Content-Type,” “Content-Length,” and “Keep-Alive.” You can add any number of Parameter-Value pairs.
-
Click to return to the dialog box.
-
In the field (which is enabled if the is Put, Post, or Post with Response), select the name of the DOM from which you want to send data as XML.
-
In the field (which is enabled if the is Get or Post with Response), select the name of the DOM tree that will receive the XML.
-
If you want to filter the incoming XML document to improve performance, select the check box next to the button, then select the button.

The document displayed is the document selected in the in the dialog box.
You use this dialog box to specify the individual nodes to retain (rather than discard) from the incoming XML document in real time to improve performance and reduce RAM overhead.
-
Select the nodes that you want to keep in the document.
Nodes that are not selected are discarded before parsing the DOM.
-
When you have selected nodes that you want to keep, click to return to the dialog box.
-
Click .
Alternatively, you can click to see the affect of the XML Interchange action without closing the dialog box. This allows you to make repetitive edits to an XML Interchange action and quickly see the results.
9.5.3 Repeat
This section includes descriptions of the following actions:
Break
This section includes the following topics:
About the Break Action
The Break Action stops the execution of a Repeat for Element, Repeat for Group, or Repeat While loop. The action model continues execution with the next action outside the loop.
The use of Break is appropriate when, for example, you are using a loop to search a node list for one particular item. When the target item is found, there is no need to continue iterating. A Break can be used to terminate the loop immediately.
NOTE:A Break action is usually used in one branch of a Decision action (within a loop). You place the Break action in either the True or False branch of the Decision action.
Adding a Break Action
-
Within a Repeat action that you want to modify to include a Break action, select a position inside the loop where you want to place the Break action.
Generally, this is in one leg or the other of a Decision action.
-
Select .
The Break action is inserted into the action model.
Continue
This section includes the following topics:
About the Continue Action
The Continue action causes execution of the current iteration of a Repeat for Element, Repeat for Group, or Repeat While loop to stop and execution to begin at the top of the loop, with the next iteration. The Continue action provides a way to pass over downstream actions inside the loop while allowing the loop to continue on to the next iteration.
A Continue action is appropriate in a situation where, for example, one item in a list should be skipped for some reason, yet execution of the loop must continue.
NOTE:A Continue action usually occurs in one branch of a Decision action within a loop. You place the Continue action in either the True or False branch of the Decision action, as appropriate.
Adding a Continue Action
-
Within a Repeat action that you want to modify to include a Continue action, select a position inside the Loop actions where you want to place the Continue action.
This is usually inside one fork or the other of a Decision action.
-
From the Action menu, select .
A Continue action appears in the action model.
Declare Group
This section includes the following topics:
About the Declare Group Action
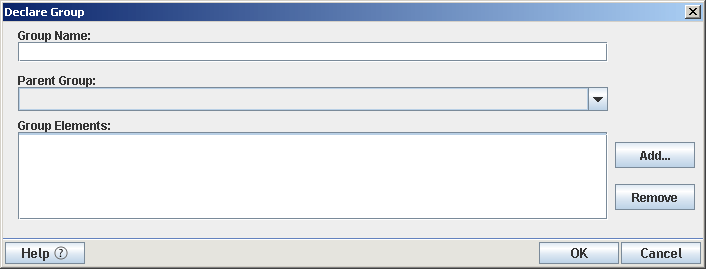
You use the Declare Group action to create two special lists, each in reference to a DOM. These group lists can then be used as the basis for a loop in the Repeat for Group action. To create the lists, you supply a Group Name and specify an XPath. The Integration activity then creates the lists as follows:
-
A Group list is created that contains one entry for each unique value found in all the elements that match the XPath. The Group list is referred to by the Group Name that you supply.
-
A Detail list is created for each unique entry in the Group list that contains as many entries as there are members in the Group. The Detail list is referred to by the group name that you supply, post-fixed with the label (Detail).
Using Groups allows you to select a repeating element in your Input DOM and create fewer elements based on the unique values across all siblings of that repeating element. Instead of having multiple elements, you have one element for each unique element value in your Output DOM.
Adding a Declare Group Action
-
Right-click the line in the action model that is one line above the position in which you want to place the Declare Group action (the new action is inserted below the line that you selected).
-
Select .
-
Type a name for the group in the field.
-
If you want to create multiple group levels, select a group from the list, which lists groups that you have previously defined.
-
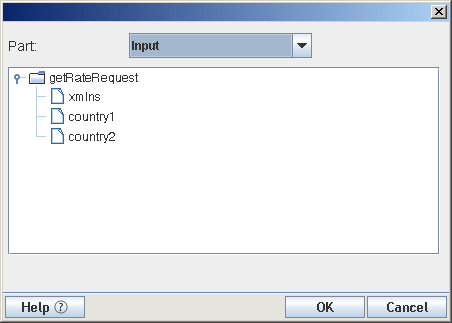
Click Add. The dialog box is displayed.
-
Select a part name and an element.
-
Click .
-
Repeat Step 5 through Step 7 to add more elements to the group.
-
When you have all the elements that you want in the group, click .
Repeat for Element
This section includes the following topics:
About the Repeat for Element Action
The Repeat action creates looping structures within an action model. Loops give you the ability to repeat a set of one or more actions. There are three types of loops: Repeat for Element, Repeat for Group, and Repeat While.
XML allows multiple instances of an element in a document (analogous to multiple records in a database table). The number of instances can vary from document to document and is defined in the document schema (DTD or XML Schema). For example, you might receive an XML document containing line items for an invoice on a daily basis. Each day the XML document has a different number of line items. Not knowing how many instances of “line item” are in the XML document poses a problem if you want to transfer these item numbers from the input XML document to an output XML document programatically. The Repeat for Element action solves this problem.
The Repeat for Element action allows you to mark an element that occurs multiple times. The action then sets up a processing loop that executes one or more actions for each instance of the marked element until no more instances exist. In the previous example, the processing loop would contain a single Map action to transfer the line item number and this action would be repeated until all line items had been mapped.
The Repeat for Element action also uses the concept of an alias. An alias performs two functions. It is an alternate name or shorthand for the marked repeating element, which saves you the work of re-specifying long XPath expressions. In some cases, the repeating element might be several levels down in the document hierarchy. When you create Map actions in the Repeat loop that transfers child elements of the marked element, using the alias is quicker than re-typing a long XPath expression. An alias is also an indicator to Map actions within the Repeat loop to use the next instance of the repeating element each time the loop processes. A Map action within a Repeat for Element loop that does not use the alias always refers to the first instance of the element in the source message.
The Repeat for Element action allows you to process more than one action within the loop. In the simplest case, the repeat loop might only contain one Map action that transfers the value of the current element instance from the input Part to the output Part. You can also define multiple actions in the processing loop. For example, a Map action to transfer the current value, and a Log action that writes to a file, creating an audit of each transfer.
Adding a Repeat for Element Action
-
Right-click the line in the action model that is one line above the position in which you want to place the Repeat for Element action (the new action is inserted below the line that you selected).
-
Select New .
-
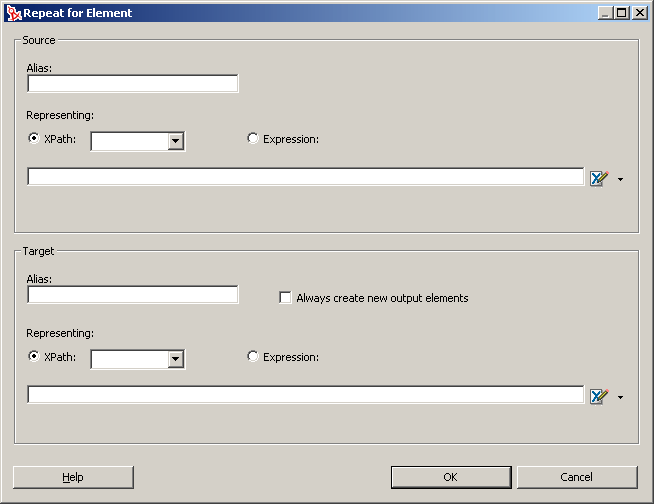
Specify the information.
-
Type an alias name in the Source field.
A good naming convention for an alias is to use the element name with a prefix indicating source or target and the type of repeat action, such as “S1Lineitem.”
-
Type an XPath expression, or click the ECMA expression builder button and build an XPath expression for the repeating element.
-
-
Specify the Target information.
-
Type an alias name in the Target field.
-
Select if you have repeating actions that should add new elements rather than updating existing elements.
-
Specify an XPath expression, or click the ECMA expression builder button and build an XPath expression for the repeating element.
-
-
Click . The Repeat for Element loop is added to the action model.
-
Click in the action model to begin adding actions to be performed within the loop.
Repeat for Group
This section includes the following topics:
About the Repeat for Group Action
The format of an XML document that you receive is not always the format that meets the requirements of your business process. A Repeat for Group action allows you to restructure data and establish a framework to calculate aggregates on your data. Grouping allows you to select a repeating element in your input part and create fewer elements based on the unique values across all siblings of that repeating element.
The Repeat for Group action sets up a processing loop based on one of two lists created by the Declare Group action. The loop executes as many times as there are entries in the list you use (either the Group list or Detail list). By combining a Repeat for Group with Map commands, you can create a new XML document that has a different structure and data from the original.
Similar to the Repeat for Element action, a Repeat for Group action also uses the concept of an alias. The values for the source group used in the Repeat for Group dialog boxes are the list names created by the Declare Group action. The list names perform two functions. They are an alternate name or shorthand for the XPath source of any Map actions within the loop. This saves you the work of re-specifying long XPath expressions. The group list name, when used in place of a DOM name in a Map action source, is also an indicator to the Map action within the Repeat loop to use the next instance in the group list each time the loop processes. A Map action within a Repeat for Group loop that does not use the group name always refers to the first instance of the element in the source part.
The target aliases created in the Repeat for Group action also serve two functions. They are an alternate name or shorthand for the XPath target of any Map actions within the loop. This saves you the work of re-specifying long XPath expressions. The target alias, when used in place of a part name, is also an indicator to Map actions within the Repeat loop to create a new instance of the Source in the target message part. A Map action within a Repeat for Group loop that does not use a target alias always overwrites the first instance created in the target message part with subsequent instances from the source group list.
Creating a Repeat for Group action consists of three tasks:
-
Create a Declare Group action to create the group lists.
-
Create a Repeat for Group action specifying which group list to use.
-
Create Map actions inside the loop.
Adding a Repeat for Group Action
-
Right-click the line in the action model that is one line above the position in which you want to place the Repeat for Group action (the new action is inserted below the line that you selected).
-
Select .
-
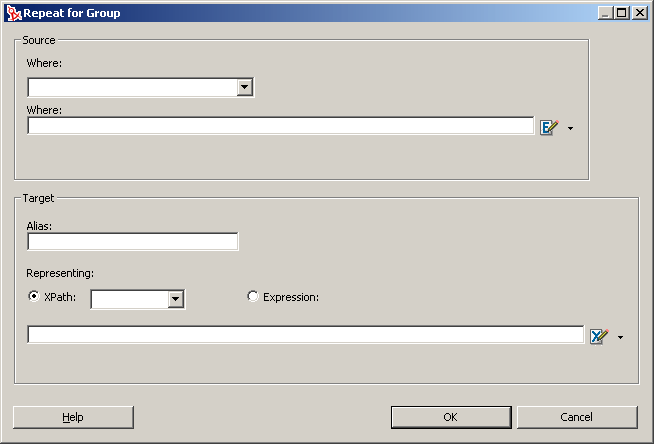
In the Source section, select a Group name from the list on which to base the Repeat for Group action loop.
-
Optionally, type a Where clause in the field to filter the group list, or click the ECMA expression builder icon and create a Where expression.
-
If you know the alias for the Target element, type the name in the field.
-
If you do not know the alias, select either the button and select an element from the list, or select the button and type an expression (or click the ECMA expression builder button and build an expression).
-
Click .
Repeat While
This section includes the following topics:
About the Repeat While Action
The Repeat While action repeats one or more actions as long as a condition that you specify remains True. The target alias that you create in the Repeat While action serves two functions. It is an alternate name or shorthand for the XPath target of any Map actions within the loop. This saves you the work of respecifying long XPath expressions. The target alias, when used in place of a DOM name in a Map action, is also an indicator to Map actions within the Repeat loop to create a new instance of the source in the target DOM. A Map action within a Repeat for Group loop that does not use a target alias always overwrites the first instance created in the target DOM with subsequent instances from the source.
NOTE:Unlike the Repeat for Element and Repeat for Group, Repeat While does not need to be based on data in a DOM tree. The loop can operate independently of data in the DOM tree.
Adding a Repeat While Action
-
Right-click the line in the action model that is one line above the position in which you want to place the Repeat While action (the new action is inserted below the line that you selected).
-
Select .

-
In the field, type an expression that tests the While loop, or click the ECMA expression builder button and build an expression.
-
In the field, type a name for a variable to keep track of the condition of the loop.
-
If you know the alias for the Target element, type the name in the field.
-
If you do not know the alias, select either the button and select an element from the list, or select the button and type an expression (or click the ECMA expression builder button and build an expression).
-
Click .
9.5.4 Comment
This section includes the following topics:
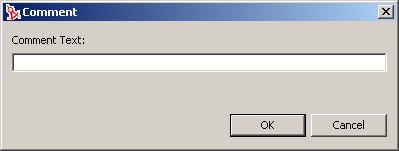
About the Comment Action
You can use the Comment action to document the action model and clarify the processing that takes place. You can add comments anywhere within an action model. Comments perform no processing of their own.
Adding a Comment Action
-
Right-click the line in the action model that is one line above the position in which you want to place the comment (the new action is inserted below the line that you selected).
-
Select .
-
Type your comment.
-
Click .
9.5.5 Decision
This section includes the following topics:
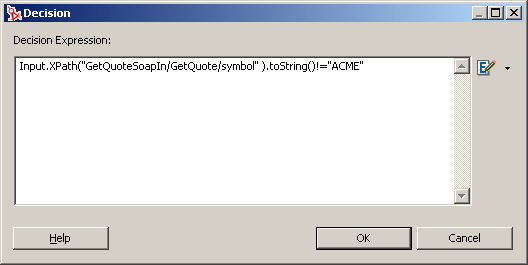
About the Decision Action
The Decision action creates an if. . . then construct between actions or a group of actions. You use a Decision action to select a branch, based on a condition that you supply. The condition must use an ECMAScript comparison operator, such as = =, <, >, !, >=, <=, (&), OR (||), or <>. The expression must resolve to a Boolean True or False statement.
Adding a Decision Action
-
Right-click the line in the action model that is one line above the position in which you want to place the Decision action (the new action is inserted below the line that you selected).
-
Select .
-
Type an ECMAScript expression, or click the ECMA expression builder button and create a Decision script that will evaluate to true or false at runtime.
-
Click .
A Decision action similar to the following is displayed.

-
In the action model pane, select the branch.
-
Add one or more actions that will execute if the expression is True.
-
Select the branch.
-
Add one or more actions to execute if the expression is False.
You can nest other Decision actions inside the TRUE or FALSE branches of the Decision action.
9.5.6 Function
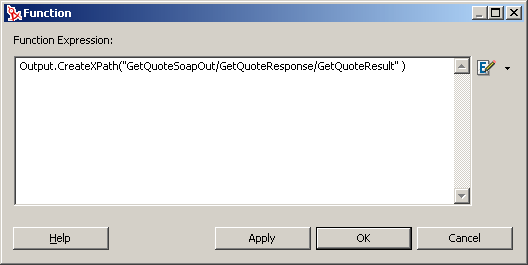
About the Function Action
The Function action executes an ECMAScript function. To manipulate a DOM element, the script that you call in the Function action must reference a fully qualified DOM element name in the current Integration activity.
Custom Script functions that you create and add to an action model can act upon any XML tree element. For example, you can create a function that changes the format of a date element. You can create a function that performs a math function on the contents of an element. You can also perform file system, database, or URL functions that have no interaction with a message part.
Adding a Function Action
-
Right-click the line in the action model that is one line above the position in which you want to place the Function action (the new action is inserted below the line that you selected).
-
Select .
-
Type the function in the field or click the ECMA expression builder button to build an ECMAScript expression.
-
Click .
9.5.7 Log
About the Log Action
Log actions provide customizable reporting capabilities (design-time as well as runtime) for Integration activities. You can specify log level settings to control the degree of reporting.
Some Log usage examples include the following:
-
Writing certain error information to the operator console when a Try On Fault condition is reached.
-
Using ECMAScript expressions to aid in debugging by logging information about variables or DOM contents, the values of which are known only at runtime.
-
Capturing specific information from each cycle of a Repeat for Element loop.
Adding a Log Action
-
Right-click the line in the action model that is one line above the position in which you want to place the Log action (the new action is inserted below the line that you selected).
-
Select .

-
Select the type of log that you want to produce from the group.
The Log action writes information to locations specified in the action. There are three locations for log output: System Output, System Log, and User Log.
-
Use to select a priority level (1 to 10) for this Log action.
The default priority level is 5. You should assign a number from 5 to 10 to messages that you want to appear in the log file. The priority you assign here is compared to the threshold number (which is set to 5 internally and cannot be changed). If the priority is equal to or greater than the threshold, the message is logged; otherwise it is not.
-
Check if you want the data in the log file to be cleared each time the component is executed.
-
If is selected in the group, type the path to the log file in the field, or use to specify a log file.
If you specify a file that doesn’t exist, the file is created. On Windows* systems, if you type the path, you must add an extra backslash character wherever a backslash character occurs in a path (for example, C:\Windows becomes C:\\Windows).
-
Create the message that you want to record to the log in the field.
You can type a message in the field or use the ECMA expression builder to build an expression.
9.5.8 Map
This section includes the following topics:
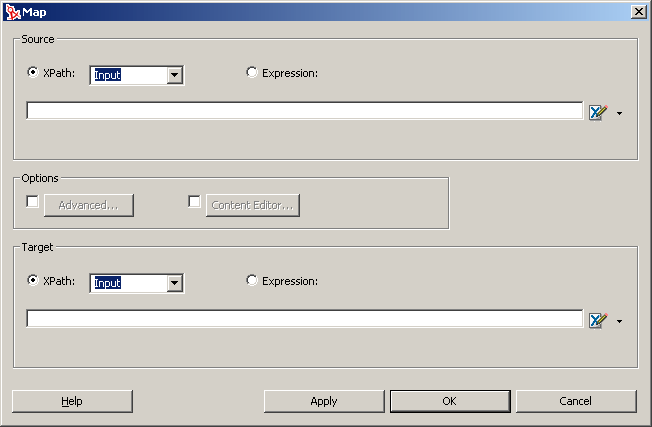
About the Map Action
The Map action performs DOM-node input and output mapping. It can transfer and transform data from one document context to another document context. A context has two parts. The first part usually identifies a DOM and the second part identifies a location within the DOM. The basic document context in an Integration activity is expressed as a DOM name combined with an element location identified through an XPath expression. The DOM name is usually Input, Output, _System Fault, or Project. The XPath expression identifying a location in a DOM has the path elements delimited by “/”.
NOTE:A context in an Integration activity can also be a Group name that itself is simply an alias or shorthand for an XPath expression.
Default Mapping Behavior
When you use the Map action to map elements and attributes within XML documents, certain default behaviors occur. The following table lists those default behaviors.
Table 9-5 Default Mapping Behavior
Many of these behaviors can be altered, on an action-by-action basis, through the use of the Advanced mapping dialog box (see Advanced Mapping Options).
Leaf Elements That Contain Markup
A problem can occur when an element is populated at runtime by a Java or ECMAScript operation. The element might receive data that contains markup (strings with illegal characters, such as < and >). If the Integration activity were to map the contents of such an element to a node in the Output DOM, the output document would be malformed. The Integration activity resolves this issue by mapping any data that contains markup to a new CDATA section in the target document.
NOTE:When markup is entered at design time, the behavior is different. If you type markup into a node, and you examine the raw XML in the Source view, you’ll see that markup characters typed into a node are converted to entities. For example, a “<” character is converted to <.
Adding a Map Action
-
Right-click the line in the action model that is one line above the position in which you want to place the Map action (the new action is inserted below the line that you selected).
-
Select .
-
In the section, select .
-
Select a part (Input, Output, _SystemFault, or Project) from the list, then type the appropriate XPath expression, or use the ECMA expression builder to locate the element that you want.
Together, the part name and XPath specify the Source context for the Map action.
-
If you want more control over mapping, select the (see Advanced Mapping Options) or (see Transforming Elements with the Content Editor) options.
You can click to see the effect of the Map action without closing the dialog box. This allows you to make repetitive edits to a Map action and quickly see the results.
-
Click .
Advanced Mapping Options
When you select the option in the dialog box, the dialog box is displayed. Options that you set in the Advanced dialog box only affect the current Map action.
Figure 9-10 Advanced
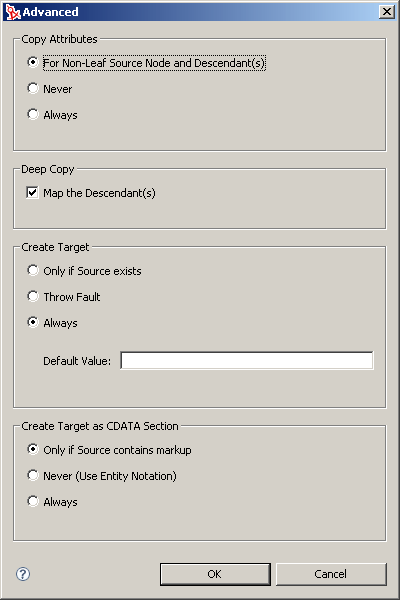
The options in this dialog box give you fine control over how input part nodes are mapped to the output part.
This section includes the following topics:
Copy Attributes
You use to specify how attributes are mapped. has the following options:
Table 9-6 Copy Attributes Options
Deep Copy
The default Integration activity behavior is to map whole branches at a time (the target node plus all of its children). This is referred to as a deep copy. In some cases, you might want to turn off this behavior so that you can copy just the parent element without its children. Deselect if you want to disable deep copy.
Create Target
You use to create the destination node that you specified in the group in the Map action (see Adding a Map Action), based on whether or not the source node is present in the source DOM. By default the Integration activity always creates the target, whether or not the runtime source DOM contains the nodes specified in the Source XPath for mapping.
For example, in the Map action, you might have specified a Source XPath that looks like
$Input/Root/MySourceElement
In the Target XPath, you might have specified
$Output/Root/MyParentNode/SomeOtherElement
If the incoming Input document does not have a node corresponding to Root/MySourceElement, the Integration activity by default creates an empty Root/MyParentNode/SomeOtherElement node in the output DOM. In some cases, this might not be what you want. Using mapping, you can change the default behavior.
Table 9-7 Create Target
Create Target as CDATA Section
You use to control the way element data gets mapped into CDATA sections.
Table 9-8 Create Target as CDATA Section
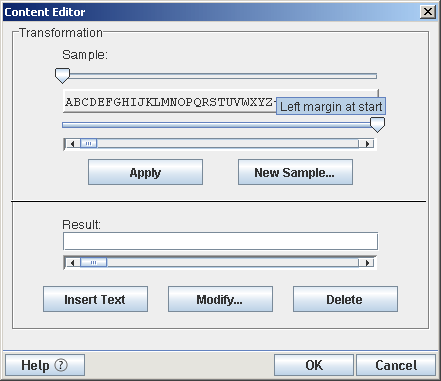
Transforming Elements with the Content Editor
You use the Content editor to change the format and content of the input element to match that required by the output element. Using the Content Editor, you can slice the input data into small parts, move the parts to different locations relative to one another, add new parts, omit some parts, and apply functions to individual parts.
-
In the Action model, select two elements from different parts (for example, from the Input and Output parts) to map.
-
Select .
-
In the Map action dialog box (see Adding a Map Action), select the check box, then select the button.
-
If desired, click and type a sample string.
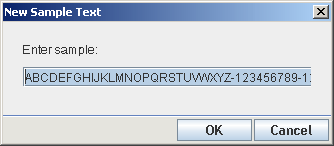
-
Click to return to the dialog box.
-
In the section, move the slider that is above the sample to the position where you want the first cut to take place, then move the slider that is below the sample to the position where you want the end cut to take place.
The sliders determine how to take a substring from the input data.
-
Click .
The substring is copied to the field as a separate object.
-
Repeat Step 6 and Step 7 for each part of the sample in the order that you want.
Using this method, you can build a new string out of substrings of the original input.
-
To change the format of an object in the Result field:
-
Select an object.
-
Click .
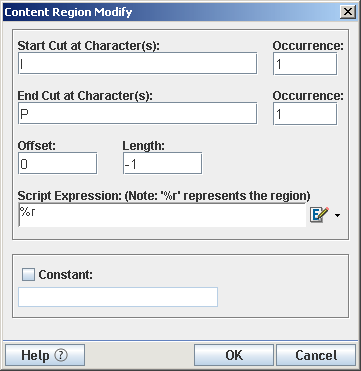
The field displays the character in the string where the first cut will take place. The first field displays when the cut will take place. In the previous illustration, the first cut will take place at the first occurrence of the letter l. The field displays that character in the string where the last cut will take place. The second field displays when the cut will take place. The Offset field displays the number of characters from the beginning of the original string where the object will start. The Length field displays the length of the object.
-
If desired, you can write an ECMAScript expression in the field to modify the content region.
The shown in the field is a local variable representing the content region to which you want to apply a function. For example, to apply the .toUpperCase() function to the content region, you would write the Script Expression: var test='%r'; test.toUpperCase().
-
To assign a constant to an object, select , then type a constant string.
-
When you are finished mapping string formats with the Content Editor, click to save the changes and close the Content Editor.
-
-
Click to return to the action model.