6.2 Editing a Schema Mapping Policy
The Schema Map editor allows you to create and edit schema mapping policies. To display a context menu, right-click an item.
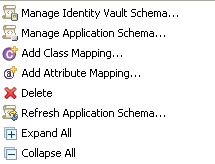
Figure 6-1 Context Menu of the Schema Map Editor
6.2.1 Removing or Adding Classes and Attributes
Removing a Class or Attribute
If you do not want a class or an attribute to be mapped to a class or attribute in the connected system, the best practice is to completely remove the class or the attribute from the Schema Mapping policy. There are three different ways to add or remove attributes and classes from the Schema Mapping policy:
-
Select the class or attribute you want to remove, then right-click and click .
-
Select the class or attribute you want to remove, then click the icon
 in the upper right corner.
-
Select the class or attribute you want to remove, then press the Delete key.
You can select multiple classes or attributes to delete at the same time.
-
Press Ctrl and select each item with the mouse.
-
Press the Delete key to delete the items.
Adding a Class
-
Right-click in the Schema Map editor, then click .
or
Select the icon
 in the upper right corner.
-
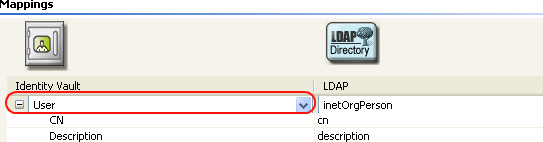
From the drop-down list for the Identity Vault, select the class you want to add.
-
From the drop-down list for the connected system, select the class you want to map to.
-
To save the changes, click > .
Adding an Attribute
-
Right-click in the Schema Map editor, then click .
or
Select the icon
 in the upper right corner.
-
From the drop-down list for the Identity Vault, select the attribute you want to add.
-
From the drop-down list for the connected system, select the attribute you want to map to.
-
To save the changes, click > .
6.2.2 Refreshing the Application Schema
If you have modified the schema in the application, these changes need to be reflected in the Schema Mapping policy. To make the new schema available, click the
icon
 in the toolbar.
When you create a new class or attribute mapping, you can see the new schema in the drop-down list for the connected application.
6.2.3 Editing Items
To edit a mapping, double-click the selected row. An in-place editor appears, allowing you to edit the mapping.
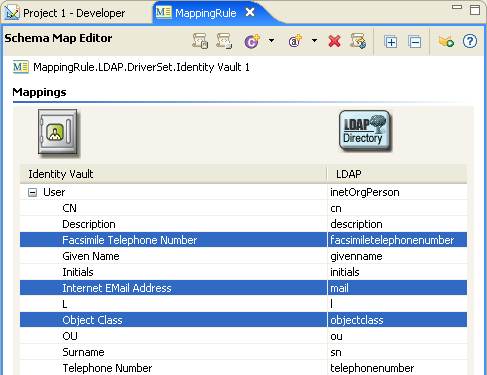
Figure 6-2 Schema Map Editor
6.2.4 Sorting Items
The Schema editor allows you to sort the items in ascending order based on either Identity Manager or the connected system. To sort, click the header of either column.
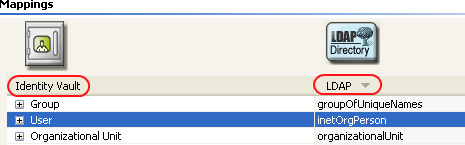
Figure 6-3 Schema Map Editor Sorting Items
6.2.5 Managing the Schema
Designer allows you to manage the Identity Vault schema and any connected system's schema. You can import the schema, modify it, and deploy the changed schema back into the Identity Vault or the connected systems. To manage the Identity Vault schema, right-click in the Schema Map editor and click
. To manage the connected systems schema, right-click in the Schema Map editor and click
. For more information about how to manage the schema, see
Managing the Schema
in the
Designer 2.1 for Identity Manager 3.5.1
.