5.2 Configuring the Driver in iManager
The JMS driver configuration file is a sample configuration. You installed this file when you installed the Identity Manager Web components on an iManager server. Think of the driver configuration as a template that you import and customize or configure for your environment.
-
In iManager, select > .
-
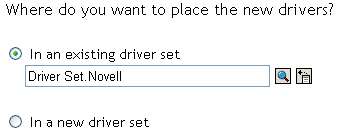
Select an existing driver set or select a new driver set.
-
If you selected an existing driver set, continue with Step 4.
or
If you selected to place the driver in a new driver set, skip to Step 6.
-
If you selected an existing driver set, browse to and select the driver set, then click .
-
Browse to and select the server the driver is associated with, click , then skip to Step 7.
-
If you selected to place the driver in a new driver set, click .
-
Define the properties of the new driver set, then click .
-
Specify the name of the driver set.
-
Browse to and select the context where the driver set is created.
-
Browse to and select the server you want the driver set associated with.
-
Leave the option selected.
-
Click .
Novell recommends that you create a partition for the driver object. For Identity Manager to function, the server that is associated with the driver set must hold a real replica of the Identity Manager objects. If the server holds a Master or Read/Write replica of the context where the objects are to be created, then the partition is not required.
-
-
Select how you want the driver configurations sorted:
-
All configurations
-
Identity Manager 3.5 configurations
-
Identity Manager 3.0 configurations
-
Configurations not associated with an IDM version
-
-
Select the JMS driver, then click .
-
Configure the driver by filling in the configuration parameters, then click .
For information on the settings, see Section 5.3, Driver Configuration Options .
-
Select .
-
Click , then browse to and select a user object that has the rights the driver needs to have on the server.
Many administrators use the Administrator User object in the Identity Vault for this task. However, you might want to create another object, such as a DriversUser, and assign security equivalence to that user. Whatever rights that the driver needs to have on the server, the DriversUser object must have the same security rights.
-
Click twice.
-
-
Select
-
Click , then browse to and select all objects that represent administrative roles and exclude them from replication with the driver.
Exclude the security-equivalence object in the Identity Vault (for example, DriversUser) that you specified in Step 11. If you delete the security-equivalence object, you have removed the rights from the driver. Therefore, the driver can’t make changes to Identity Manager.
If there are objects that are currently excluded, they do not appear in the Excluded users list unless you select .
-
Click twice.
-
-
Click .
-
View the summary, then click .
-
After configuring the driver in iManager, proceed with Section 6.0, Configuring Messaging Vendors. You can also view information about configuring additional driver properties in Section 10.0, Customizing the Driver.