4.2 Creating the Driver in iManager
You create the JMS driver by importing the driver’s basic configuration file and then modifying the configuration to suit your environment. After you’ve created and configured the driver, you need to start it.
4.2.1 Importing the Driver Configuration File
There are four configuration files. Each file corresponds to one of the supported JMS vendors: JBossMQ, IBM WebSphereMQ, SonicMQ, and TIBCO EMS.
-
In iManager, click
 to display the Identity Manager Administration page.
-
In the Administration list, click to launch the Import Configuration wizard.
-
Follow the wizard prompts, filling in the requested information (described below) until you reach the Summary page.
When you finish providing the information required by the wizard, a Summary page, similar to the following is displayed.
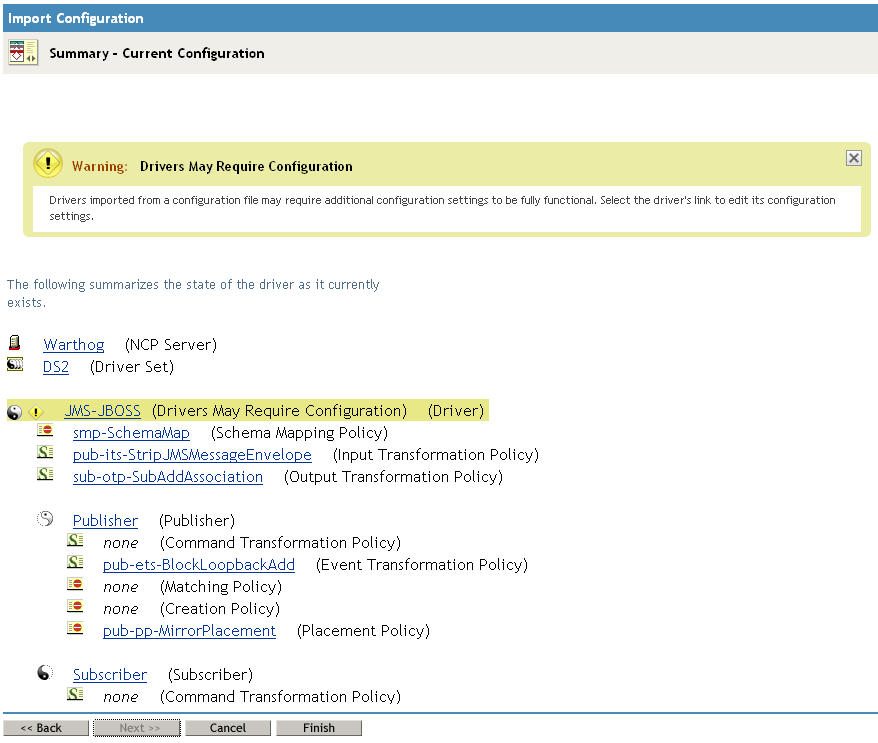
At this point, the driver is created from the basic configuration file. To ensure that the driver works the way you want it to for your environment, you must review and modify the driver’s default configuration settings.
-
To modify the default configuration settings, click the linked driver name, then continue with the next section, Configuring the Driver.
or
To skip the configuration settings at this time, click . When you are ready to configure the settings, continue with Configuring the Driver.
4.2.2 Configuring the Driver
After importing the driver configuration file, the driver will start. However, the basic configuration probably will not meet the requirements for your environment. You should complete the following tasks to configure the driver:
-
Configure the driver parameters: There are many settings that can help you customize and optimize the driver. The settings are divided into categories such as Driver Configuration, Engine Control Values, and Global Configuration Values (GCVs). Although it is important for you to understand all of the settings, your first priority should be to review the Driver Parameters located on the Driver Configuration page.
-
Configure the driver filter: Modify the driver filter to include the object classes and attributes you want synchronized between the Identity Vault and the JMS vendor.
-
Configure policies: Modify the policies on the Subscriber and Publisher channels. For information about using policies, see the Policies in Designer 3.5 or Policies in iManager for Identity Manager 3.6.1 guide.
After completing the configuration tasks, continue with the next section, Starting the Driver.
4.2.3 Starting the Driver
When a driver is created, it is stopped by default. To make the driver work, you must start the driver and cause events to occur. Identity Manager is an event-driven system, so after the driver is started, it won’t do anything until an event occurs.
To start the driver:
-
In iManager, click
to display the Identity Manager Administration page.
-
Click .
-
Browse to and select the driver set object that contains the driver you want to start.
-
Click the driver set name to access the Driver Set Overview page.
-
Click the upper right corner of the driver, then click .
For information about management tasks with the driver, see Section 6.0, Managing the Driver.